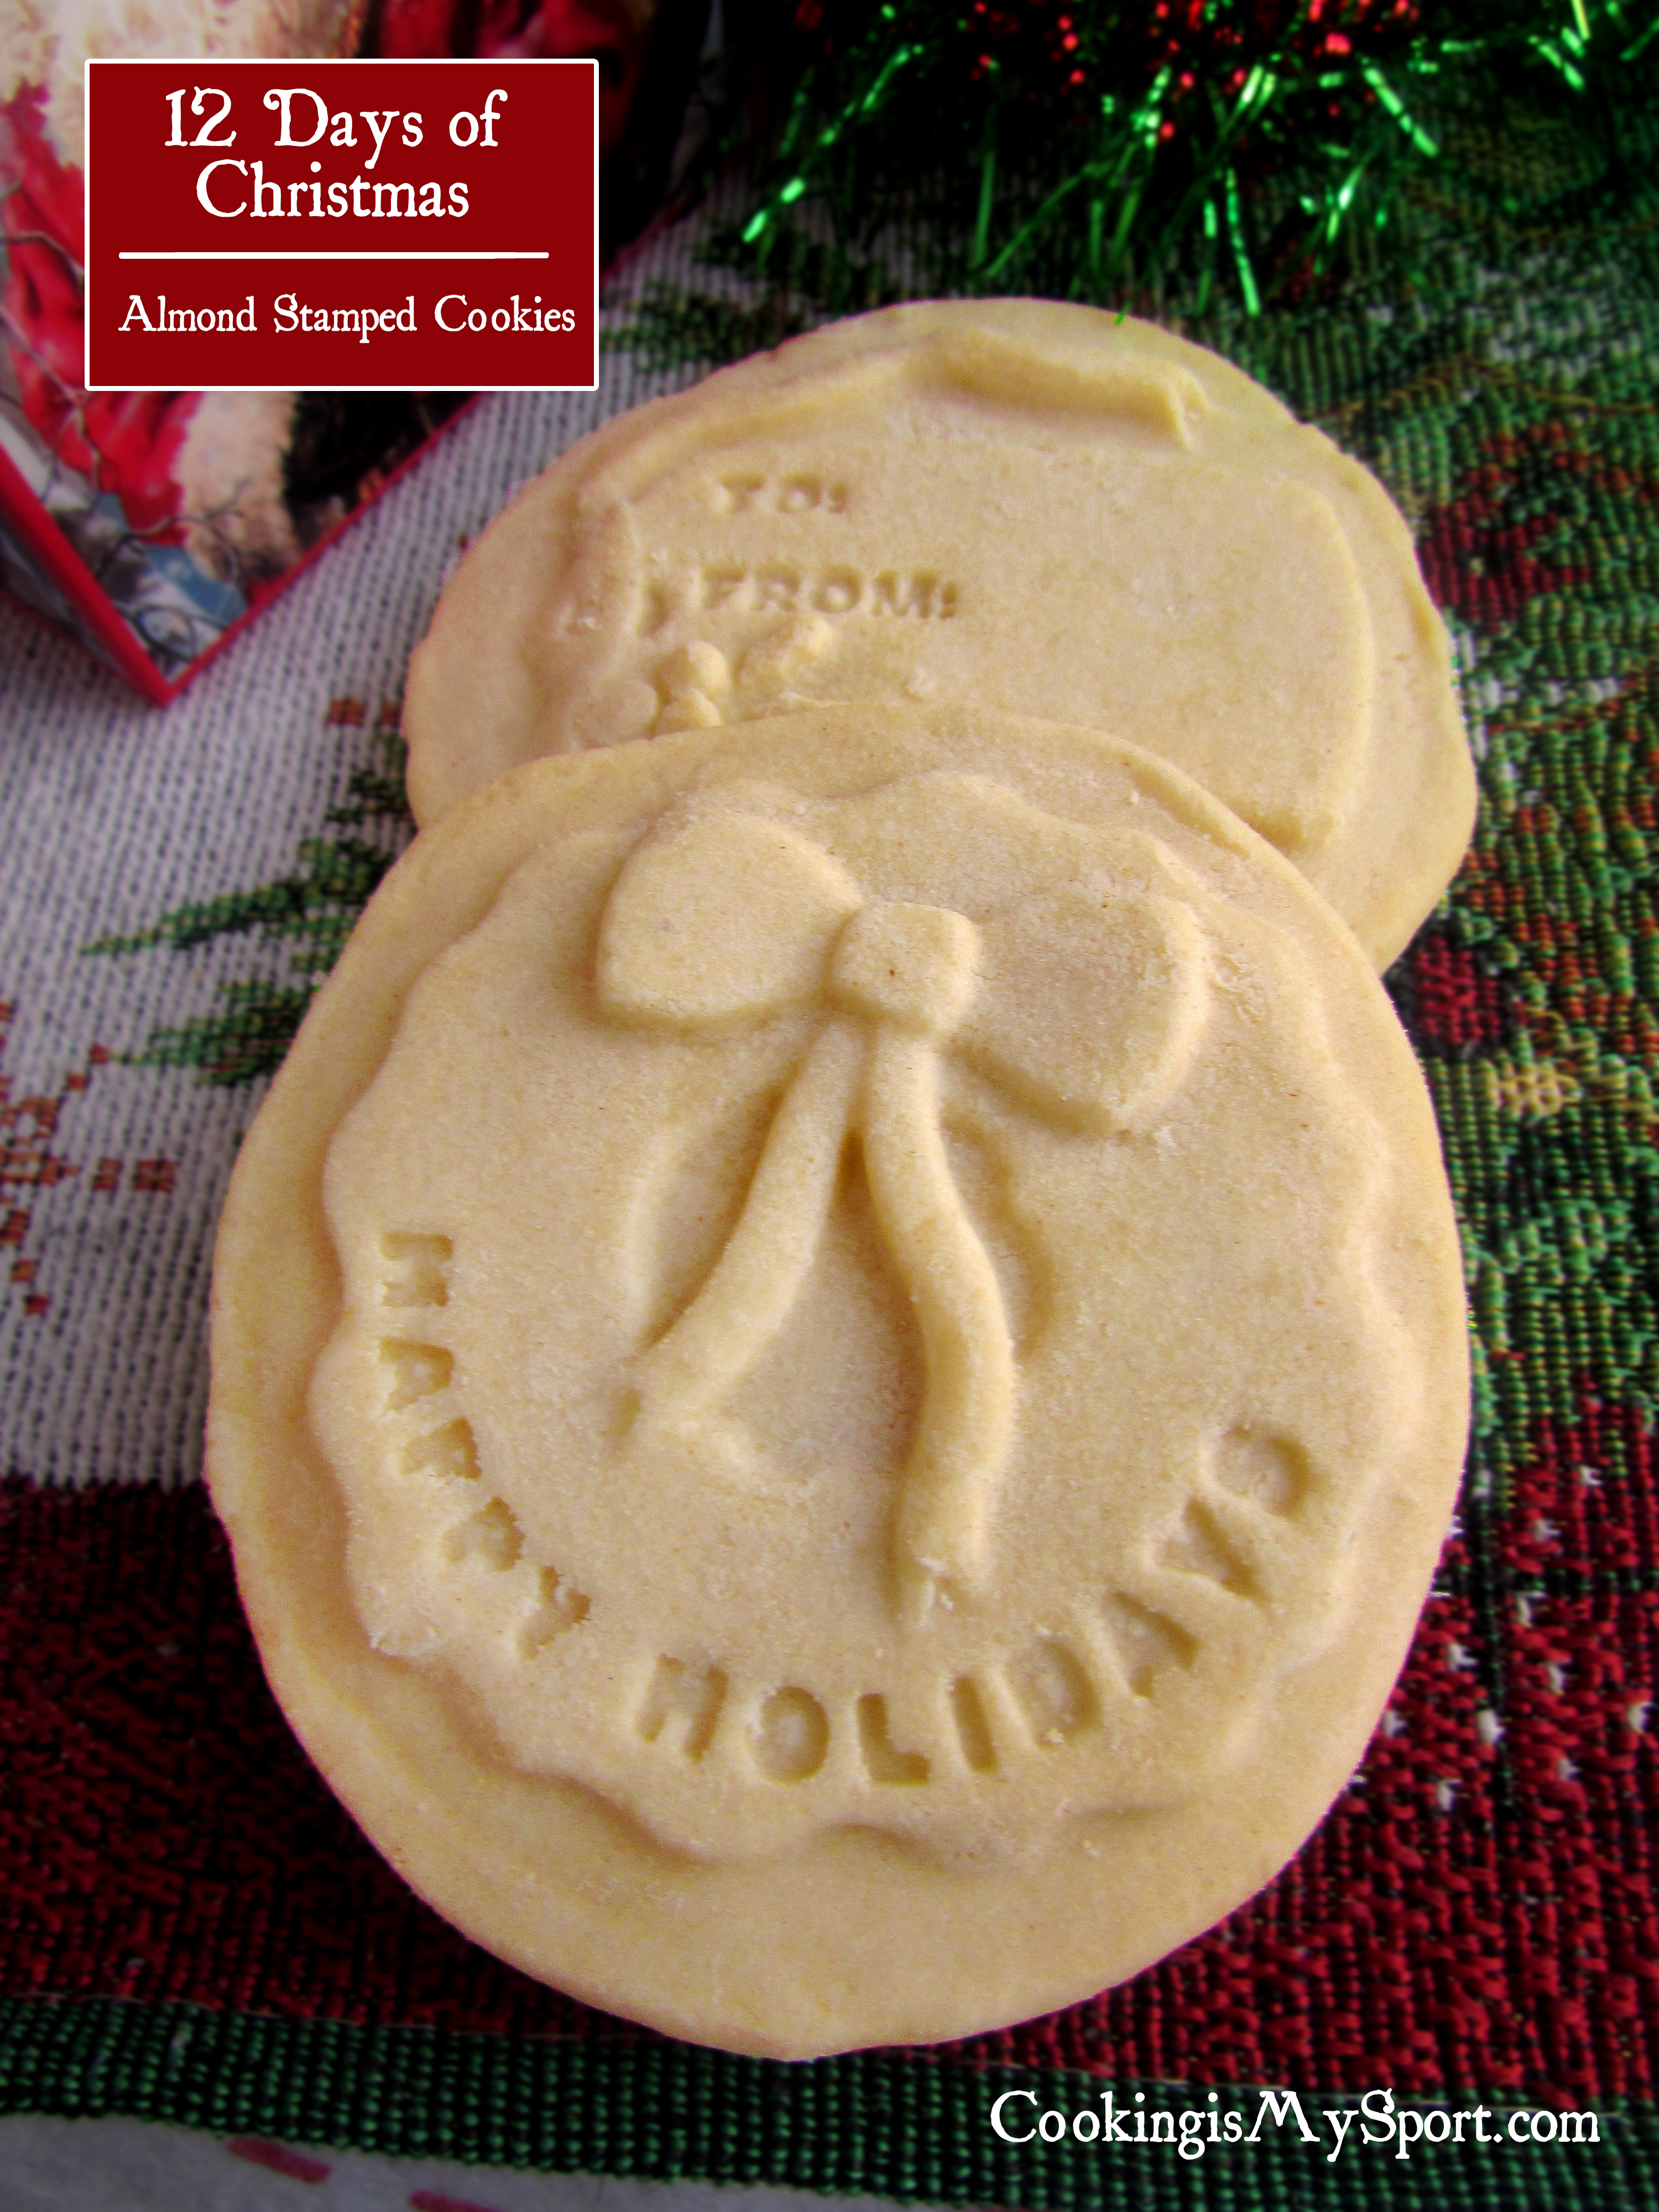
Almond Stamped Cookies

It was around this time last year that I really started getting into making stamped/imprinted cookies. My first try was with the Cardamom Wafers I made for the series two years ago. I liked the results and knew I wanted to keep experimenting with the method. It’s a far less laborious alternative to making your Christmas cookies pretty, especially for someone who isn’t that artfully inclined like yours truly. I’m so totally not the type that can take a tube of colored gel or icing and pipe on elaborate designs. Not at all. The extent of my cookie decorating skills is to spread icing on top, then drop some sprinkles on top and call it a day. With cookie stamps, all you do is press a tool into the dough, and the work is practically done for you.
Probably the best, most extreme form of stamp/imprint cookies is the Springerle cookie. It’s a thick German-based cookie dough that is imprinted using VERY intricate, beautiful wood molds, then left out for the dough to be able to ‘dry’ for hours before being baked. I first heard about them last fall and after hunting down two springerle molds of my own, made my first attempt in the first post of the 12 Days of Christmas series for 2015. The results blew me away. If you treat that dough right, give it enough time to dry out and bake gently, it’ll result in a cookie that impresses everyone.
Thing about Springerle is, the hand-carved wood molds used to make them don’t come cheap. I’d love to get my hands on some more but at $40-$60 a pop (and depending on the size and intricacy of the mold, possibly even more than that), buying more has taken a far back seat to my financial priorities.

The good news is, making beautiful stamped/imprinted cookies doesn’t have to be a pricey process. There are plenty of molds that although made out of plastic, still feature intricate designs. The Cardamom print wafers and these Speculaas cookies were both made with a set of plastic cookie stamps from my grandmother’s 30+ year old Christmas baking collection and they made some of the prettiest cookies to come out of my kitchen. After multiple recipes, different doughs and using different kinds of molds, I think I can say pretty confidently that the real secret to making printed cookies lies in how you treat the dough, not so much the mold itself.

The most important tip I can give with imprinted cookies is this: you’ve gotta chill the dough. THOROUGHLY. I mean, to the point where they’re almost rock solid. With the exception of Springerle that become rock hard by themselves in the regular open air, I’ve put every other standard cookie dough I’m stamping/imprinting not in the refrigerator but in the actual freezer for a minimum of half an hour before I bake it. It does sometimes result in me needing to bake them a tad bit longer than the recipe states, (although not that much), but it’s the coldness of the dough when it goes in that will preserve the intricacy of the design from the stamp or mold, regardless of what kind you’re using. If the butter or other fat in the dough is too warm, it expands during baking, causing the cookies to spread, which will blur the design. If the butter is frozen when it goes into the hot oven, it has less time to expand: got it?

These cookies from today’s recipe are my latest attempt at imprinting. Aren’t they pretty? As I said, you don’t have to go expensive to get pretty cookies. The stamps I used for these came from Target and they came in a set of three for $20.00. (See here if you’re interested). They’re *really* nice, quality stamps too. Like most bakeware, they came with a recipe with which to try them out and since it looked like the dough came together in a matter of minutes, I figured what the heck and tried it out for myself.
These have a no frills, simple flavor profile which I think is appropriate for a print cookie: think along the lines of that trademark almond flavor that reminds you of the thick cookies you can get from bakeries. Because the dough uses powdered sugar rather than regular white, the crumb of the cookies is much finer and delicate. It melts in your mouth, and it’s just divine. As I said, the making of the dough is really simple, the most crucial step is how you treat the dough after stamping/imprinting.
Just remember: freezer, not fridge. Long time. Solid dough. Less spreading. Sharper design. You can do this. What’s more you *should*.

Day 1: Stuffing Bread
Day 2: Pumpkin Crunch Tart
Day 3: Cinnamon Roll Cookies
Day 4: Dulce de Leche Hot Chocolate
Day 5: Almond Stamped Cookies
********************************************************
Almond Stamped Cookies
Recipe Courtesy of Nordic Ware
Ingredients
- 3/4 cup butter, softened
- 1 cup powdered sugar
- 1 egg
- 1 teaspoon almond extract
- 2 1/2 cups flour, plus more for flouring
- 1/2 teaspoon salt
Special Equipment: Nordic Ware Cookie Stamps, or any other cookie stamps, cutters you want to use
Directions
In a small bowl, use a fork to mix together the flour and salt.
In a large bowl, use the whisk attachment or a handheld mixer to cream together the butter and powdered sugar until light and fluffy.
Add the egg and almond extract. Gradually add in the flour in about 1/2 cup increments until the dough comes together.
Shape dough into balls, using about 1/8 cup or 2 tablespoons for each cookie. Place onto a baking sheet lined with parchment paper. Using your hand, press each dough ball to form a disk about 1/4 inch thick.
Dip your cookie stamps into flour, then lightly tap them to free excess. Firmly press the stamp into the cookie disk until dough reaches the edges of the stamp. Remove carefully and repeat with the remaining dough balls, flouring stamps before each use to prevent them from sticking to the dough.
Freeze the cookies for about 35-40 minutes to allow to firm up. (This will help protect the design and keep them from spreading in the oven)
Preheat oven to 350 degrees Fahrenheit. Remove cookies from freezer and bake for 12-14 minutes, until just beginning to brown on edges. Allow to set for about 1-2 minutes on baking sheet before removing to wire racks to cool completely.
Note: No one oven is the same, & different baking sheets bake cookies differently. Keeping this in mind, I will ALWAYS test bake one cookie before baking entire sheets of the whole batch, just to get a good idea of how long they should be in the oven and if I need to adjust the way I’ve cut, rolled them out, etc. I highly recommend that you do the same.)


I remember your stamped cookies from last year Jess! love the “to and from” stamp that you have used! We have a Nordic Ware store in Minnesota so I may have to look for these when I’m home for the holidays!
Thanks Heather! I bought these stamps from Target and I know you’ve got a couple of those in Ann Arbor or Minnesota lol
So cute !!
Thank you 😀
Delicious!!
They are quite tasty Patricia; thanks!
They look lovely!
Thanks Freda!
These look awesome! So great for the holidays and as easy finish!
Thank you!
SOOOOO cute!! What a great and personalized idea for cookies!
I think they’d be great for a cookie decorating party or for gift giving Jasmine. Thanks!
Jess, These cookies look so pretty! I especially like the ones that have To and From on it- what a treat to get personalized cookies! Also good to know that we don’t have to buy super expensive stamps to make such pretty cookies.
Thank you so much for sharing them at Fiesta Friday!
Thank you Sandhya, I think the gift tag stamp is my favorite one of the bunch 😉
These stamped cookies looks so pretty!!
Thanks Neetha 😀
Nice and yum recipe 🙂
Thanks!
Can you freeze the cookies on the same baking sheet that will go in the oven? Or would that change cooking time?
It didn’t for me, but different baking sheets bake differently depending upon the material they’re made of. If you’re concerned about that, what I would do, is test bake a chilled cookie on a chilled baking sheet, then test bake one on a room temperature baking sheet and see how it makes a difference in the finished product.
If I want to make these ahead of time, can I leave them in the freezer for a few days, then pop them in the oven when I’m ready?
I wouldn’t keep them in the freezer indefinitely, but if you did want to make them ahead of time, I would keep the unbaked, stamped cookies in the refrigerator for up to 2 days, then bake when ready. I think that would work fine.
The cookies stamped and baked nicely.
Turned out really cute. Thanks for the tip to do a trial cookie. Mine needed to bake longer.
I’ll use your process but will try other recipes to sweeten up a bit more. I like sweeter cookies, but I could see these being perfect with hot cocoa.
Thank you so much. You made this so easy.
I’m so glad that you liked them–Thanks and Happy Holidays 😀