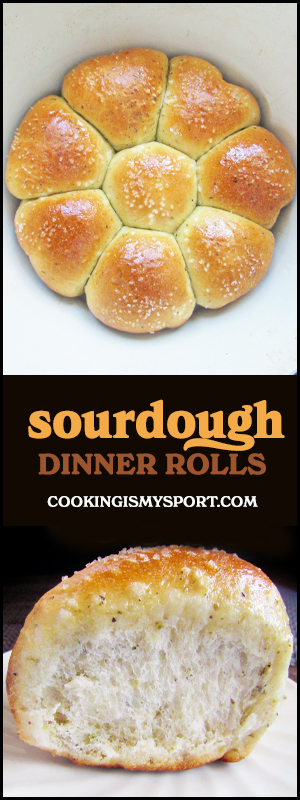
Sourdough Dinner Rolls
Happy Spring, everyone.
I hope these past few months have been treating you well. I’m glad to be back from my mini-hiatus (what can I say, work has been working) with another delicious recipe to add to the blog’s Sourdough Chronicles from my one and only pet sourdough starter, Donatello.
Dinner rolls were one of the very first recipes I practiced/experimented with when I was learning how to bake bread, for several reasons. The dough is typically very easy to put together and forgiving for beginners. There’s no complicated kneading or shaping required. You mix the ingredients, you let it rise. You shape the rolls, you let them rise. You bake the rolls. you’re done.
Simpe enough.
Dinner rolls are one of those recipes that I like to think of/call Blank Canvas Recipes. Once you get a hold on the basic chemistry of the recipe and you have the basic ratios of ingredients in place, you can start throwing moer ‘colors’ on the canvas to give it a bit more variation and personalization.
We’ve added lots of ‘color’ the Dinner Rolls canvas here on the blog over the years. There’s one for everyone’s taste.
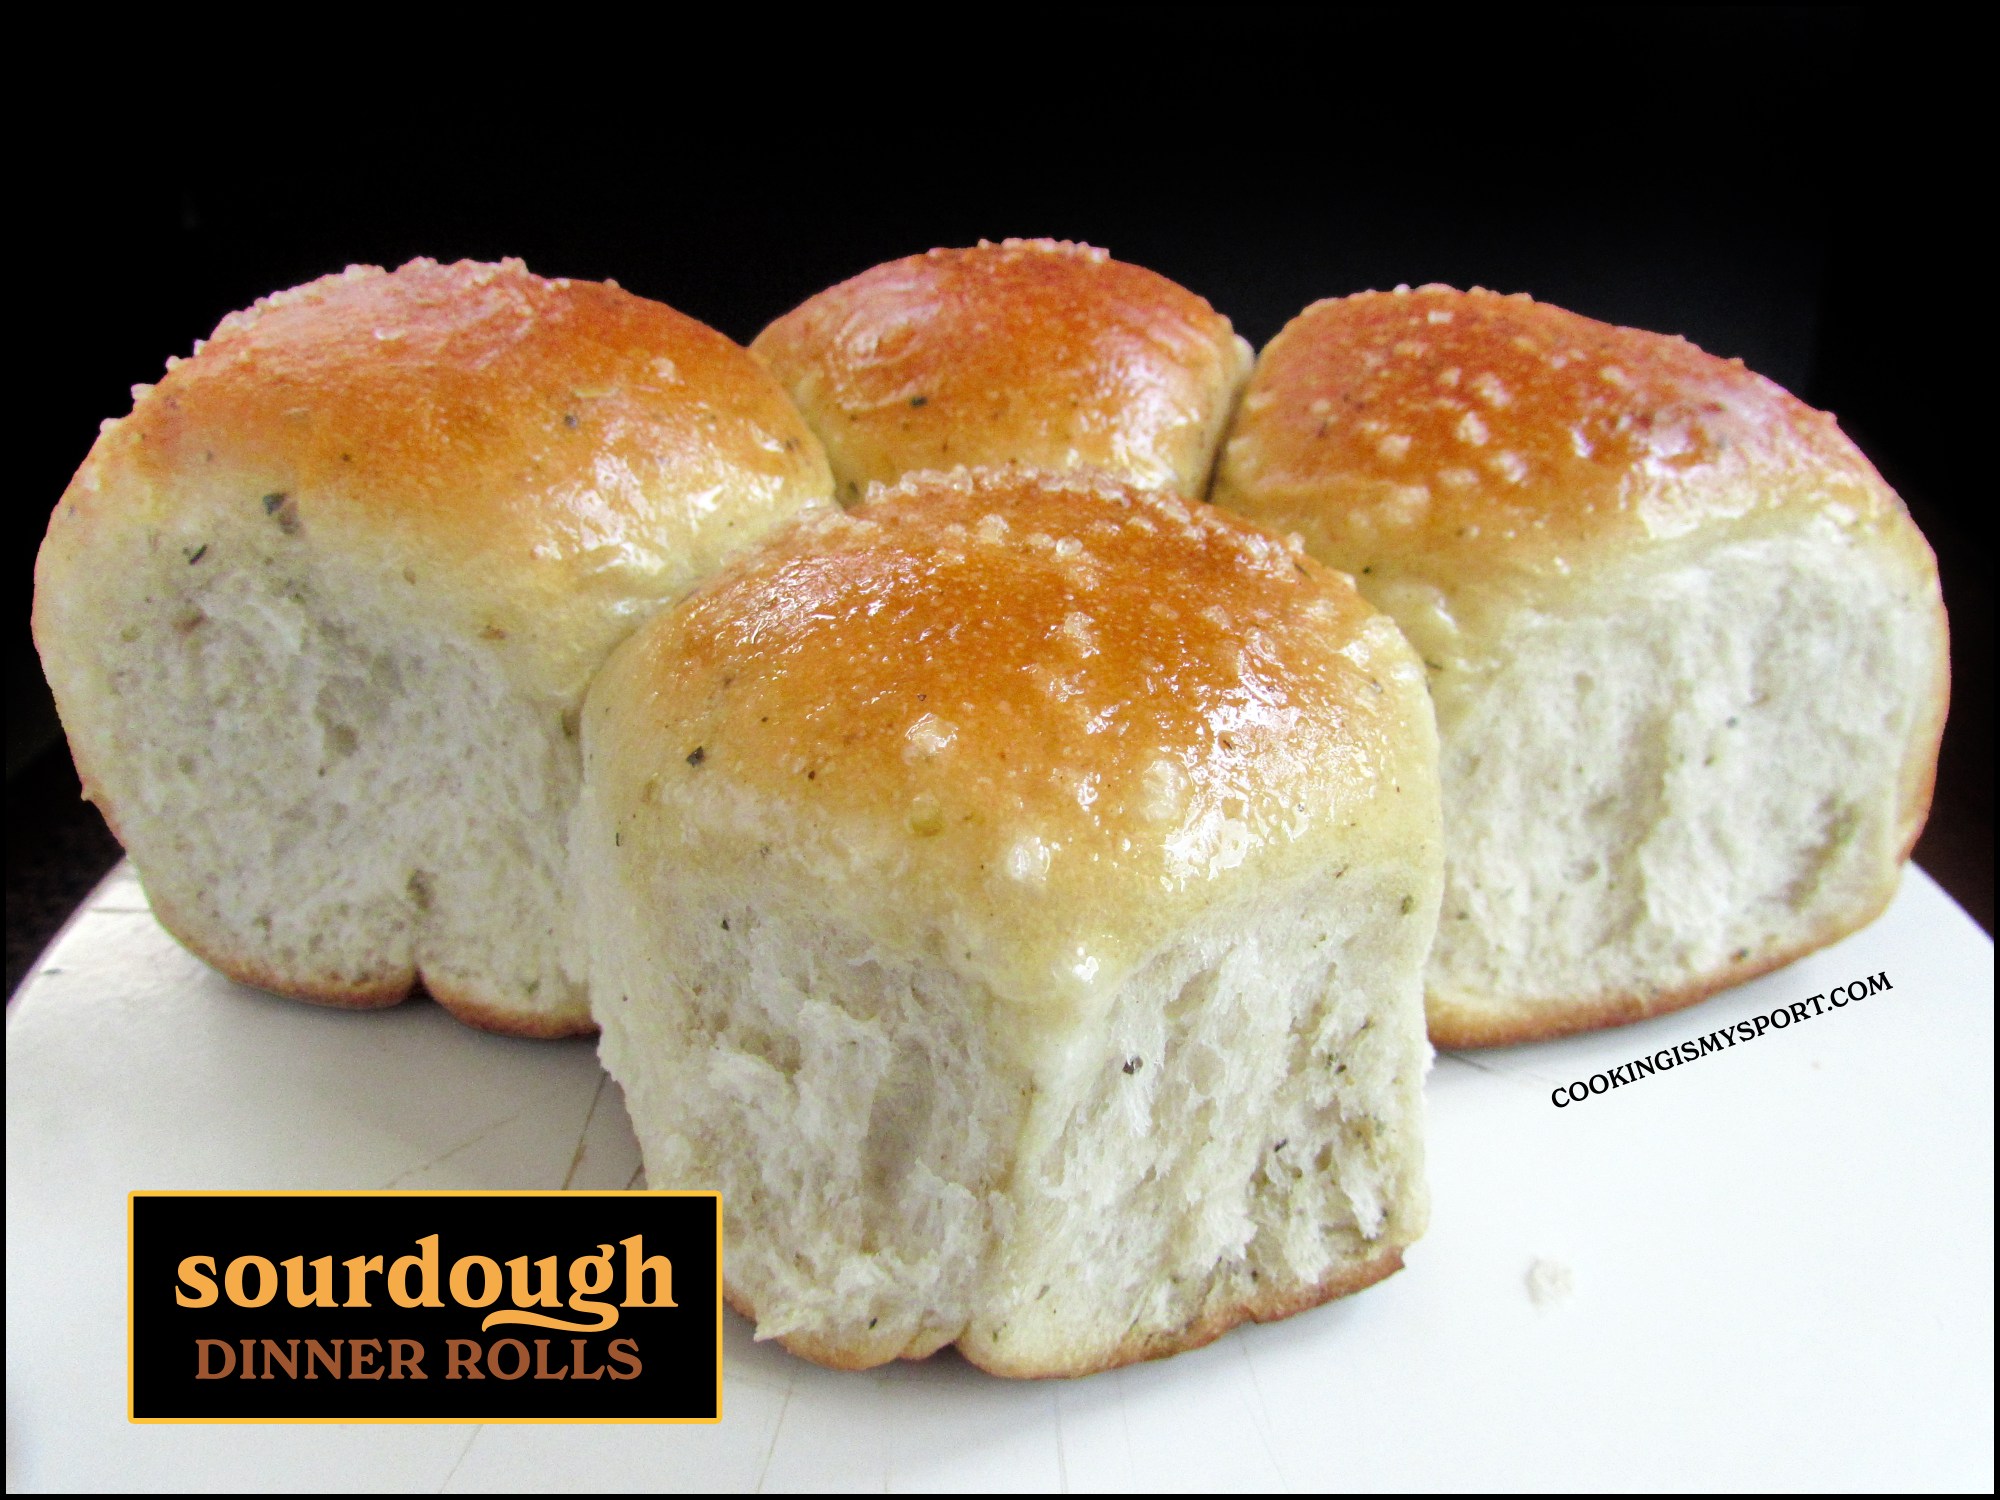
You can make them slightly sweet and pretty to look at, like these.
You can make them as slider rolls to serve alongside meat for a cookout (yes, it is worth the extra effort).
You can add ingredients to the dough like sweet potato that will give the rolls added color, texture and flavor.
You can even add other flours and shape them into something a bit different than just regular round rolls.
As it turns out, you can also throw in some active sourdough starter, with some really delicious results.
You can add sourdough starter to most baked good recipes and get really good results, but I have to say, adding it to these dinner rolls got me truly GREAT results. I knew even when I was kneading the dough just by the ‘feel’ of it alone that they were going to be delicious; bread makers will know exactly what I mean by that.
A bread dough that is going to turn out great when baked typically already feels smooth, elastic-y and supple when you’re kneading/shaping it, and this one felt wonderful.
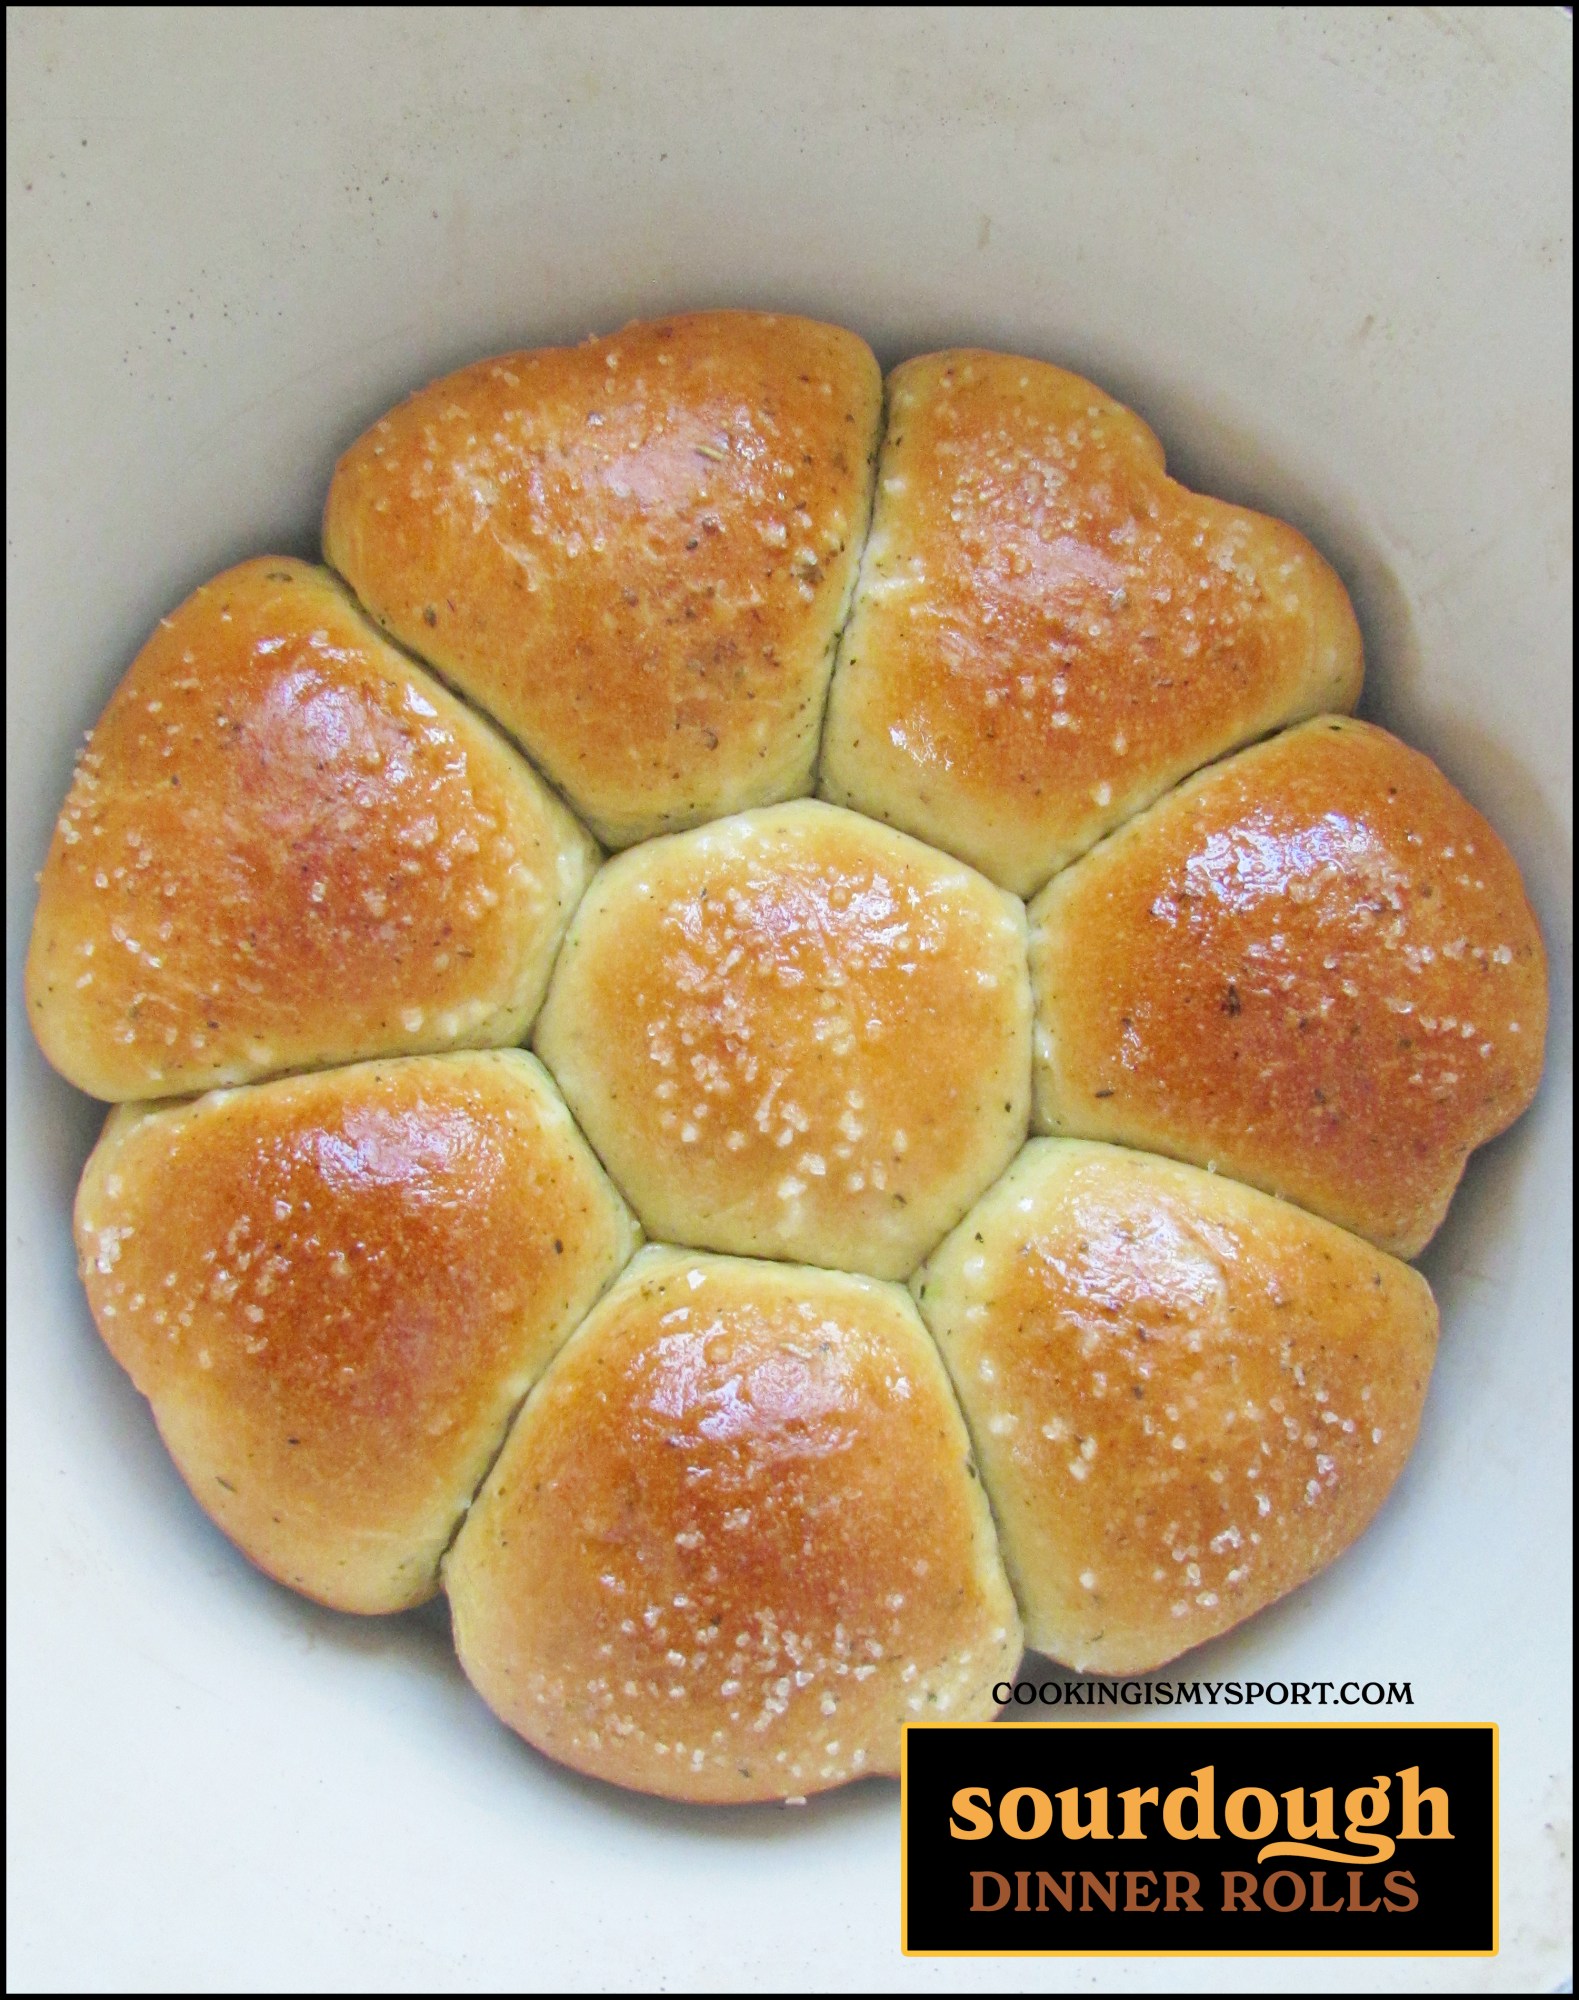
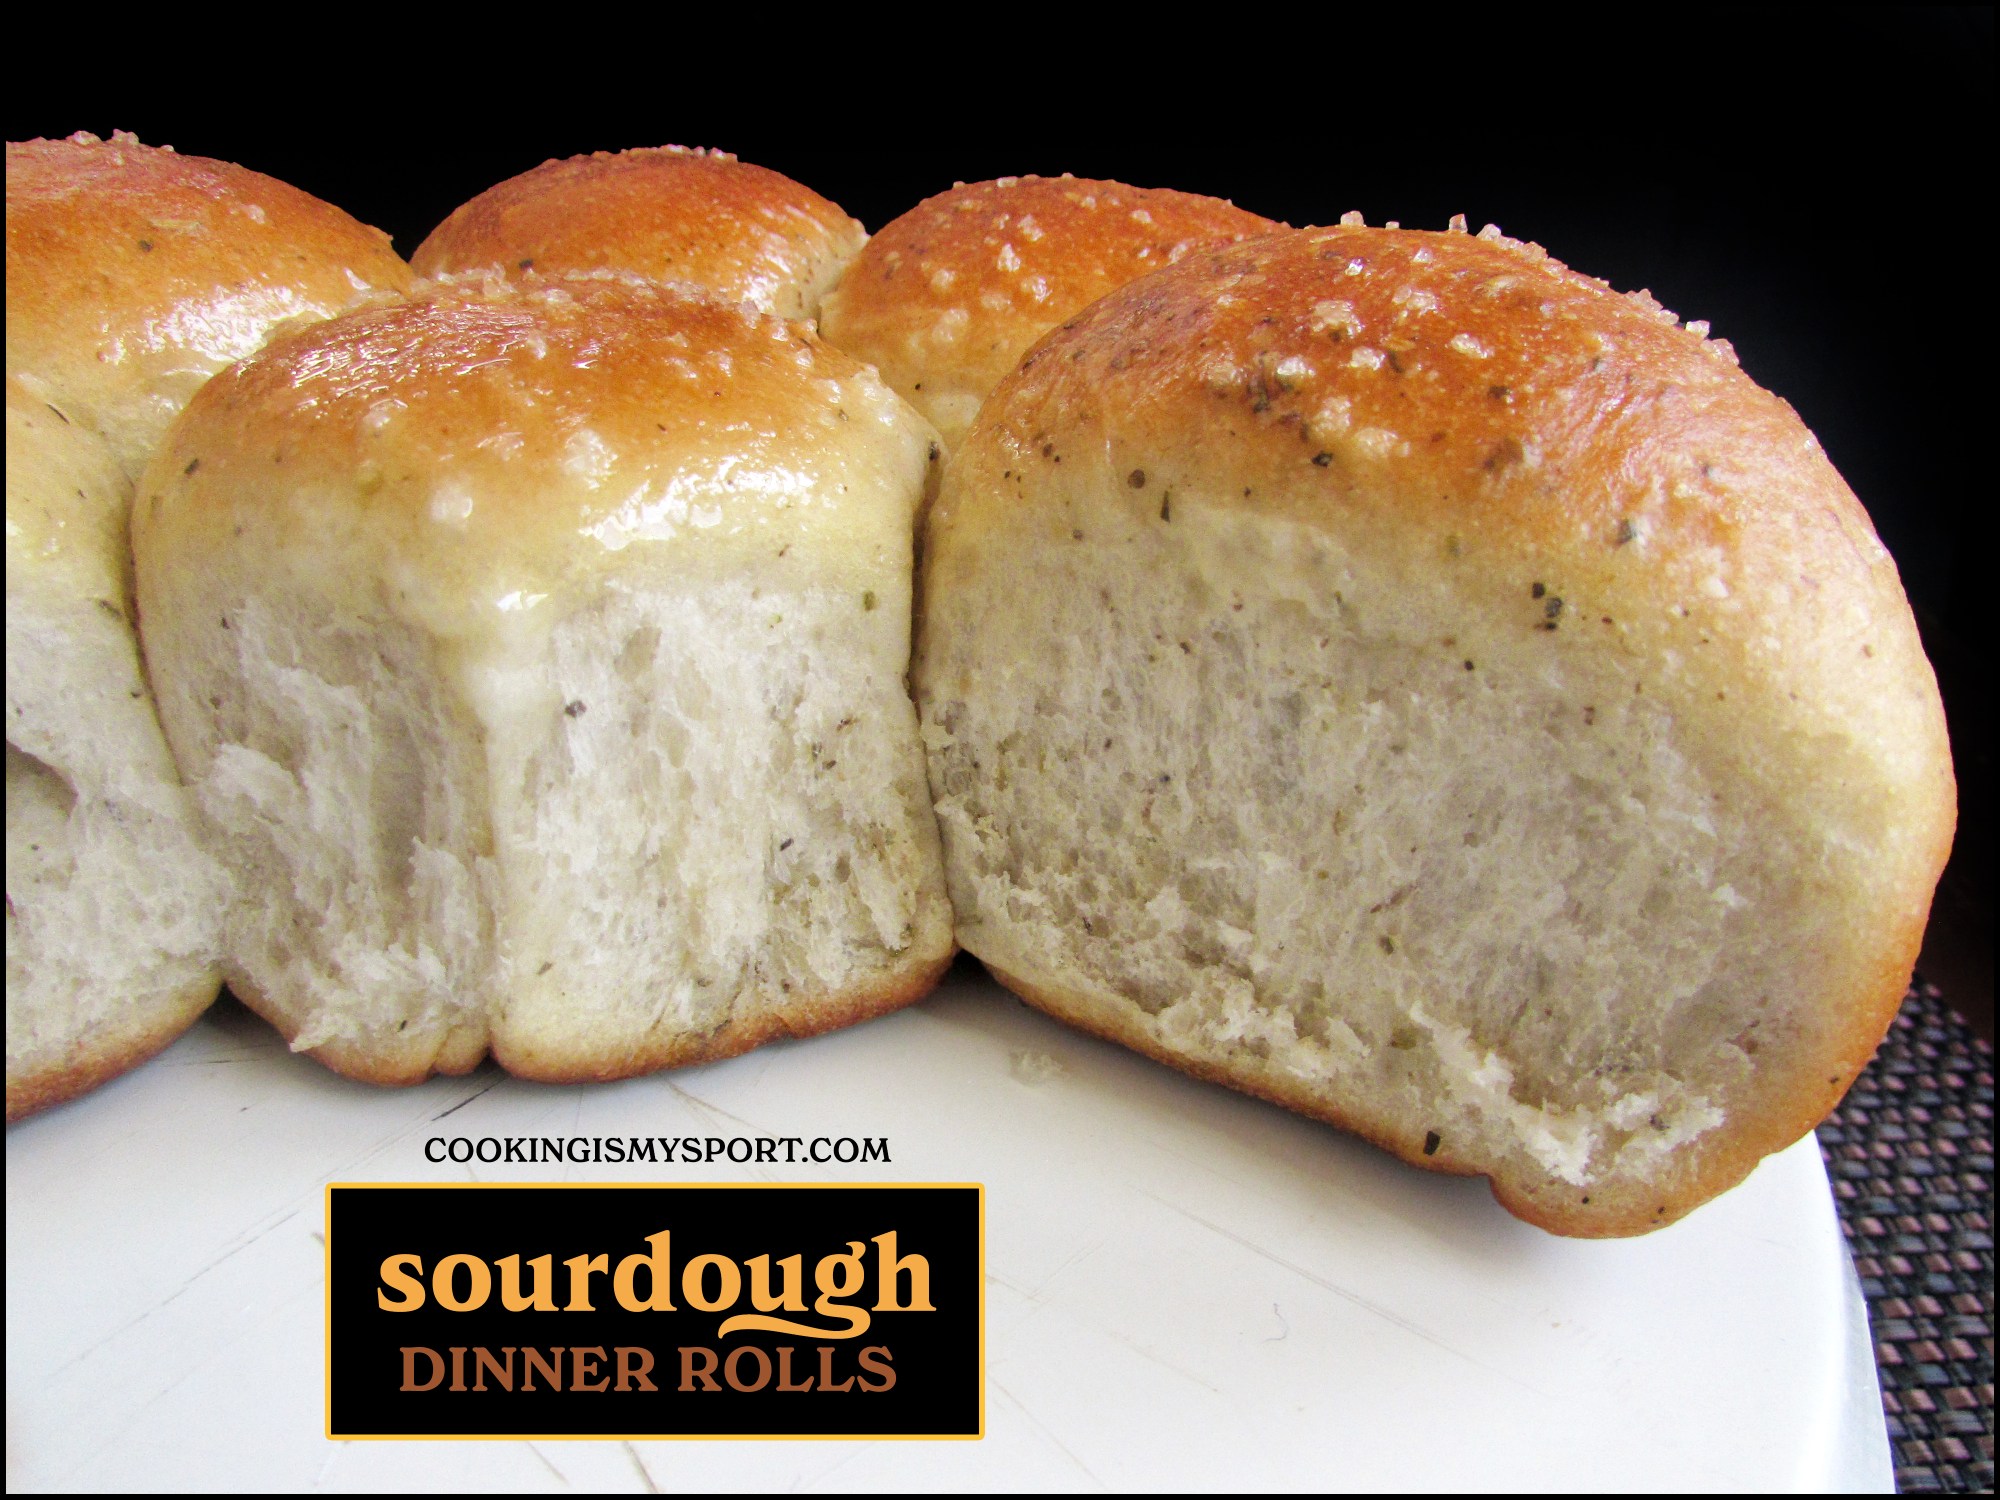
Dinner rolls are great when baked in cake pans, but baking them inside a Dutch Oven really takes them up a notch. Whereas a typical cake pan will yield dinner rolls that are very soft and pillowy, the Dutch oven traps a lot more heat, resulting in a browner and stronger crust on the rolls’ exterior. The round shape and closed lid will also make it so that the rise will also look a lot uniform than a cake pan, as the rolls are going to rise more vertically as opposed to expanding horizontally.
I decided to keep things simple for how I ‘seasoned’ this dough, as I wanted the sourdough starter to be the main attraction on the taste buds. My only addition was a few teaspoons of dried herbs that I think lend themselves well to bread, but you can feel free to add whichever ones you prefer (or leave them out).
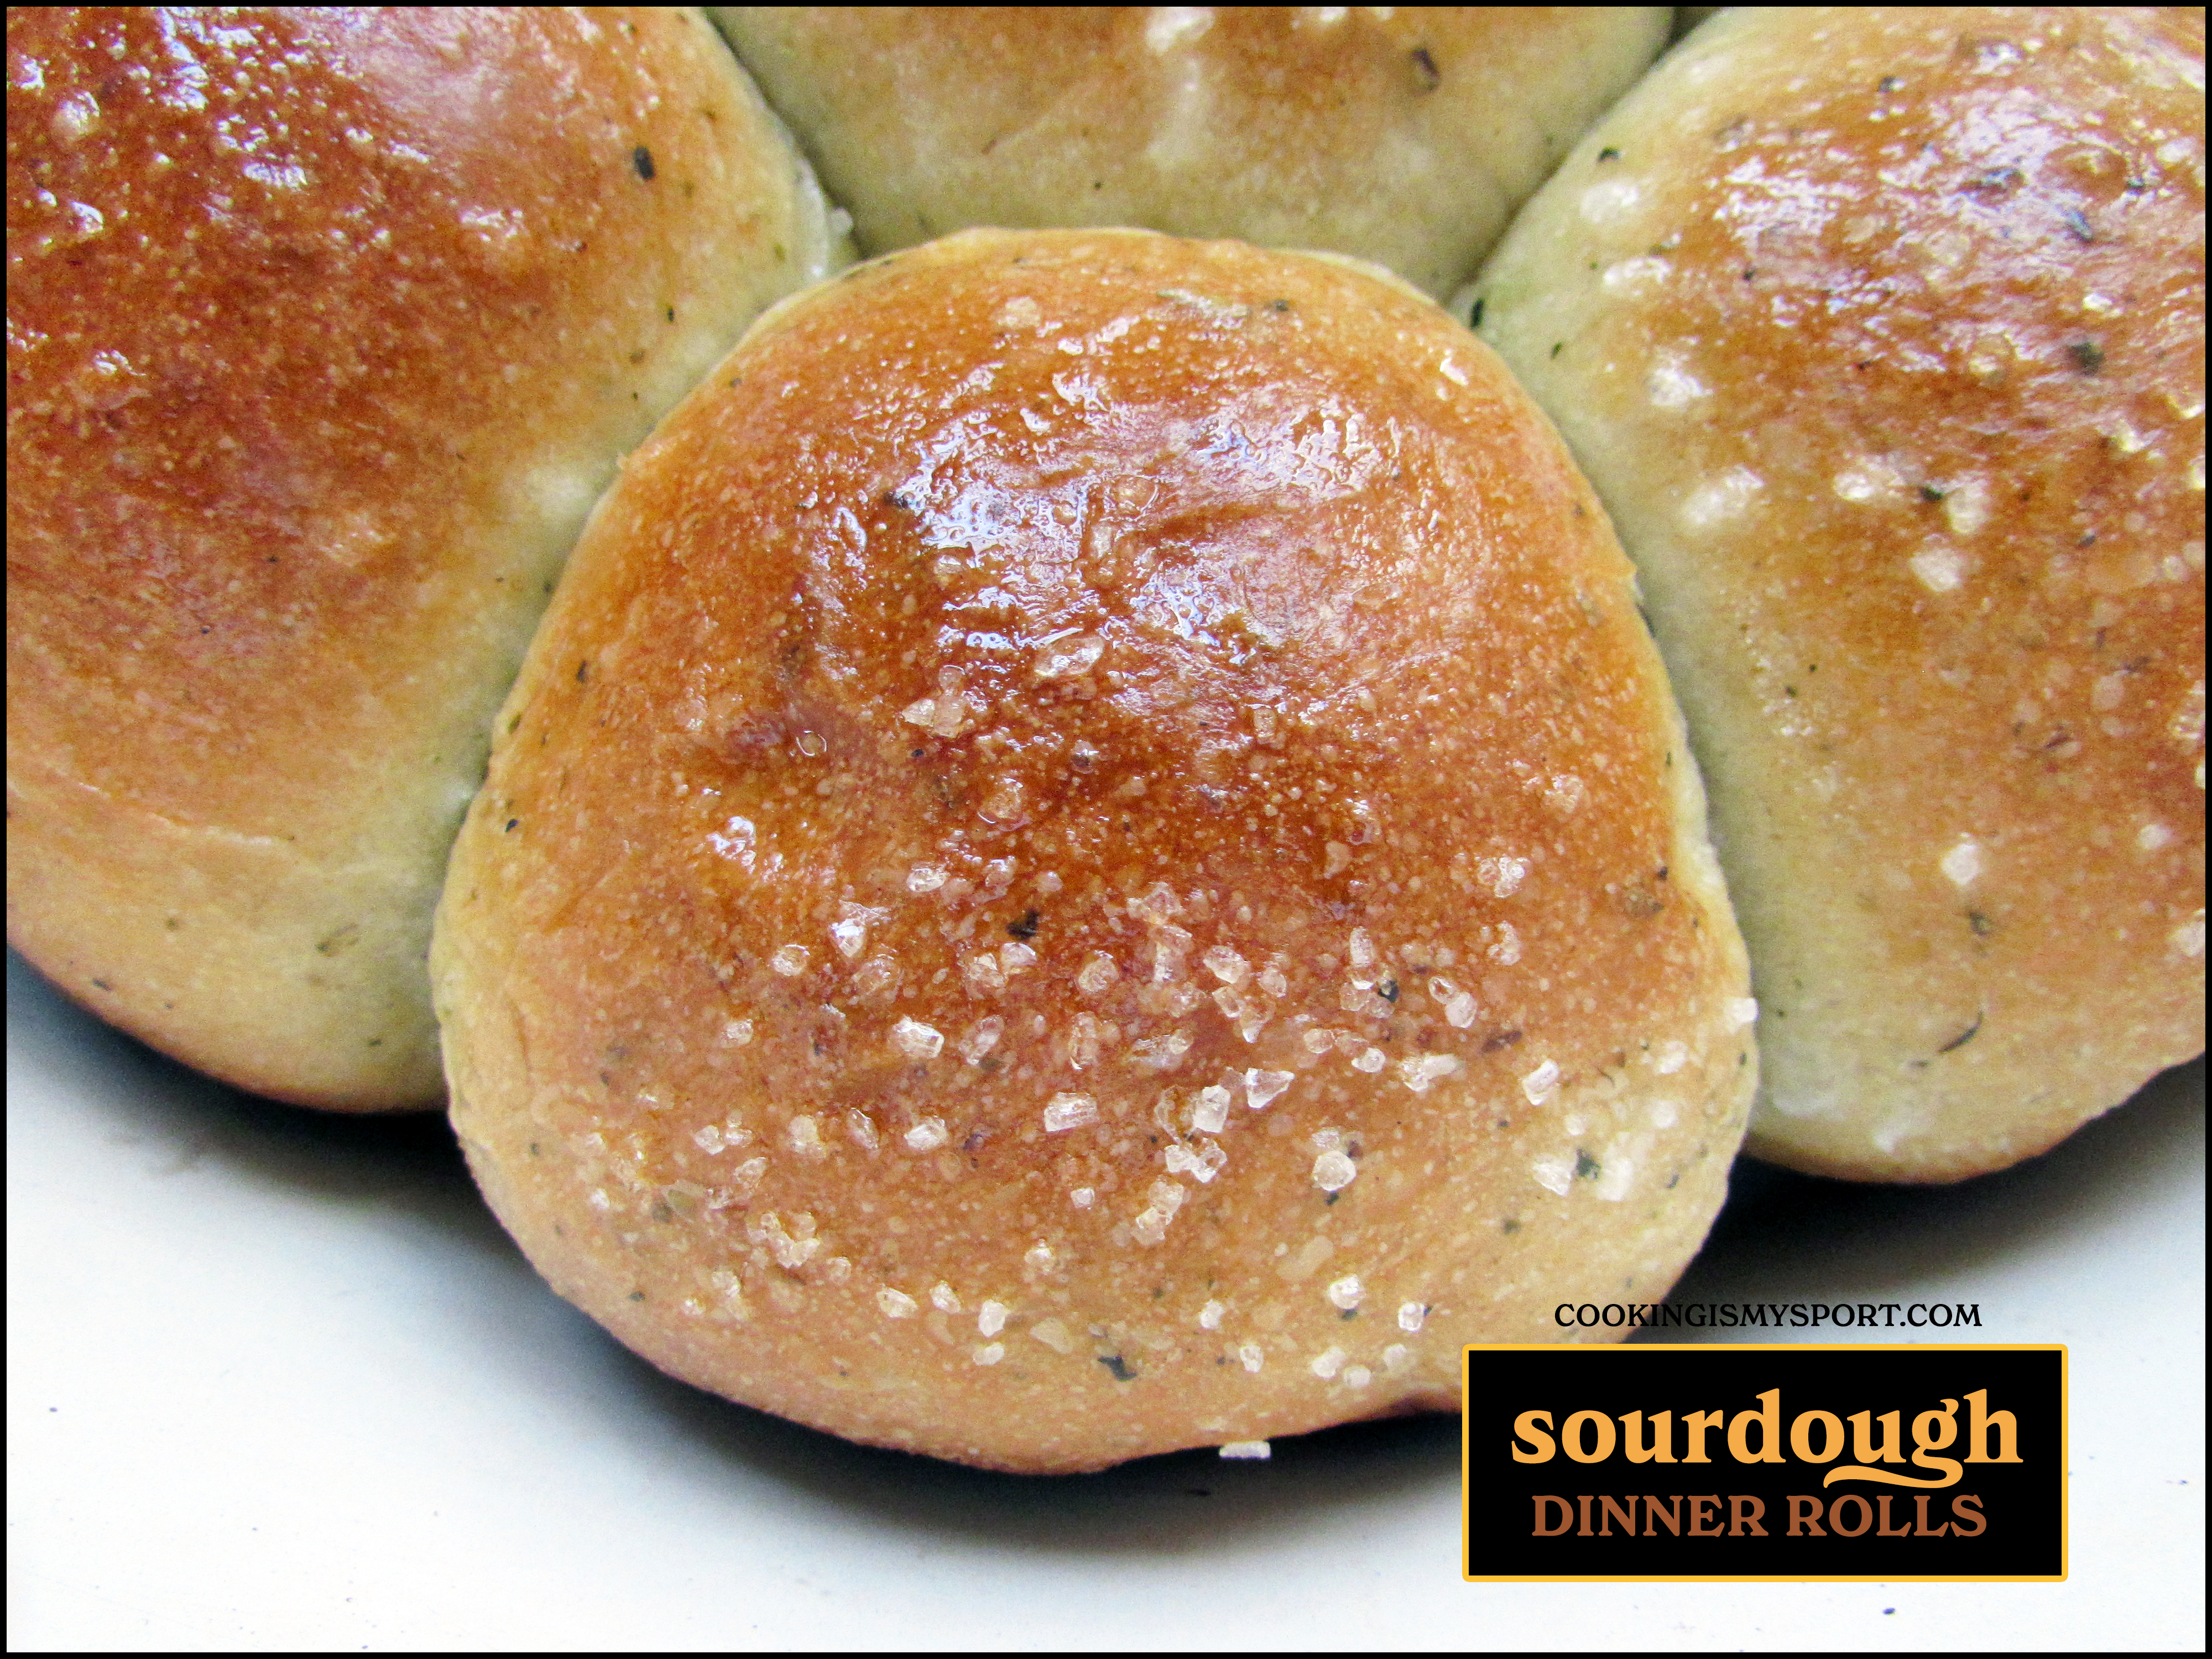
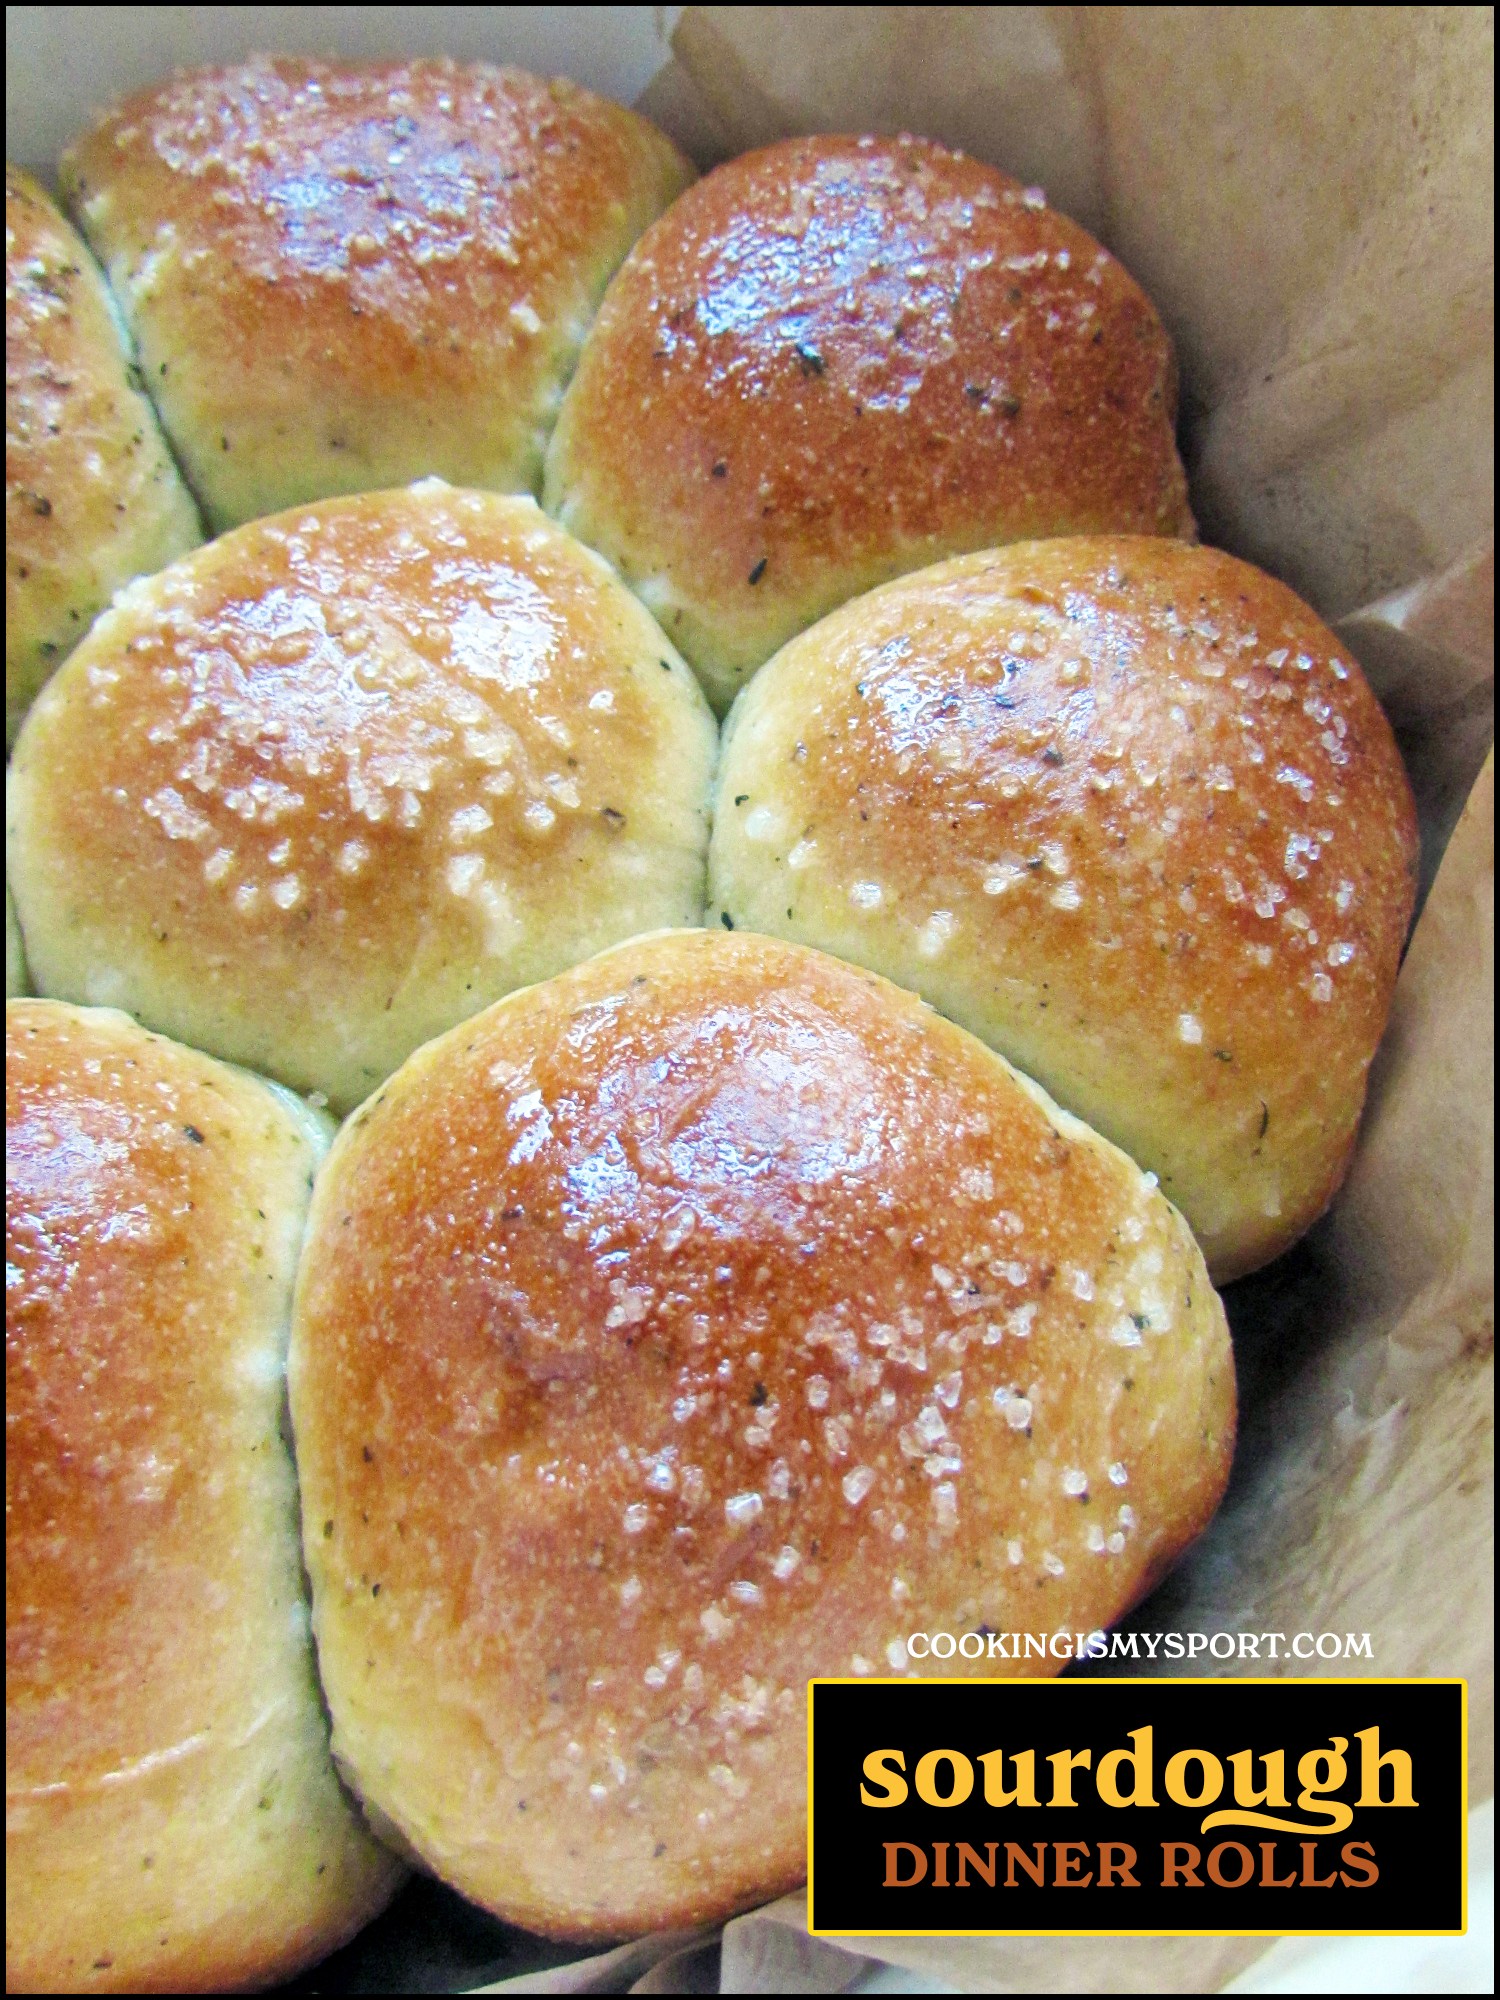
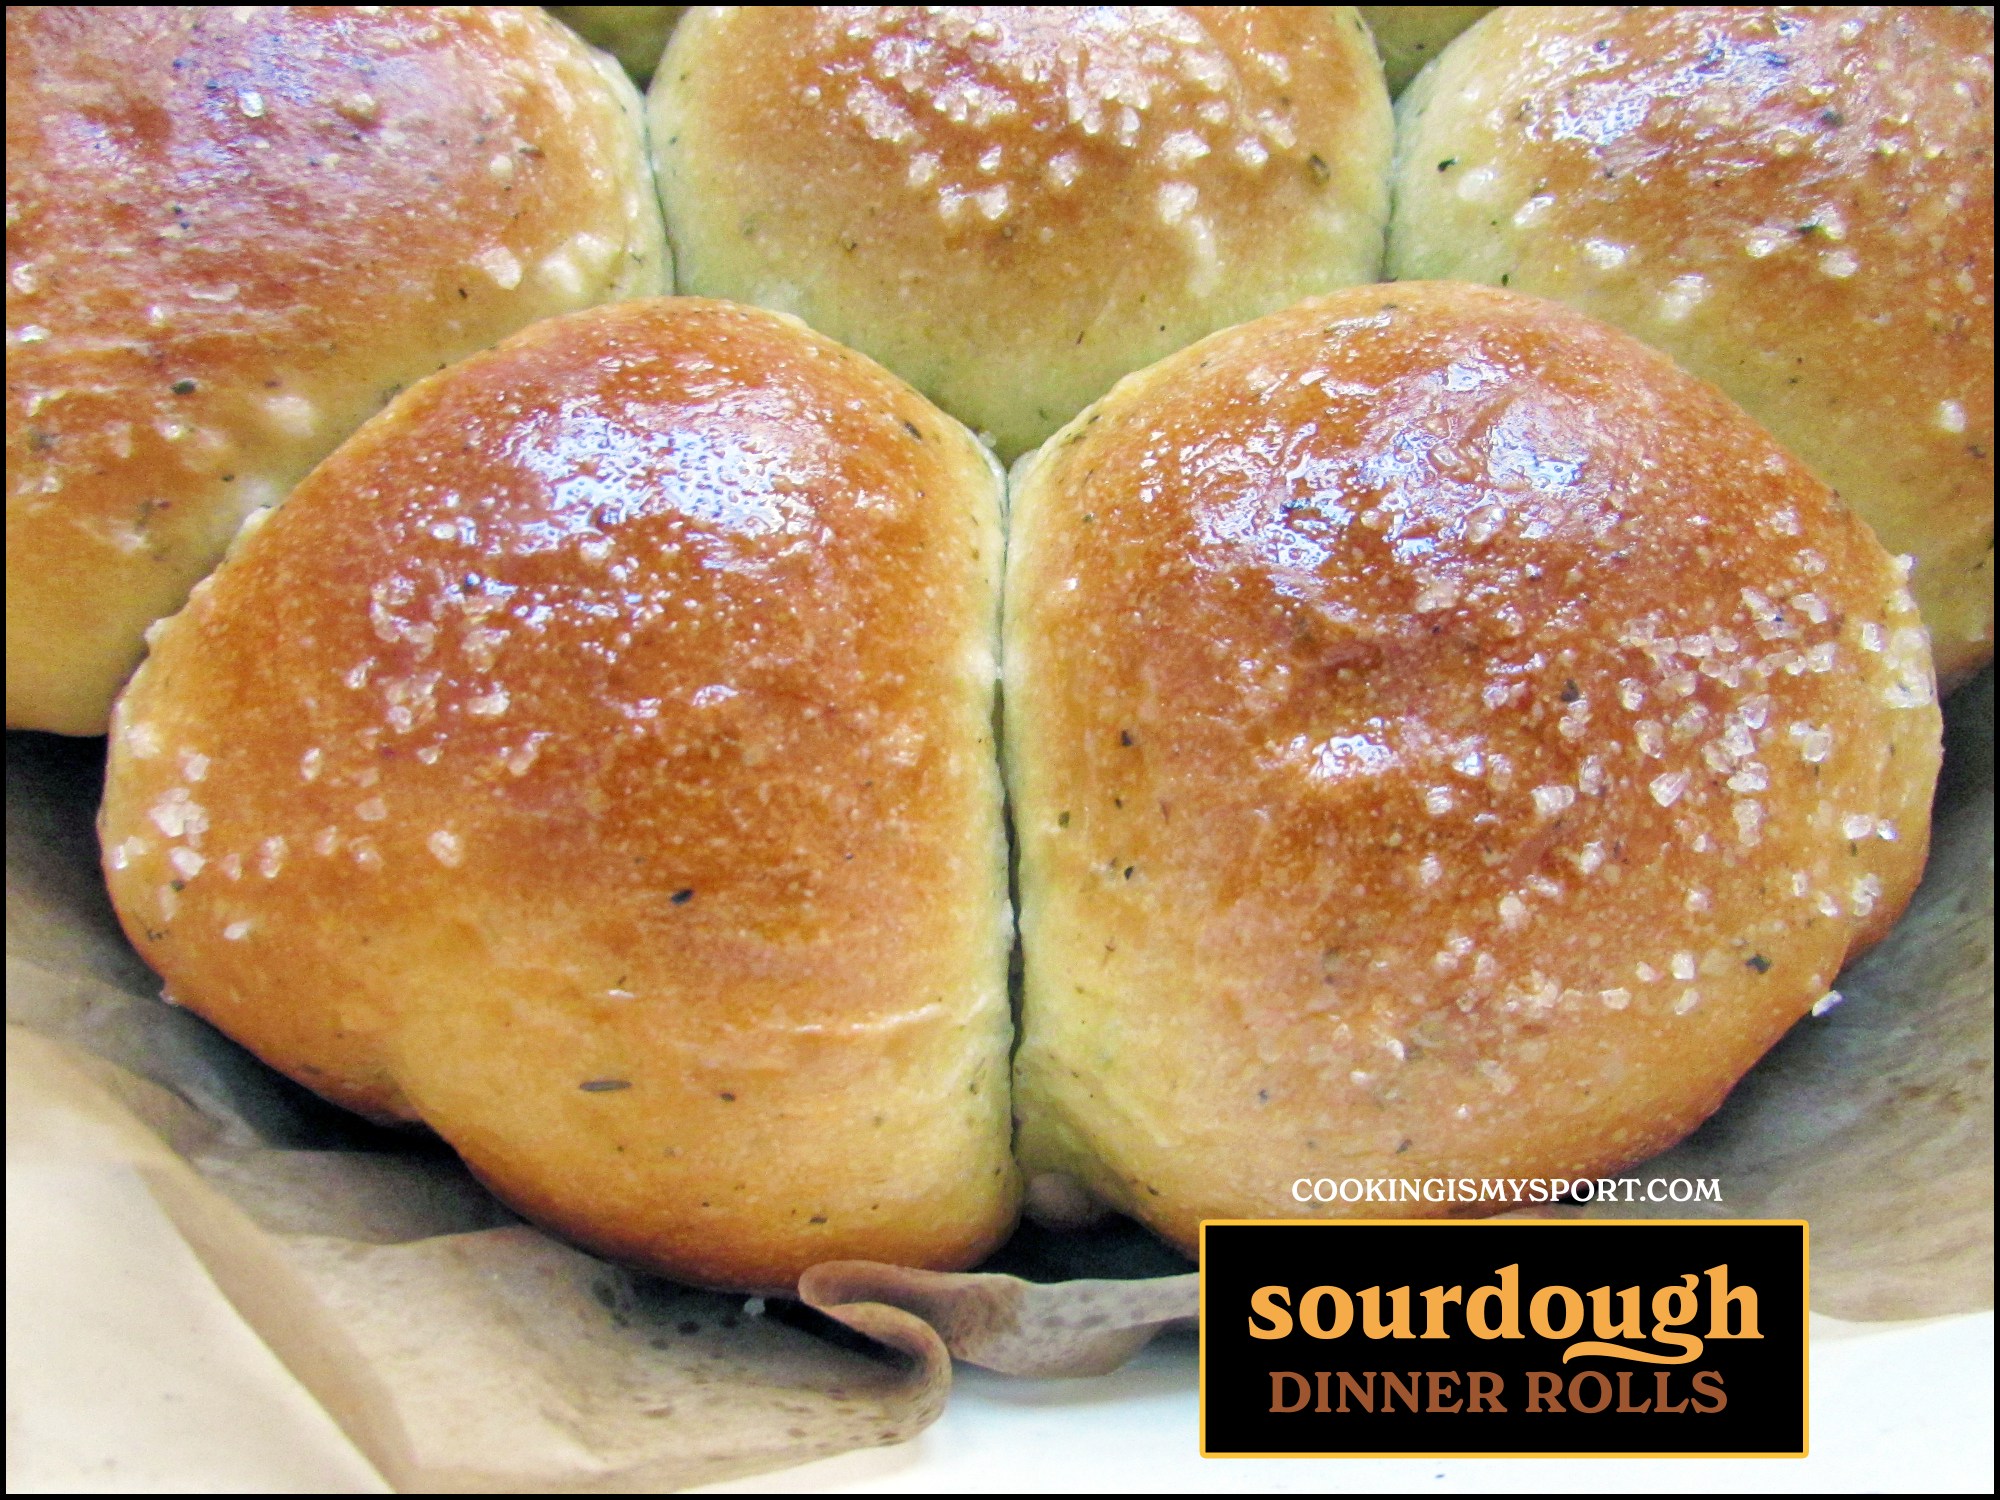
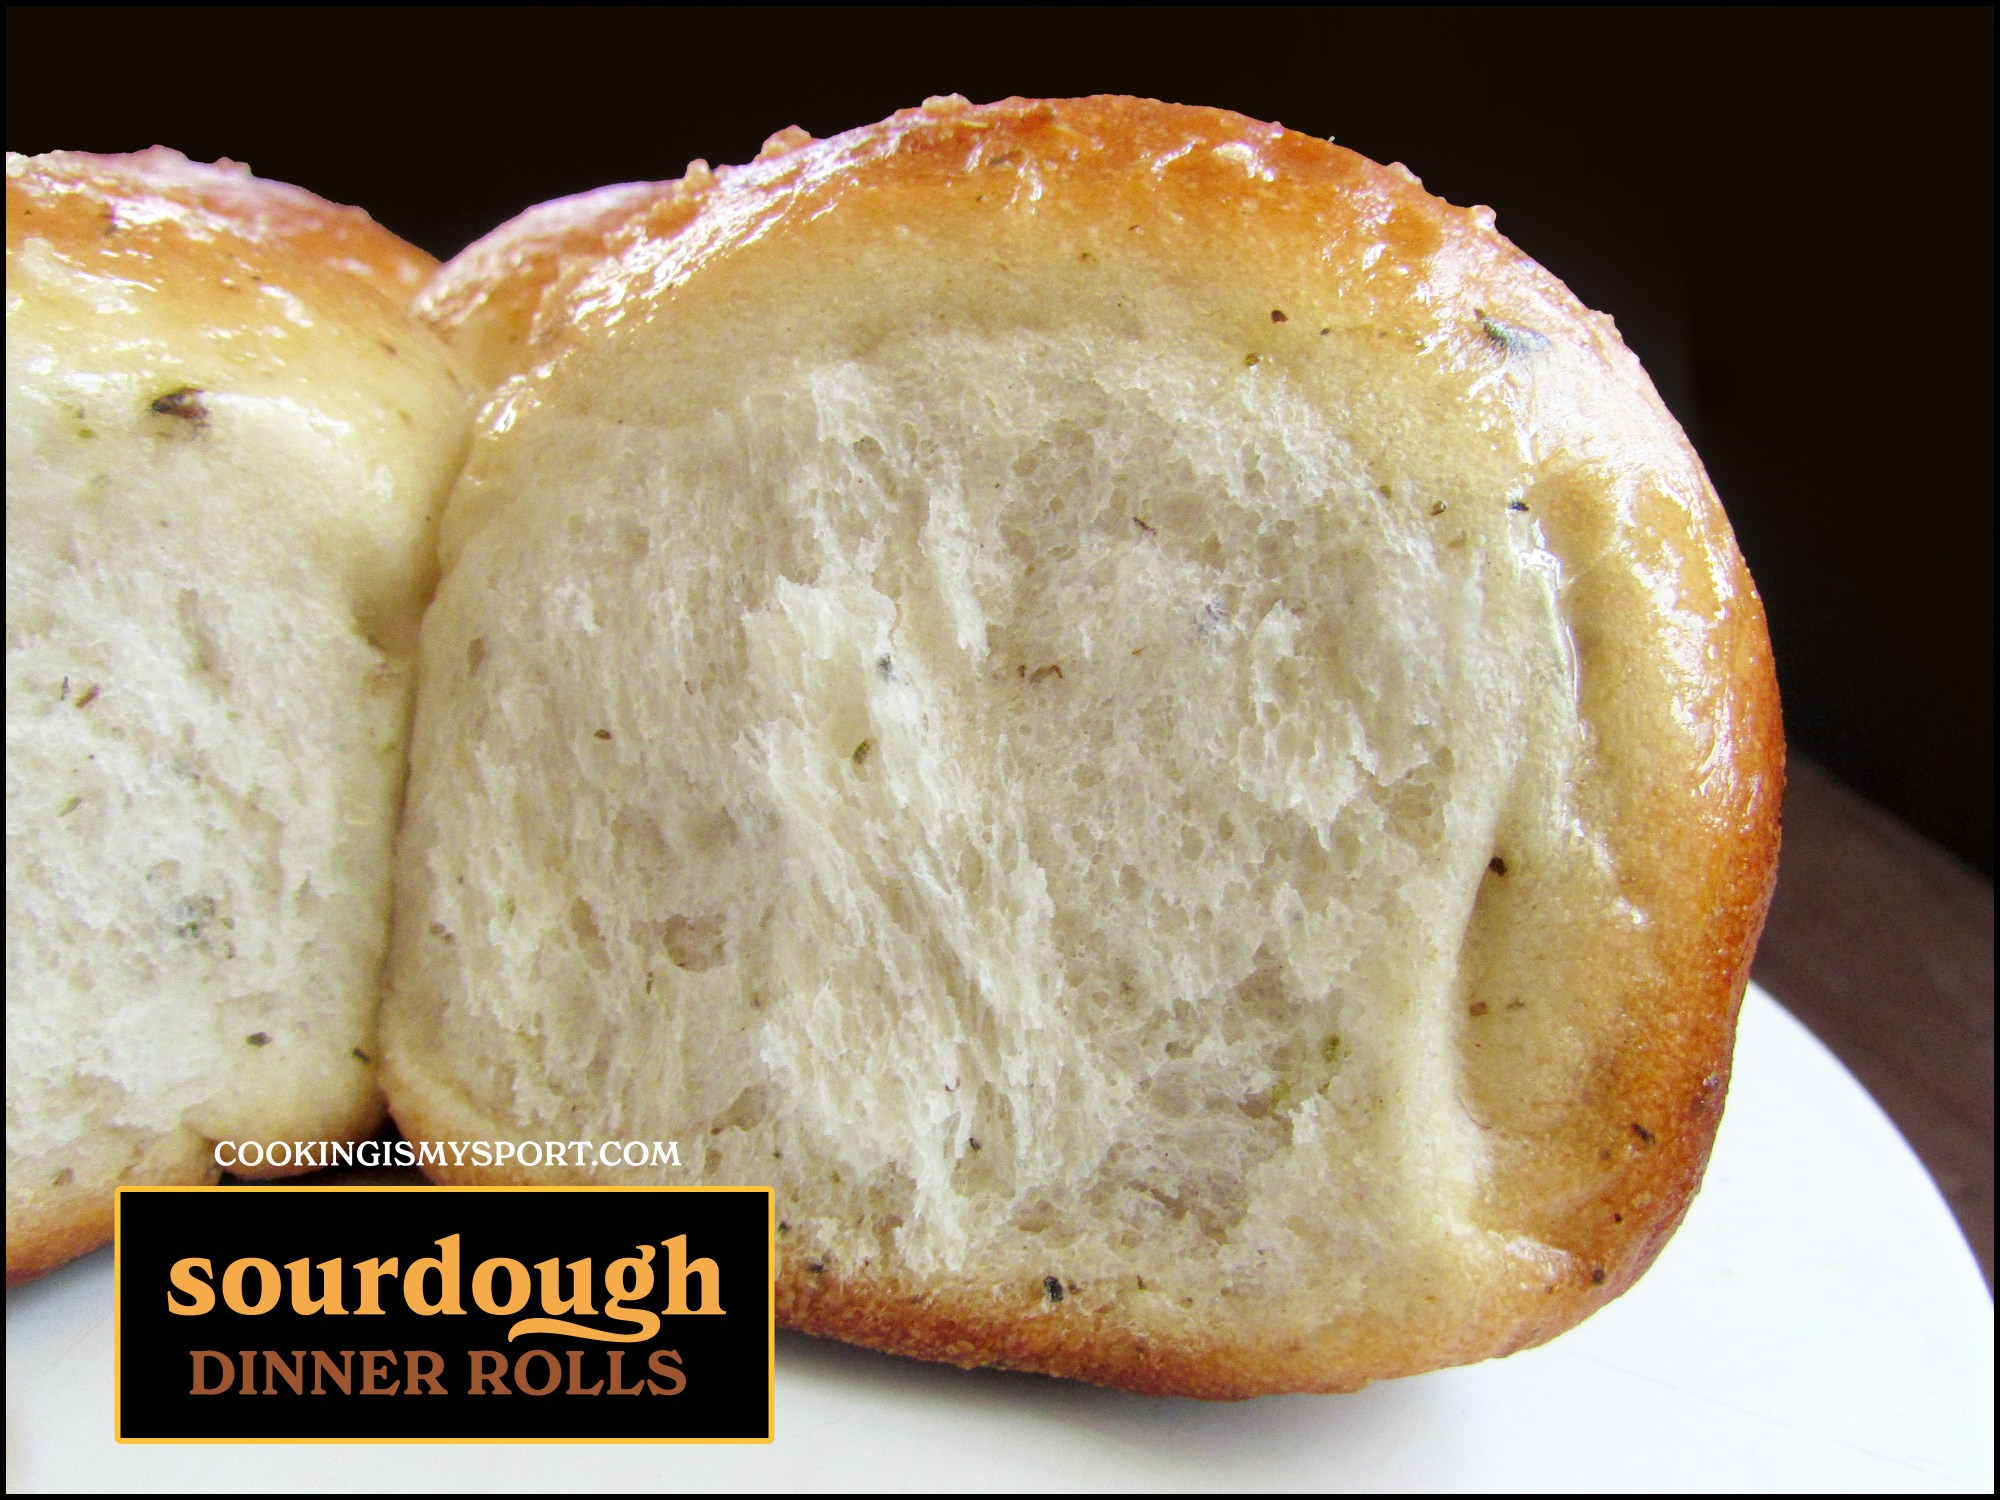
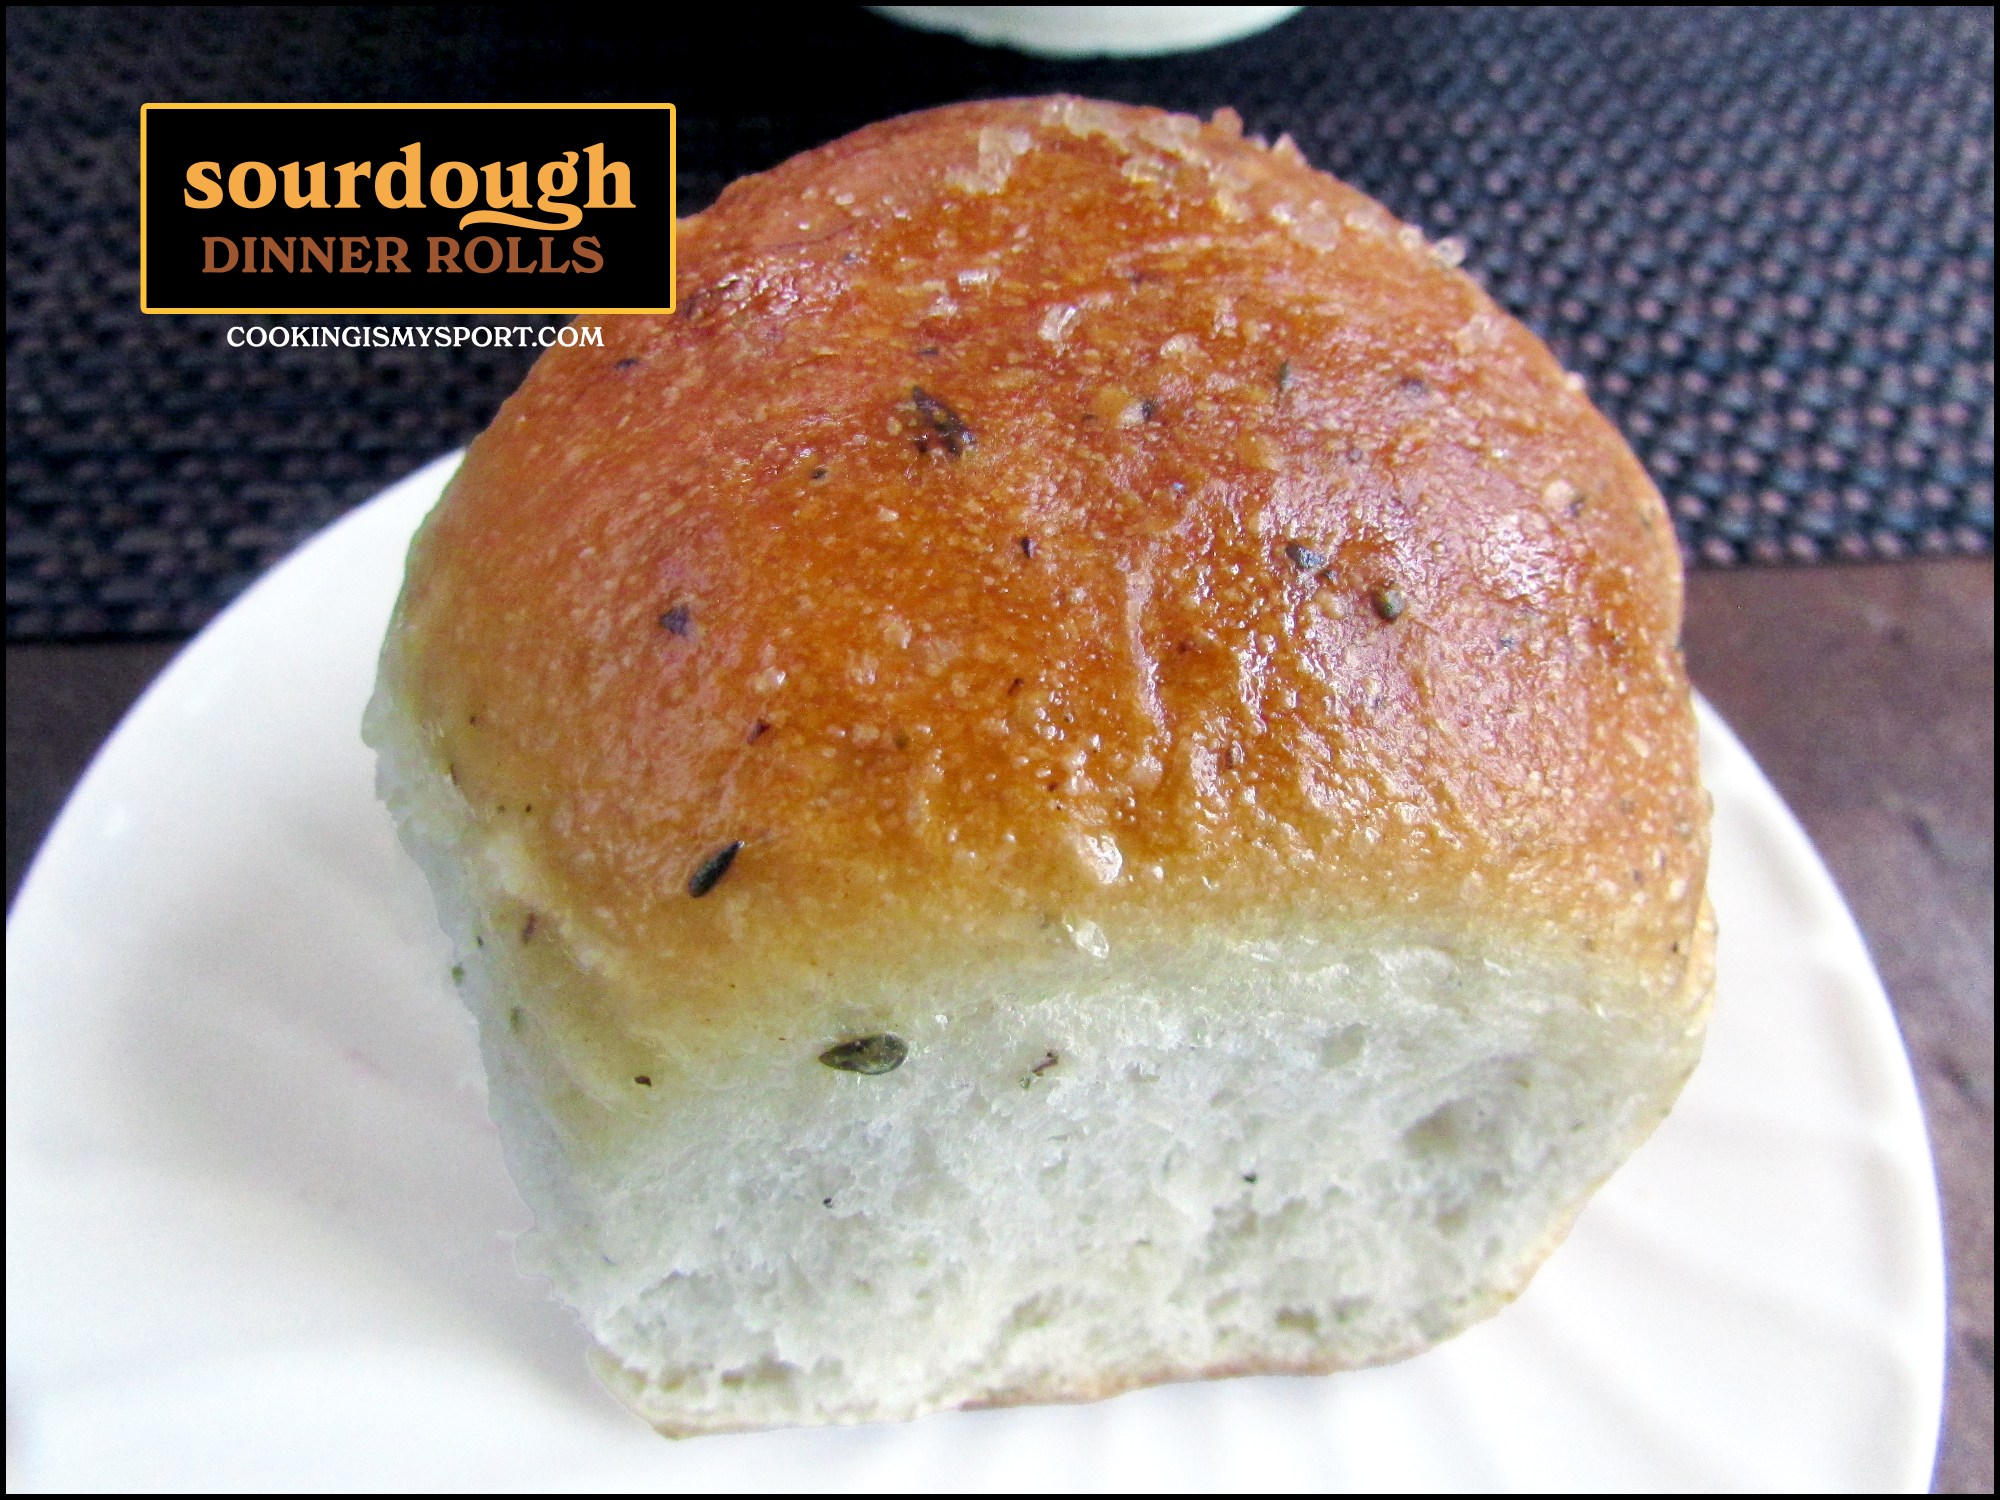
I also decided not to get too fancy for the topping, opting out of seeds or more herbs and just giving them a sprinkling of coarse sea salt that would only enhance the doughs sourdough herb flavors.

I know I probably don’t have to say it, but I will anyway; these were so good.
The smell alone as they baked in the oven was glorious. They rose and browned so beautifully that I was a bit miffed at myself for not having made dinner rolls in the Dutch Oven before now; it’s definitely how I’m going to prefer to make them going forward.

The best part, I think, was the contrast of textures that we’ve got going on here. As I said, baking rolls in a Dutch Oven will give the exterior and bottom of teh rolls a golden brown crust. But that doesn’t mean that they won’t still be soft. Oh no; as you can see, these are SO pillowy soft and fluffy on the inside, which serves as a truly perfect contrast to their upper and lower crust.
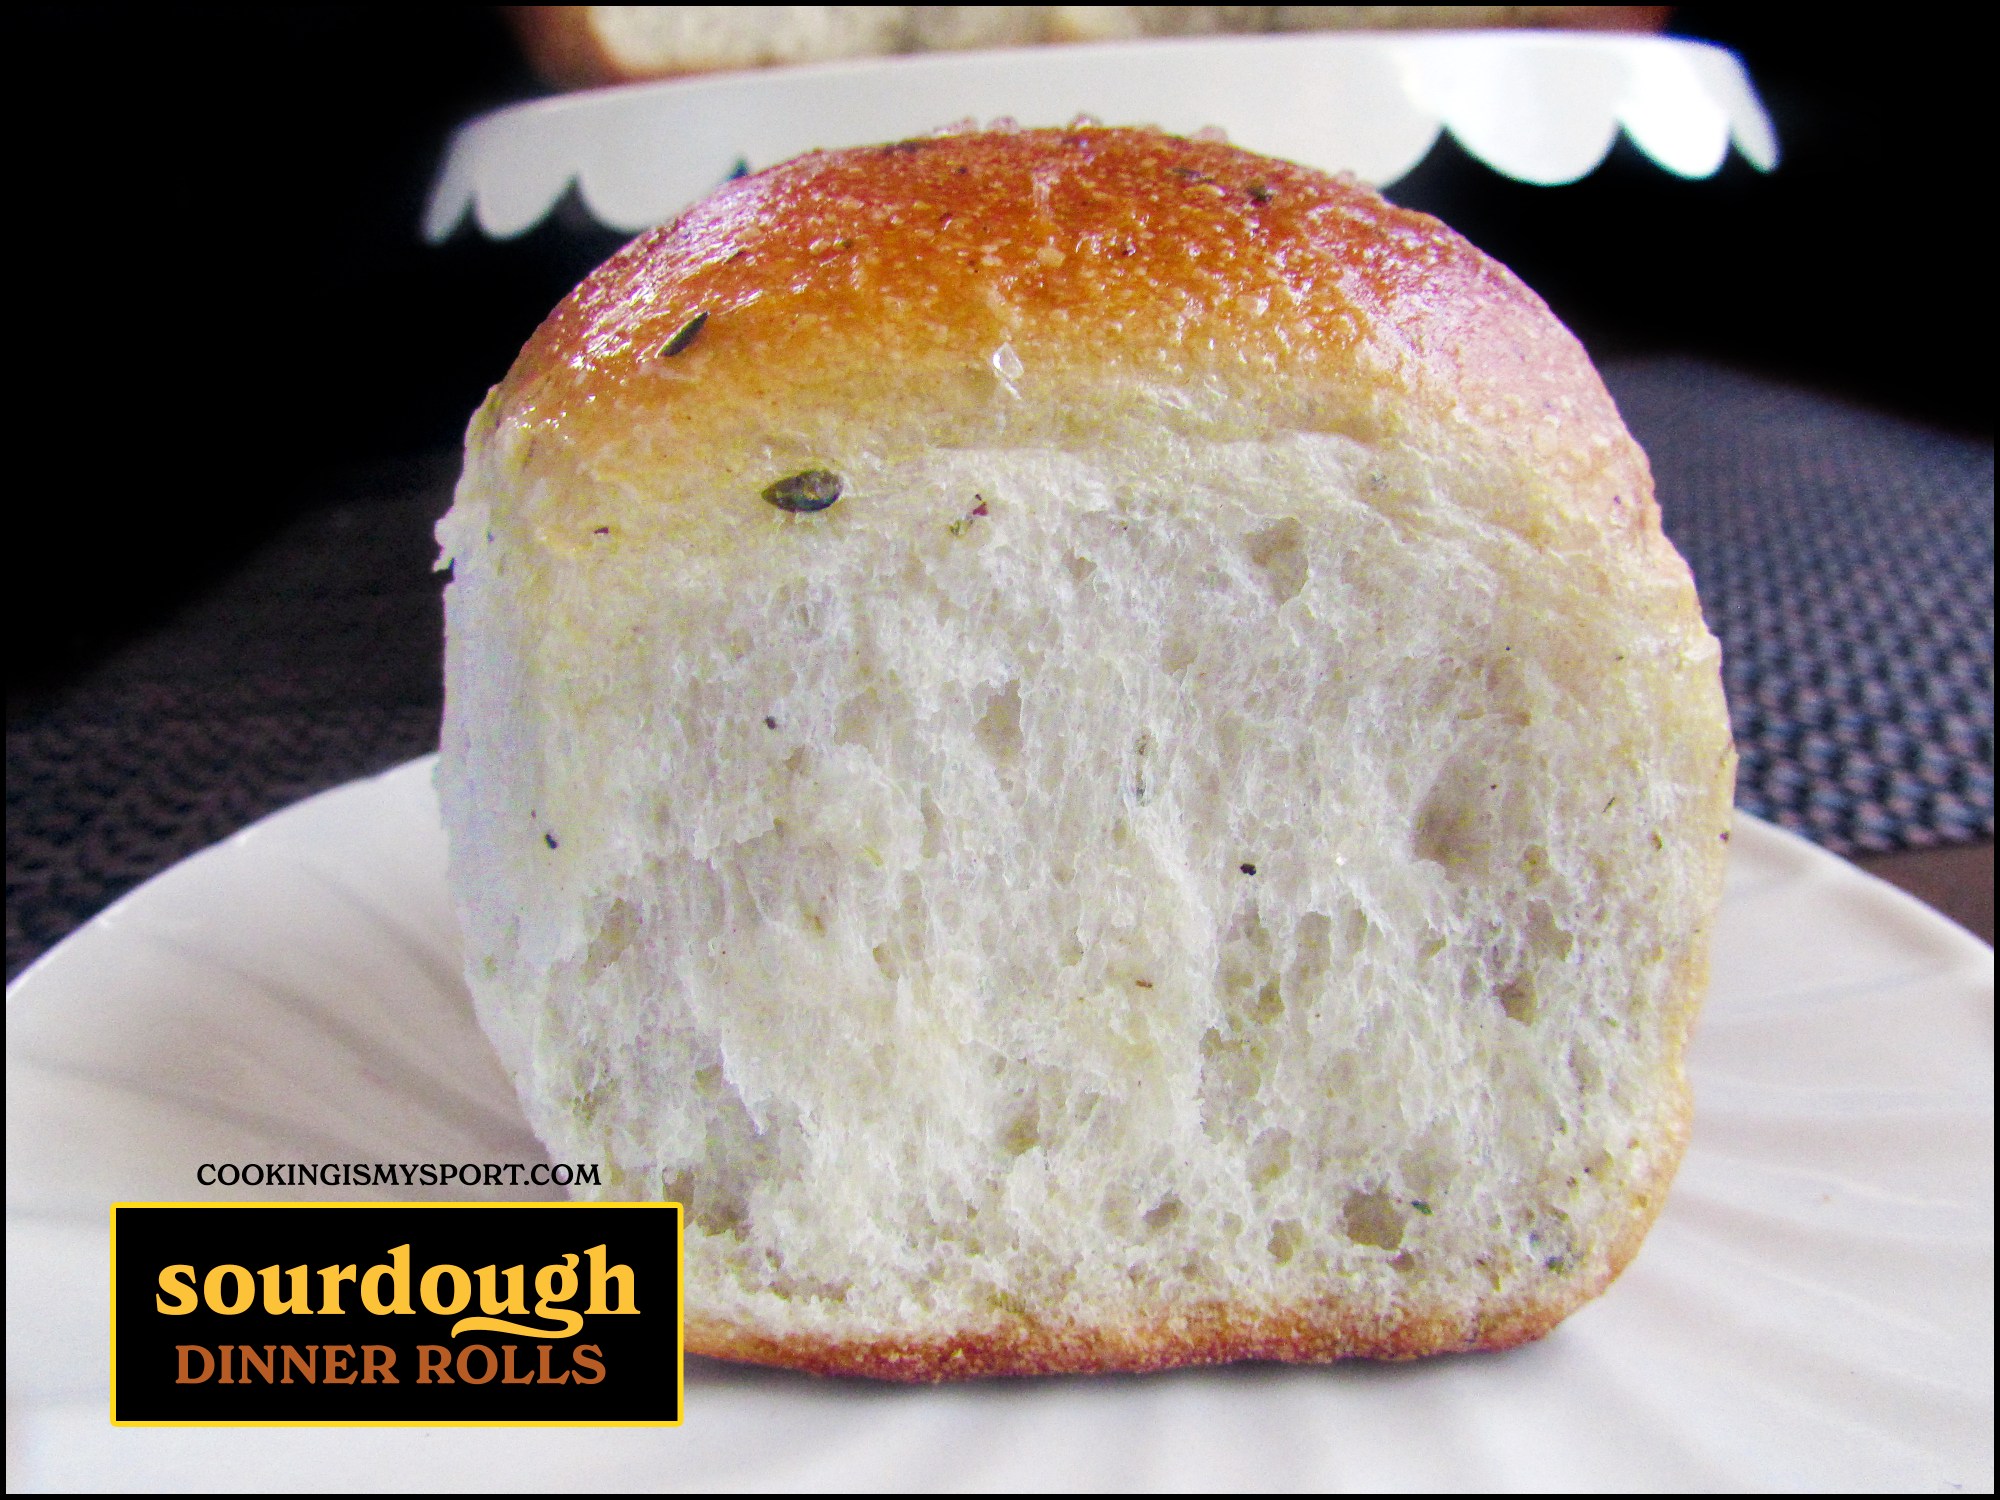
I sliced one of these babies in half, smeared it with some Kerrygold and was TRULY in heaven. And if you make them and decide to do the same, I’m fairly confident that you will be too.
Sourdough Dinner Rolls
Recipe Adapted from King Arthur Flour
Ingredients
For Dough
- 1 cup (227g) ripe sourdough starter
- 3 1/2 cups (420g) Bread Flour or All-Purpose Flour
- 2 tablespoons (18g) non-diastatic malt powder, or 1 tablespoon (11g) brown sugar
- 2 teaspoons (12g) table salt
- 1-2 heaping teaspoons dried herbs (I usually use an Italian blend)
- 1 to 1 1/8 cups (227g to 255g) water, lukewarm
- 1 teaspoon active dry yeast
- 1 tablespoon white sugar
For Topping
- 1 tablespoon (9g) non-diastatic malt powder, or brown sugar, mixed with 1 tablespoon (14g) warm water
- Coarse sea salt
Directions
Pour the warm water in a medium sized bowl. Sprinkled the active dry yeast on top, followed by the white sugar.
Allow to proof for 10 minutes, until frothy.
In the bowl of a standing mixer, or using a handheld mixer fitted with the dough hook, or by hand using a bread whisk combine all of the remaining dough ingredients together until they hold together in one mass.
Move the dough to a work surface you’ve dusted with flour and knead with your hands until it is smooth and tacky, 8-10 minutes.
Lightly spray the mixing bowl with cooking spray, place the dough inside.
Cover with plastic wrap and a damp kitchen towel and allow to proof/rise for 1- 1 1/2 hours, until doubled in size.
Turn the dough back out onto work surface. Divide it into 8 equal pieces. Use your palms to gently roll them into tight balls.
Line a Dutch Oven with parchment paper. Place the dough balls in the bottom of the Dutch Oven. Cover again with the plastic wrap and the damp kitchen towel and allow to rise/proof for another hour. (They should be puffy but they don’t necessarily have to double in size this time.)
About thirty minutes into the proofing/rise, preheat oven to 450 degrees Fahrenheit.
Just before baking, whisk together the malt power or the brown sugar with the water in a small bowl, then brush over the rolls.
Sprinkle with the sea salt. Place the lid over the pot.
Bake for bake the rolls for 20 to 25 minutes.
Remove the lid from the pan and continue to bake the rolls about 10 minutes longer, until they’re a deep golden brown and a digital thermometer inserted into the center of one reads at least 205°F.
Remove the rolls from the oven and cool them on a rack. Alternatively, for crustier rolls, open the oven door and allow the uncovered rolls to cool in the turned-off, open-door oven
Sharing at Fiesta Friday #637.


These look like little pillows!
Thank you Dorothy–that is exactly what they tasted like 😉