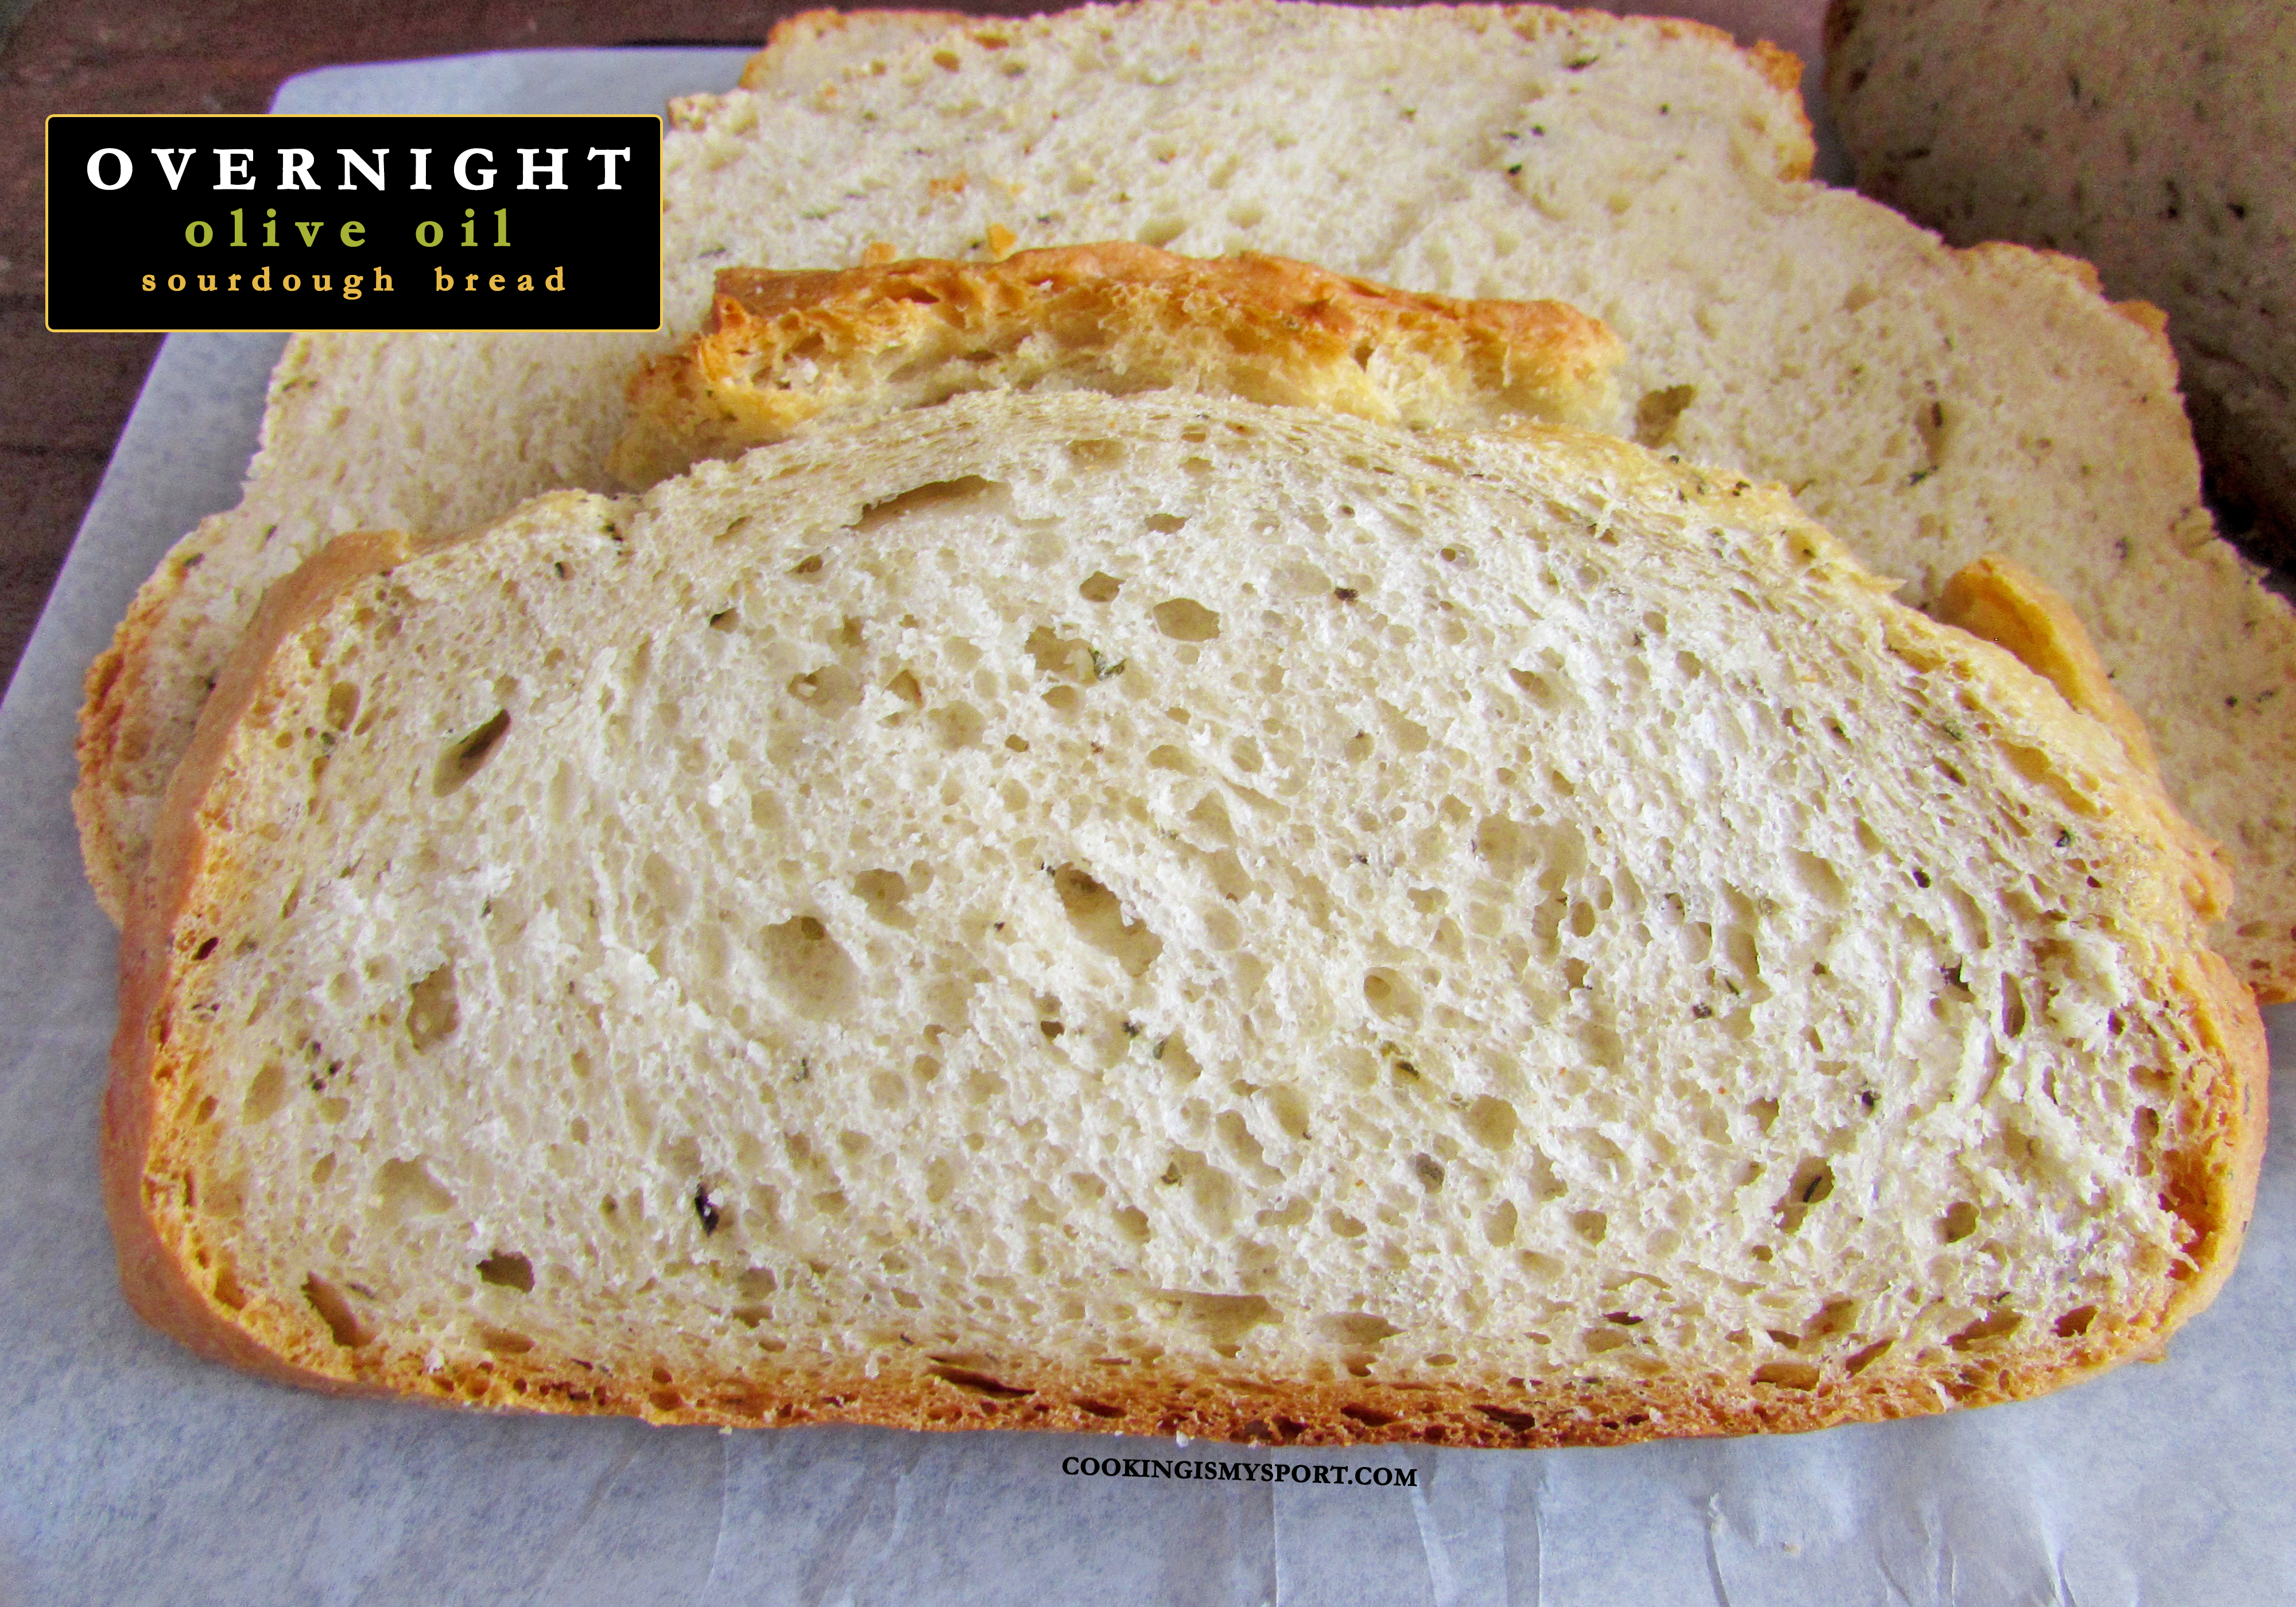
Overnight Olive Oil Sourdough Bread

At the start of this year, I checked off one of the things that been on my Baking Bucket List for years by deciding to practice/teach myself how to bake sourdough bread. It took some determination and more than a little trial/error, but I can report that it’s been going rather well.

I’ve found that the most important thing when baking sourdough is maintaining your sourdough starter. It’s often called a pet, and for good reason. You have to give it regular, measured ‘feedings’ and store it in specific way so as to keep it from going bad. The longer you can keep this up, the better quality of your starter, and thus, the better ‘sour’ flavor of your bread.
As the sourdough chronicles continue in my kitchen, my starter pet/baby Donatello (named after the turtle, not the sculptor) is now just about to turn nine months old. He’s full of pep, vigor, yeast and bacteria (the good kind). I’m a pretty proud and satisfied mama.
Ever since the first sourdough bread recipe I shared on the blog, I have been experimenting with others, to see what I like or don’t like and what works best for me and Donatello. The latest one has worked out so well that it’s become a regular staple in our house, to the point where I make it just about every other week.

There are two things about this bread that I think set it apart from some of the other sourdough recipes I’ve tried out over the past few months. First, the actual labor is spread out over two days so that it’s really easy and relatively quick to put together. Because the sponge (the flour, water and starter mixture that’s made on Day 1) is left to set overnight, I also think it improves the fermentation of the dough and overall flavor. Second, the addition of olive oil to the dough gives it AMAZING texture, and flavor. I went ahead and added a blend of my favorite dried herbs to the dough as well, which paired well with the oil.
There’s a reason why this is our new favorite bread. If you’re a sourdough lover/baker, I highly recommend giving this one a try.
***********************************************
Overnight Olive Oil Sourdough Bread
Recipe Adapted from King Arthur Flour
Ingredients
- 1 cup (227g) sourdough starter, ripe (fed)
- 1 2/3 cups (379g) warm water, plus 1/4 a cup, divided
- 5 1/2 cups (660g) All-Purpose Flour, divided
- 1 1/2 teaspoons active dry yeast
- 1 tablespoon white sugar
- 2 teaspoons (12g) salt
- 2 tablespoons (25g) olive oil
- 2 tablespoons of your favorite dried herbs (I usually do a mix of rosemary, thyme and basil)
- Cornmeal, for sprinkling
Directions
On Day 1:
In a medium size bowl, combine the sourdough starter, the 1 2/3 cups of warm water and 3 cups (362 grams) of the all purpose flour. Use a fork or whisk to stir together briskly, until well combine.
Loosely cover the top with plastic wrap or a kitchen towel, and allow to sit at room temperature for 2 hours (I usually let mine sit in the microwave).
After 2 hours have passed, place the bowl in the refrigerator and allow to rest overnight and/or up to 16 hours.
On Day 2:
Pour the 1/4 cup of warm water into a small bowl. Sprinkle the yeast on top, then sprinkle the white sugar on top of that. Allow to sit for ten minutes until proofed and frothy.
Take the bowl out of the fridge and add the remaining flour, the salt, the olive oil, the proofed yeast and the dried herbs. Use the dough hooks on a handheld mixer (or a fork) to make a soft dough that cleans the sides of the bowl. Turn the dough out onto a lightly floured or oiled work surface, and knead it, adding more flour as necessary, until it’s smooth and springs back when you poke it. If the dough feels too stiff, add a few more teaspoons of olive oil to soften it.
Place the dough in a lightly greased bowl, cover it with lightly greased plastic wrap, and let it rise for 2 hours at moderate room temperature (below 80°F or so). The dough should become puffy.
Gently deflate the dough. Shape into a boule-like round. (somewhat like a tomato shape) Flour a banneton bowl (or a regular bowl) and place the dough inside, seam side up. Cover with the plastic wrap and kitchen towel and allow to proof for another 45 minutes-to an hour.
About halfway through the second rise, preheat the oven to 425 degrees Fahrenheit and place a 6 quart Dutch oven with the lid on inside the oven. (BE SURE THE HANDLE ON THE LID IS METAL AND NOT PLASTIC)
Take the Dutch oven out of the oven and remove the lid. (It’s going to be very hot; Don’t burn yourself.)
Place a piece of parchment paper on a sheet pan and sprinkle it with cornmeal. When the dough is finished rising, Turn the parchment line sheet pan upside down and place on top of it. In one swift motion, turn the dough bowl upside down onto the parchment paper, and lift away the bowl.
Grip two sides of the parchment paper and use them to swiftly lift the bread into the Dutch oven. Use a bread lame, or a very sharp knife to slash at least two gashes into the surface of the bread, about 1-1 1/2 inches deep each. You can make a cross, or any other pattern you desire) Place the lid on top of the Dutch oven and place the whole thing back inside the oven.
Allow to bake, undisturbed for 30 minutes. Remove the lid and check the color of the dough. The bread should be risen and slightly golden brown on top. If it’s still pale, place the lid back on and allow to bake for another 10 minutes, then check it again. If it’s golden brown, remove the lid and allow to bake for another 15-20 minutes.
Use an internal thermometer to check the inner temp of the bread. It should be at least 205 degrees Fahrenheit.
Carefully remove the bread from the Dutch Oven and allow it to cool completely on a wire rack for at least an hour.

Sharing at Fiesta Friday #447.


Sounds great. It seems like kalamata olives would be good in that, too. You’ve posted a recipe for making and maintaining a sour dough starter, correct? If not, can you recommend one?
I have! I used King Arthur Flour’s recipe for starting mine out in the beginning, which is here: https://www.kingarthurbaking.com/recipes/sourdough-starter-recipe.
Although as time has passed, I’ve made my own adjustments to what seems to work best for me and my starter. For instance, their recipe calls for regular maintenance feedings to be done with all purpose flour, which does work fine, but I get the most rise/activity out of mine when I used bread flour instead, and I do occasionally have to adjust the ratio of flour and water when feeding. But their recipe is an excellent place to start (pun intended lol)
Thanks for the info Jess! Do you need to feed it once a week, less, more?
That depends on a few things. If you’re just starting out with making the starter, I would say to feed it twice a day (once in morning, once in evening) for at least two weeks. Once it gains some maturity and grows faster (you’ll be able to tell when it does), you can scale the feedings back to be more infrequent.
When I know I want to bake, I will typically feed the starter twice a day, once in the morning and once in the evening for about 2-3 days in advance of my baking. Other than that, normally, I just feed it once a week.
Wow…that is commitment. It’s like a pet….You’d need a starter pet sitter if you take a trip. 🙂
Haha, yeah it can feel like a pet for sure. I will say though that once you get it good and going, you can afford to be MUCH more lax with the feedings. I definitely have when I’ve just been too lazy, but my starter doesn’t hold it against me. They can be very forgiving once they have enough yeast/bacteria in there lol
Nice to know you can go on a vacation and keep your starter. 🙂
That’s a beautiful loaf of bread Jess!
Thank you Dorothy!
That’s a nice looking loaf and good to see a baker not striving for the over-sized holes that too many people associate with sourdough. In my own baking I stick to a simple formula of just flour, water and salt – no commercial yeast – and while I regularly do bake over two days when the weather is cooler, my summer schedule has me mix a fully active starter at around 7am, baking off fully proved dough at around 5pm. Everyone goes their own way.
Thanks Clive. So long as it tastes good to me, I’m satisfied with the results 🙂
Fabulous! Any possibility that you have this recipe with directions for using a four quart pot? I only have that size, used a large soup pan, but it was stainless steel . Thank you, Rosalie Faso
Hi Rosalie, you could halve the ingredients in the recipe and it would fit inside a four quart pot. You would also need to shorten the baking time. I hope this helps!