Rustic Sourdough Bread

When was the last time you accomplished something you’d really wanted to accomplish for a really long time?
I’m at a point in my life when I’m learning a lot about accomplishment. I’m doing, which is what I think most people associate accomplishment-but a huge chunk of it is also in what I learn. They’re both just as important, with the learning aspect sometimes edging out the doing.

One of the things I set out to accomplish at the start of this year was a task that had been on my Baking Bucket List for a while; upwards of a few years. I kept putting it off and putting it off. But because I’m in an Accomplishment Mode, I made up my mind a couple of months ago that I was finally going to learn how to bake sourdough bread for myself.
After two months of practice, determination, and errors, I’m pleased and proud to say, that I have.

The essential ingredient in sourdough bread is something called a sourdough starter. A starter is comprised of nothing but water and flour that’s allowed to ferment until it forms acids and gases that give the sourdough bread it’s signature tangy flavor.

When I was doing my research into sourdough baking, I heard starters being called “pets” a lot, and now that I have one of my own, I definitely understand why. They’re just as touchy and finicky as a pet, especially in the beginning when you’re trying to get it started (no pun intended). You have to ‘feed’ a starter daily, up to twice a day in the beginning. The types of flour you use matter to how strong/well it ferments. You also have to weigh out the ingredients to get the best results. It really is a science.

Because bakers get so involved with their starter in the preparation and maintenance, many give their starters names, just like you would give one to a pet. (Apparently it’s considered good luck, or something like that) I have to admit, I too joined in on this trend. My starter baby/pet/co-pilot is a He, and his name is Donatello.
No, not after the sculptor. After the turtle. (Those who know, know).

It took Donatello and I a while to get the hang of this starter/sourdough thing, but we finally have and what we made together was truly glorious.
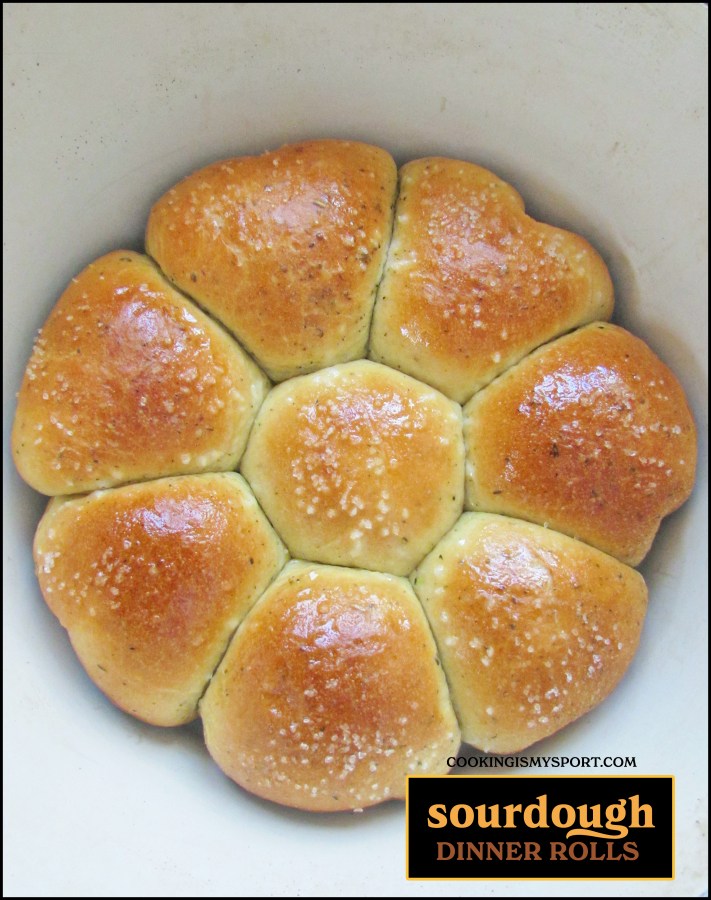
If you take a look at the ingredients list, you’ll see that this recipe is definitely for beginners. In the first place, it uses a combination of sourdough starter and active dry yeast, which helps to ensure that the dough will still rise without needing the starter to be absolutely perfect. In the second place, there aren’t any other flavorings for the dough besides salt. Now it tastes delicious exactly as written, but in subsequent bakings I have also incorporated dry herbs and pepper into the dough, which just upped the taste factor even more.

Lastly, My recipe makes a LOT of bread. A LOT. This was on purpose, as I wanted a loaf that would pretty much fill my six quart Dutch Oven, and that’s exactly what this did. But If you prefer, you can definitely halve the recipe and still come out with a smaller, but just as delicious loaf of sourdough bread.
Here’s to the doing and the learning of Accomplishment….
***********************************
Rustic Sourdough Bread
Recipe Adapted from King Arthur Flour
Ingredients
- 2 cups (454 grams) ripe sourdough starter, stirred down (I used King Arthur’s recipe for sourdough starter, which can be found here.)
- 1 1/2 cups (680 grams) lukewarm water
- 2 teaspoons active dry yeast
- 1 tablespoon white sugar
- 5 teaspoons salt
- 10 cups (1204 grams) all purpose flour
Directions
Sprinkle the active dry yeast on top of the warm water, then sprinkle the sugar on top. Allow to sit about 10 minutes, until proofed and frothy.
Meanwhile, combine the remaining dry ingredients together in the bowl of a large standing mixer and stir together with a large fork.
Make a well in the center of the ingredients and pour in the sourdough starter and yeast-water mixture.
Use the dough hook to stir until a smooth dough comes together. (I’ve had days where I needed to add more flour, I’ve had days where I needed to add more water. This is probably just going to depend upon the weather, the time of year, and the temperature of your kitchen.)
Grease the bowl, place the dough back inside and cover with plastic wrap, and a damp kitchen towel. Allow the dough to rise until it’s covered in size, about 90 minutes.
Gently deflate the dough. Shape into a boule-like round. (It’s somewhat like a tomato) Flour a banneton bowl (or a regular bowl) and place the dough inside, seam side up. Cover with the plastic wrap and kitchen towel and allow to proof for another 45 minutes-to an hour.
About halfway through the second rise, preheat the oven to 425 degrees Fahrenheit and place a 6 quart Dutch oven with the lid on inside the oven. (BE SURE THE HANDLE IS METAL AND NOT PLASTIC)
Take the Dutch oven out of the oven and remove the lid. (It’s going to be very hot; Don’t burn yourself.)
Place a piece of parchment paper on a sheet pan. When the dough is finished rising, Turn the parchment line sheet pan upside down and place on top of it. In one swift motion, turn the dough bowl upside down onto the parchment paper, and lift away the bowl.
Grip two sides of the parchment paper and use them to swiftly lift the bread into the Dutch oven. Use a bread lame, or a very sharp knife to slash at least two gashes into the surface of the bread, about 1-1 1/2 inches deep each. You can make a cross, or any other pattern you desire) Place the lid on top of the Dutch oven and place the whole thing back inside the oven.
Allow to bake, undisturbed for 30 minutes. Remove the lid and check the color of the dough. The bread should be risen and slightly golden brown on top. If it’s still pale, place the lid back on and allow to bake for another 10 minutes, then check it again. If it’s golden brown, remove the lid and allow to bake for another 20-30 minutes.
Use an internal thermometer to check the inner temp of the bread. It should be at least 205 degrees Fahrenheit.
Carefully remove the bread from the Dutch Oven and allow it to cool completely on a wire rack for at least an hour.

Sharing at Fiesta Friday #421.


Beautiful!
Thank you! 😀
Great job, Jess!! Just a word of caution, working with sourdough can be very addicting; I’m still amazed every time I see those bubbles in my starter- It’s ALIVE!! 🙂
Great recipe Jess!