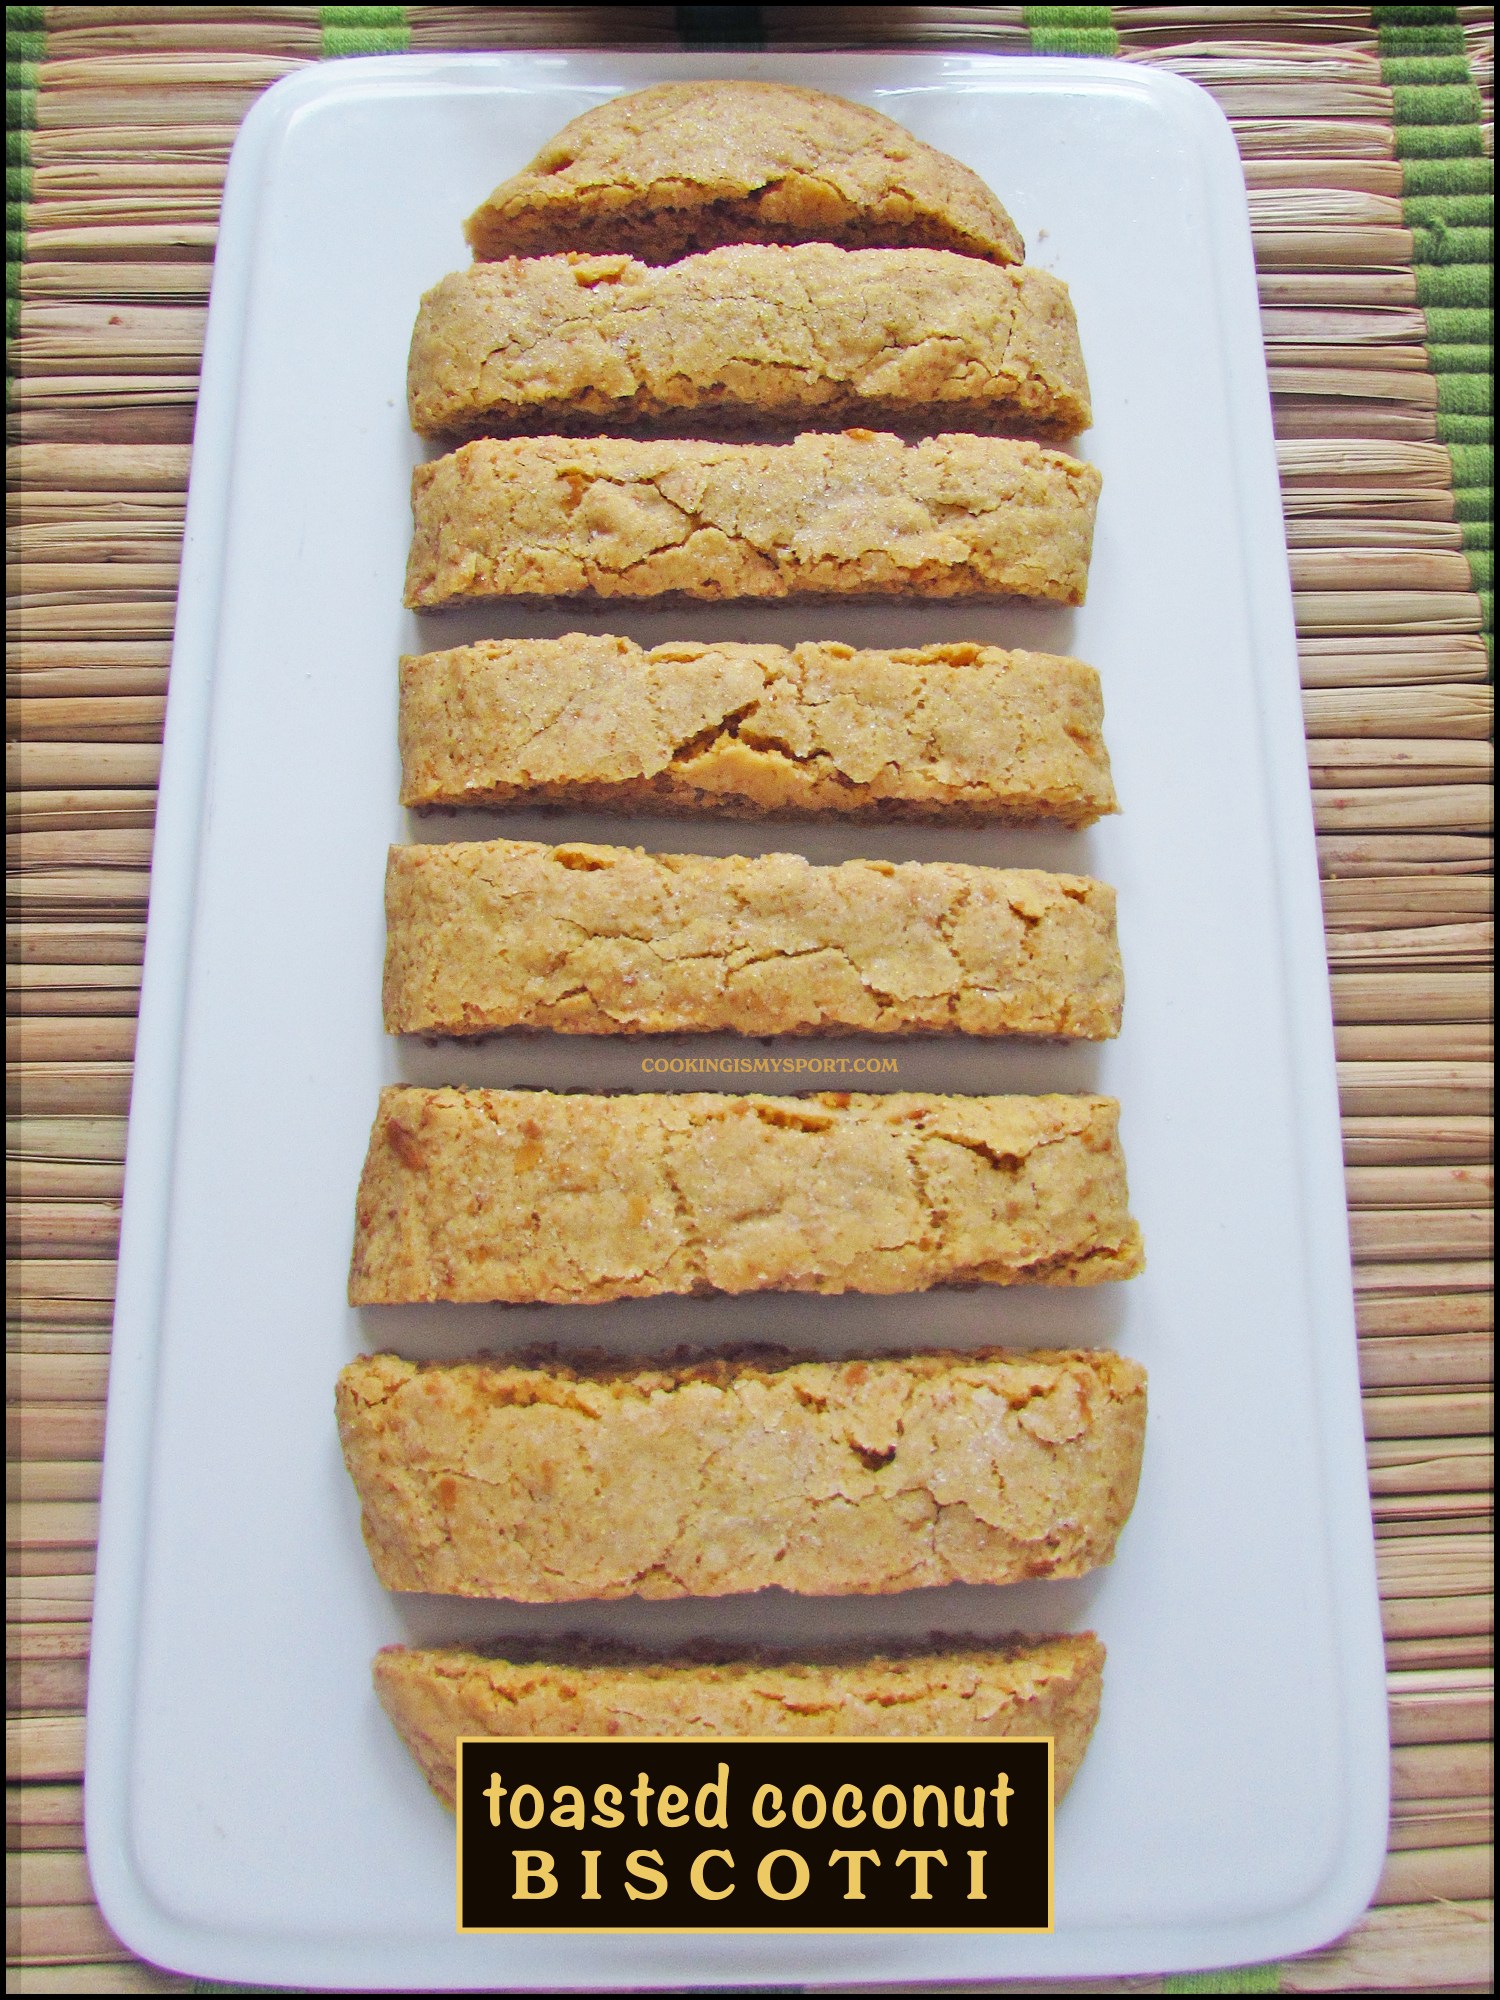
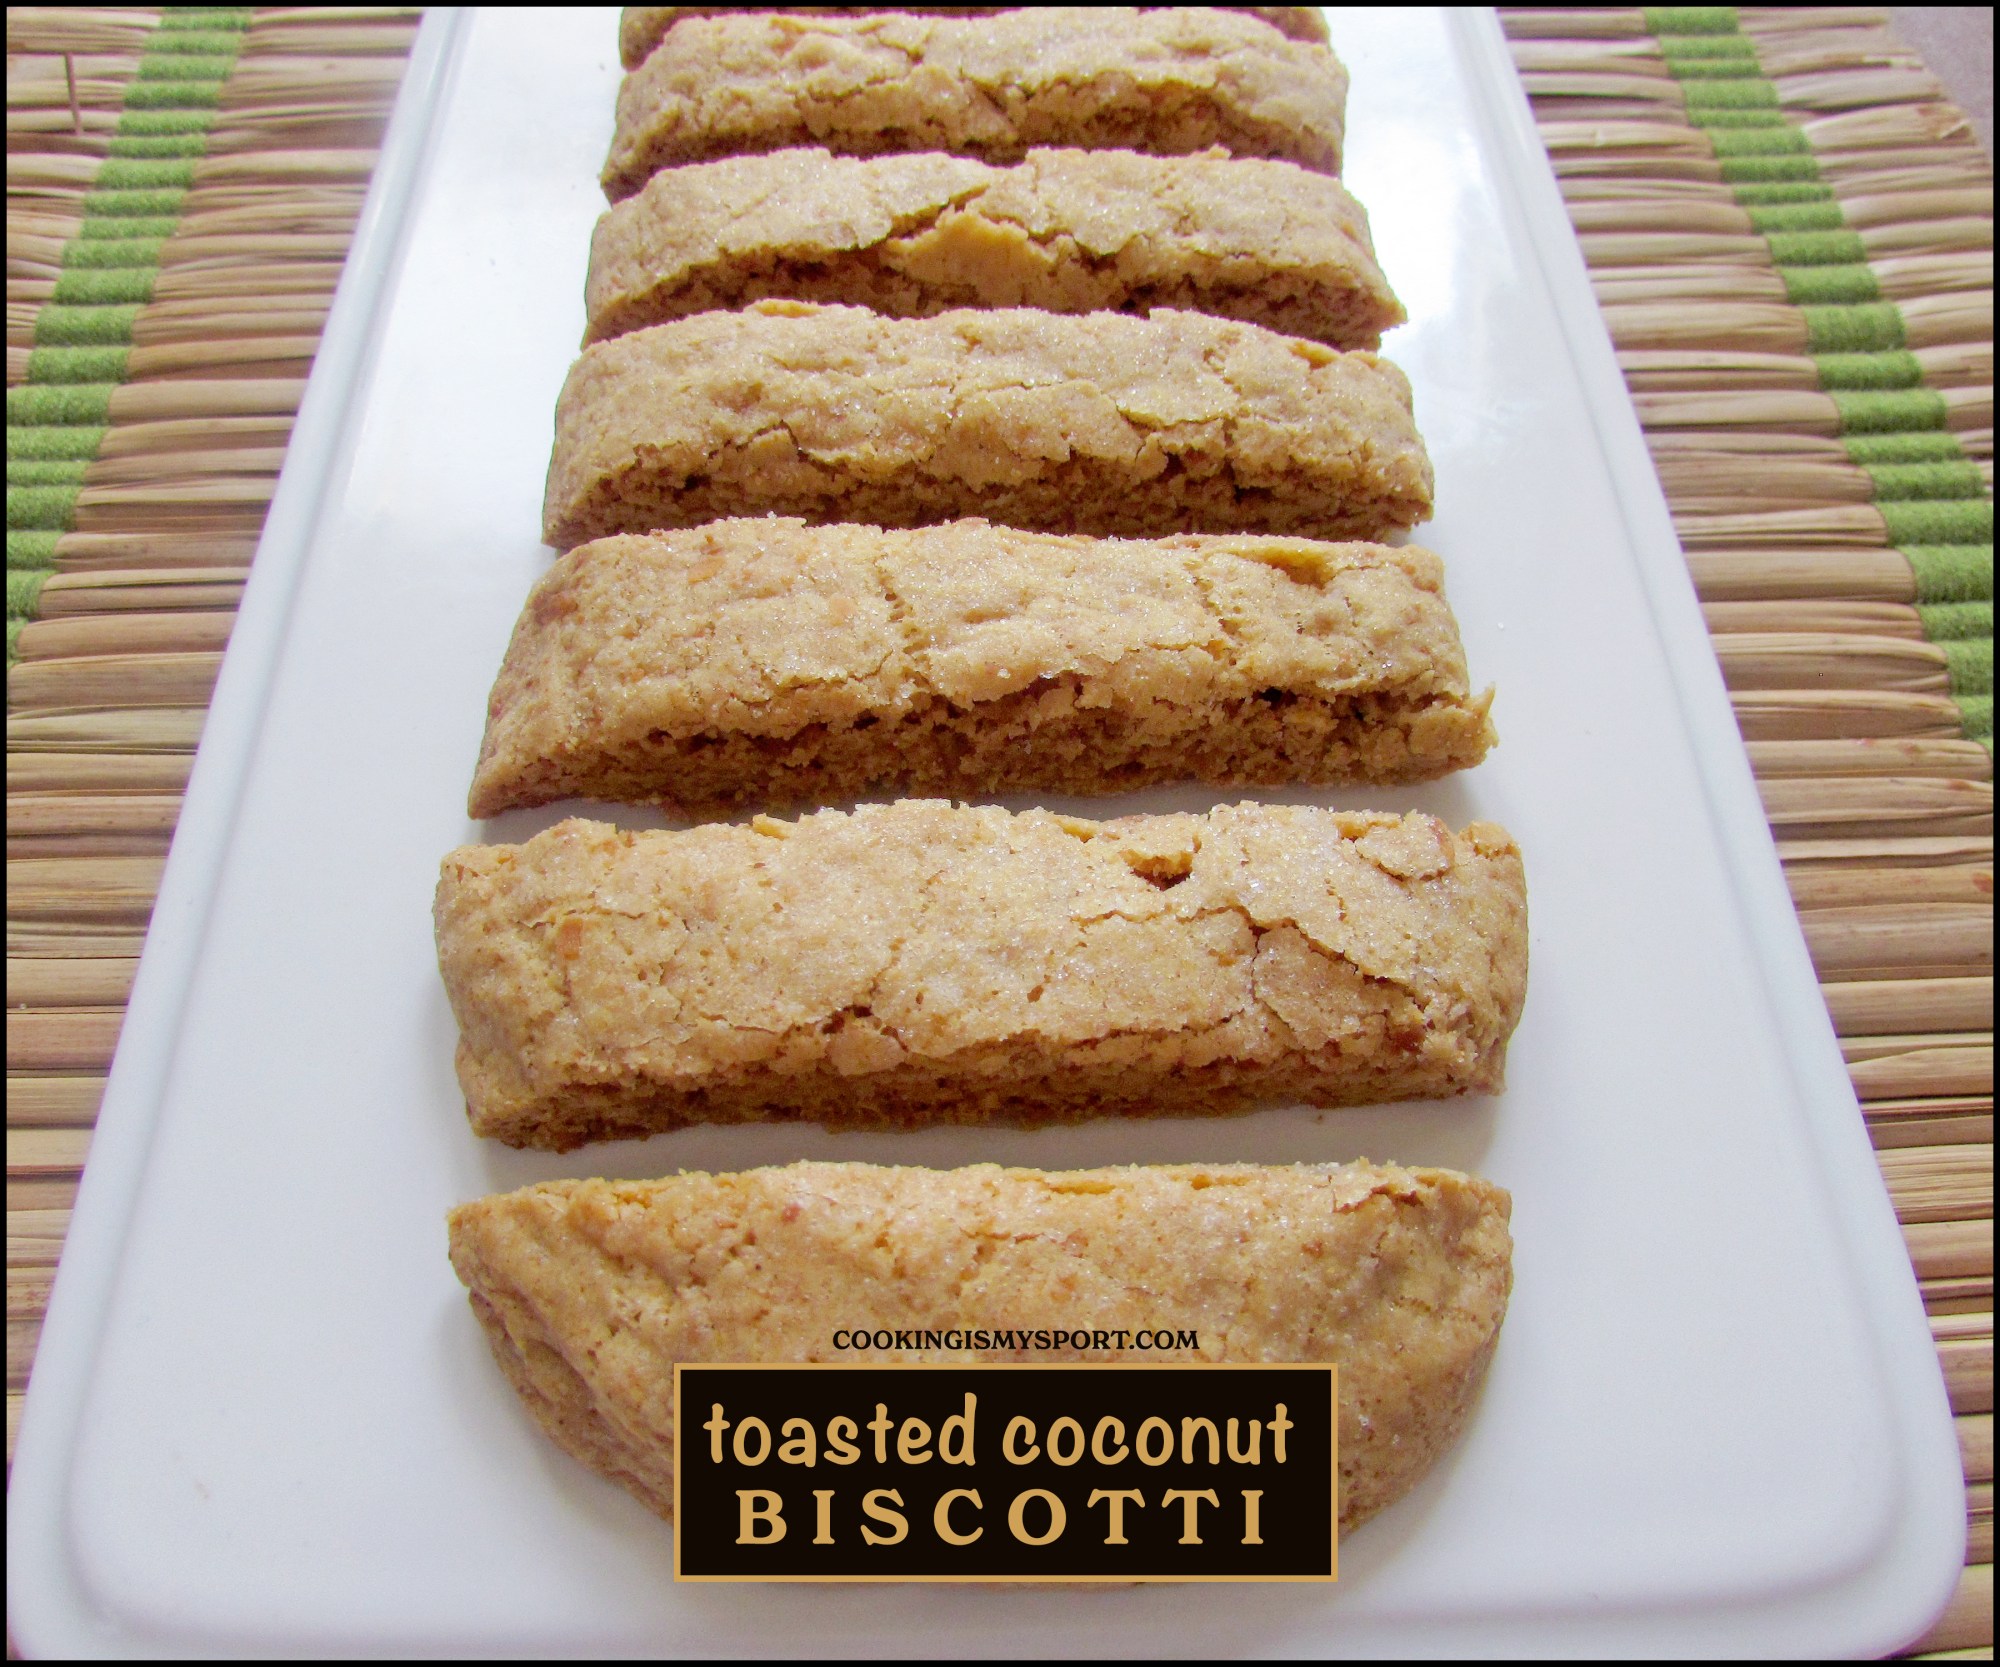
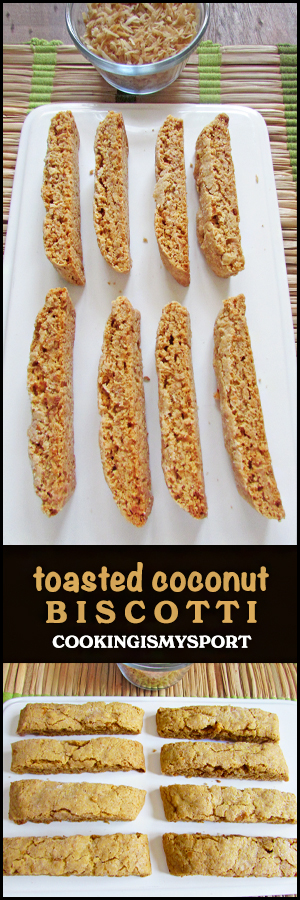
Toasted Coconut Biscotti
As Spring gradually begins to fade into summer time, my cooking/baking instincts usually start to trend towards wanting to cook and bake with more ‘spring’/’summer’ like foods and ingredients. It’s safe to say that we are in the summer phase of the year, so needless to say, the recipes form here on out are going to look and ‘taste’ like summer.
Coconut is definitely an ingredient that I will always associate with summer and warmer–if not tropical– weather.
And would you believe that I used to absolutely despise it?
It was for a lot of reasons, but most of it was the texture. Most of the coconut desserts I had tried with coconut as a kid were made with the sweetened shredded coconut that looks like wet shredded toilet paper and has the texture of what I would imagine wet shredded toilet paper would have if you ate it. The flavor is extremely sweet but also, not particularly assertive. I don’t know y’all in my opinion, it’s just pretty awful.

Flaked coconut was a step up in texture, but not much in terms of flavor. Again, I just found it too subtle and rather pointless. So needless to say, coconut and I were on non-speaking terms with one another for years.
It was about two years ago that something happened to change all of that.
I was recipe testing for a variation of one of my favorite desserts and I tried out something that was relatively new to me, but I found myself very curious about: toasted coconut. Supposedly, it not only changed the texture of regular sweetened shredded coconut, but also gave it a stronger, richer, nuttier flavor.
I figured it couldn’t hurt to try, so I did.
Long story short, I was blown away.
As it turns out, I don’t actually hate coconut; I just hate coconut that isn’t toasted.
When it is, it does truly delicious things to a wide variety of baked goods.
Cookies. Scones. More cookies. Cake. Tarts. More cakes.
The possibilities for toasted coconut truly are endless; today is case in ploint, as I’m back with yet another tasty (and also extremely easy way) way to put it to good use.

Biscotti are what I like to think/call Blank Canvas recipes. This means that the base recipe for the food is basic/simple enough to where, so long as you don’t alter the ingredients too much as to alter the basic chemistry of the recipe, you can experiment with it to your heart’s content to suit any number of different flavors/tastes.
I have made a TON of biscotti over the years on this blog. If oyu don’t believe me, look for yourself: I promise you, there’s a biscotti recipe on here for everyone.
Heck, there’s probably a biscotti recipe on here for the people who think they don’t even LIKE biscotti.
(And honestly, if you think you’re one of those people just…think again will you. Seriously. Reconsider.)

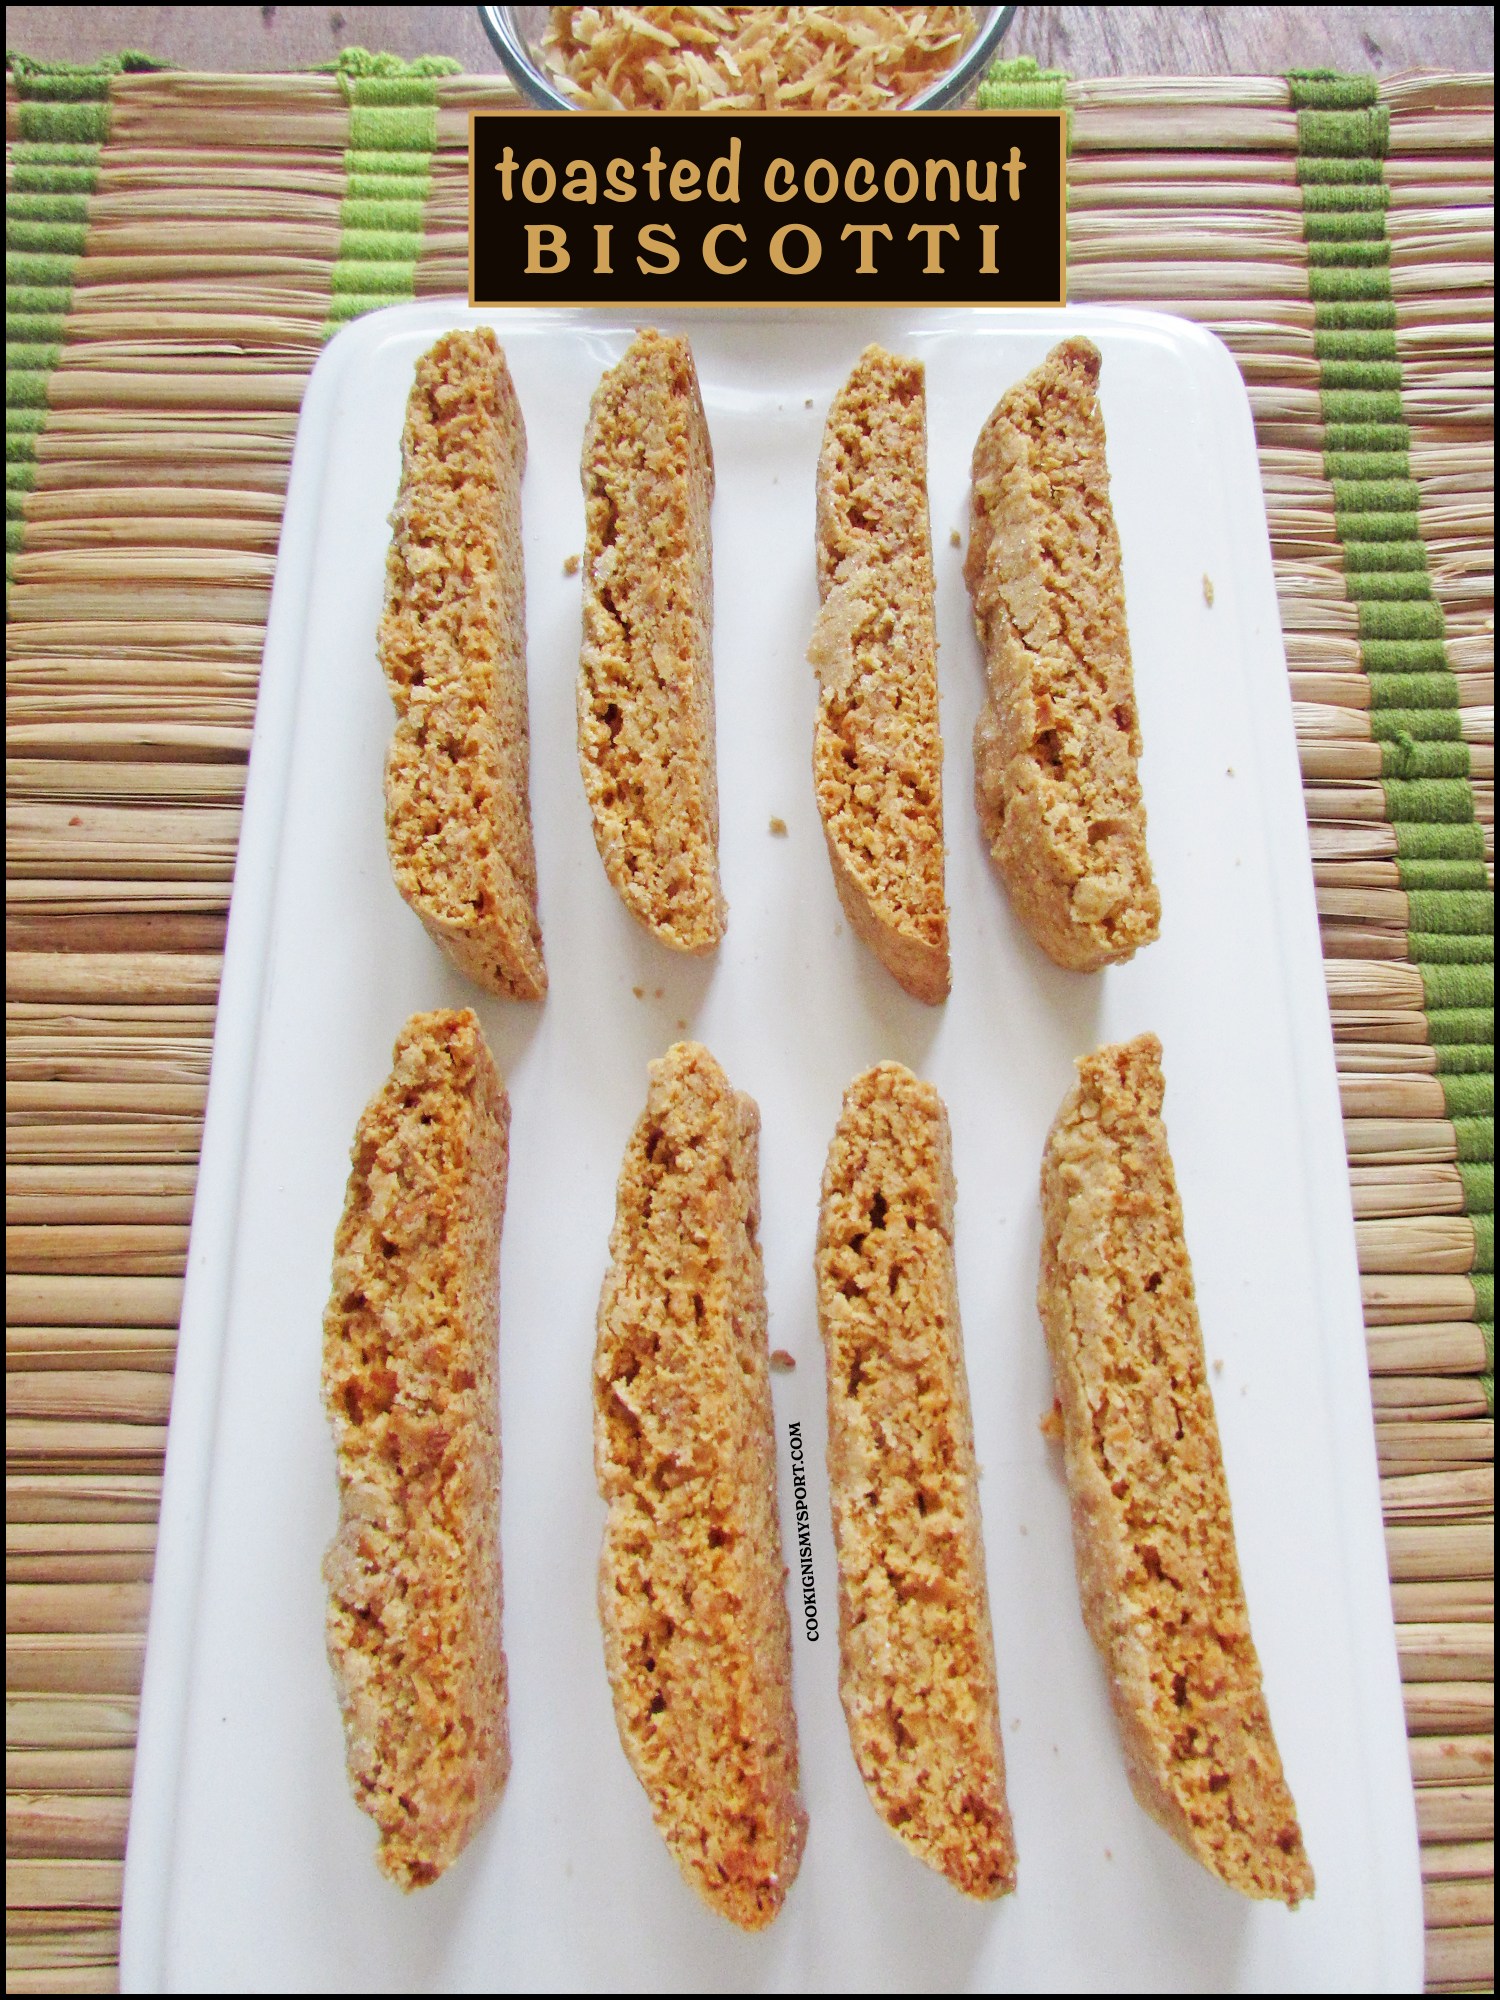
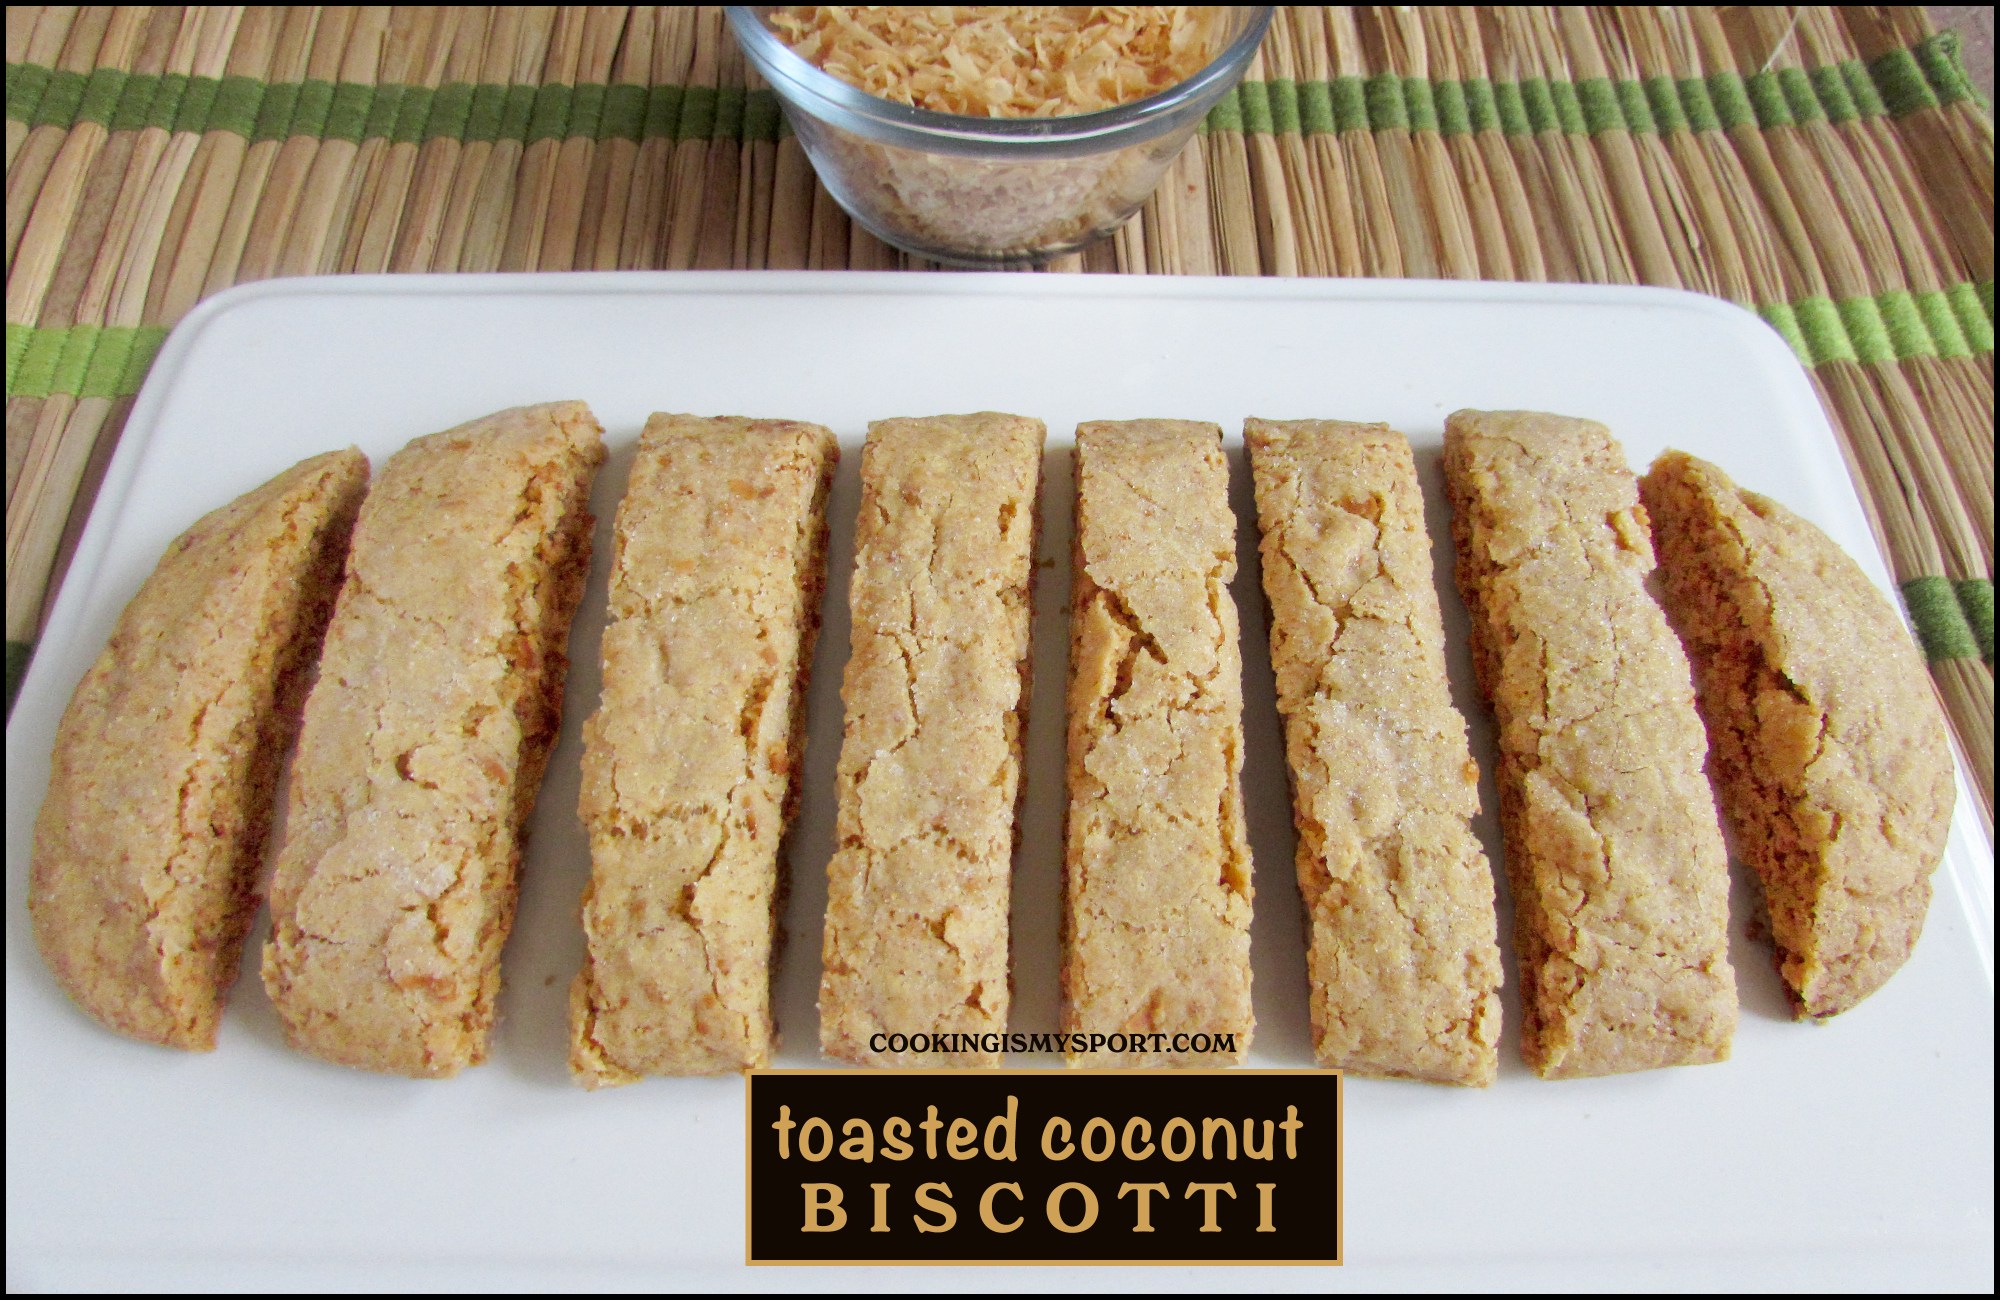
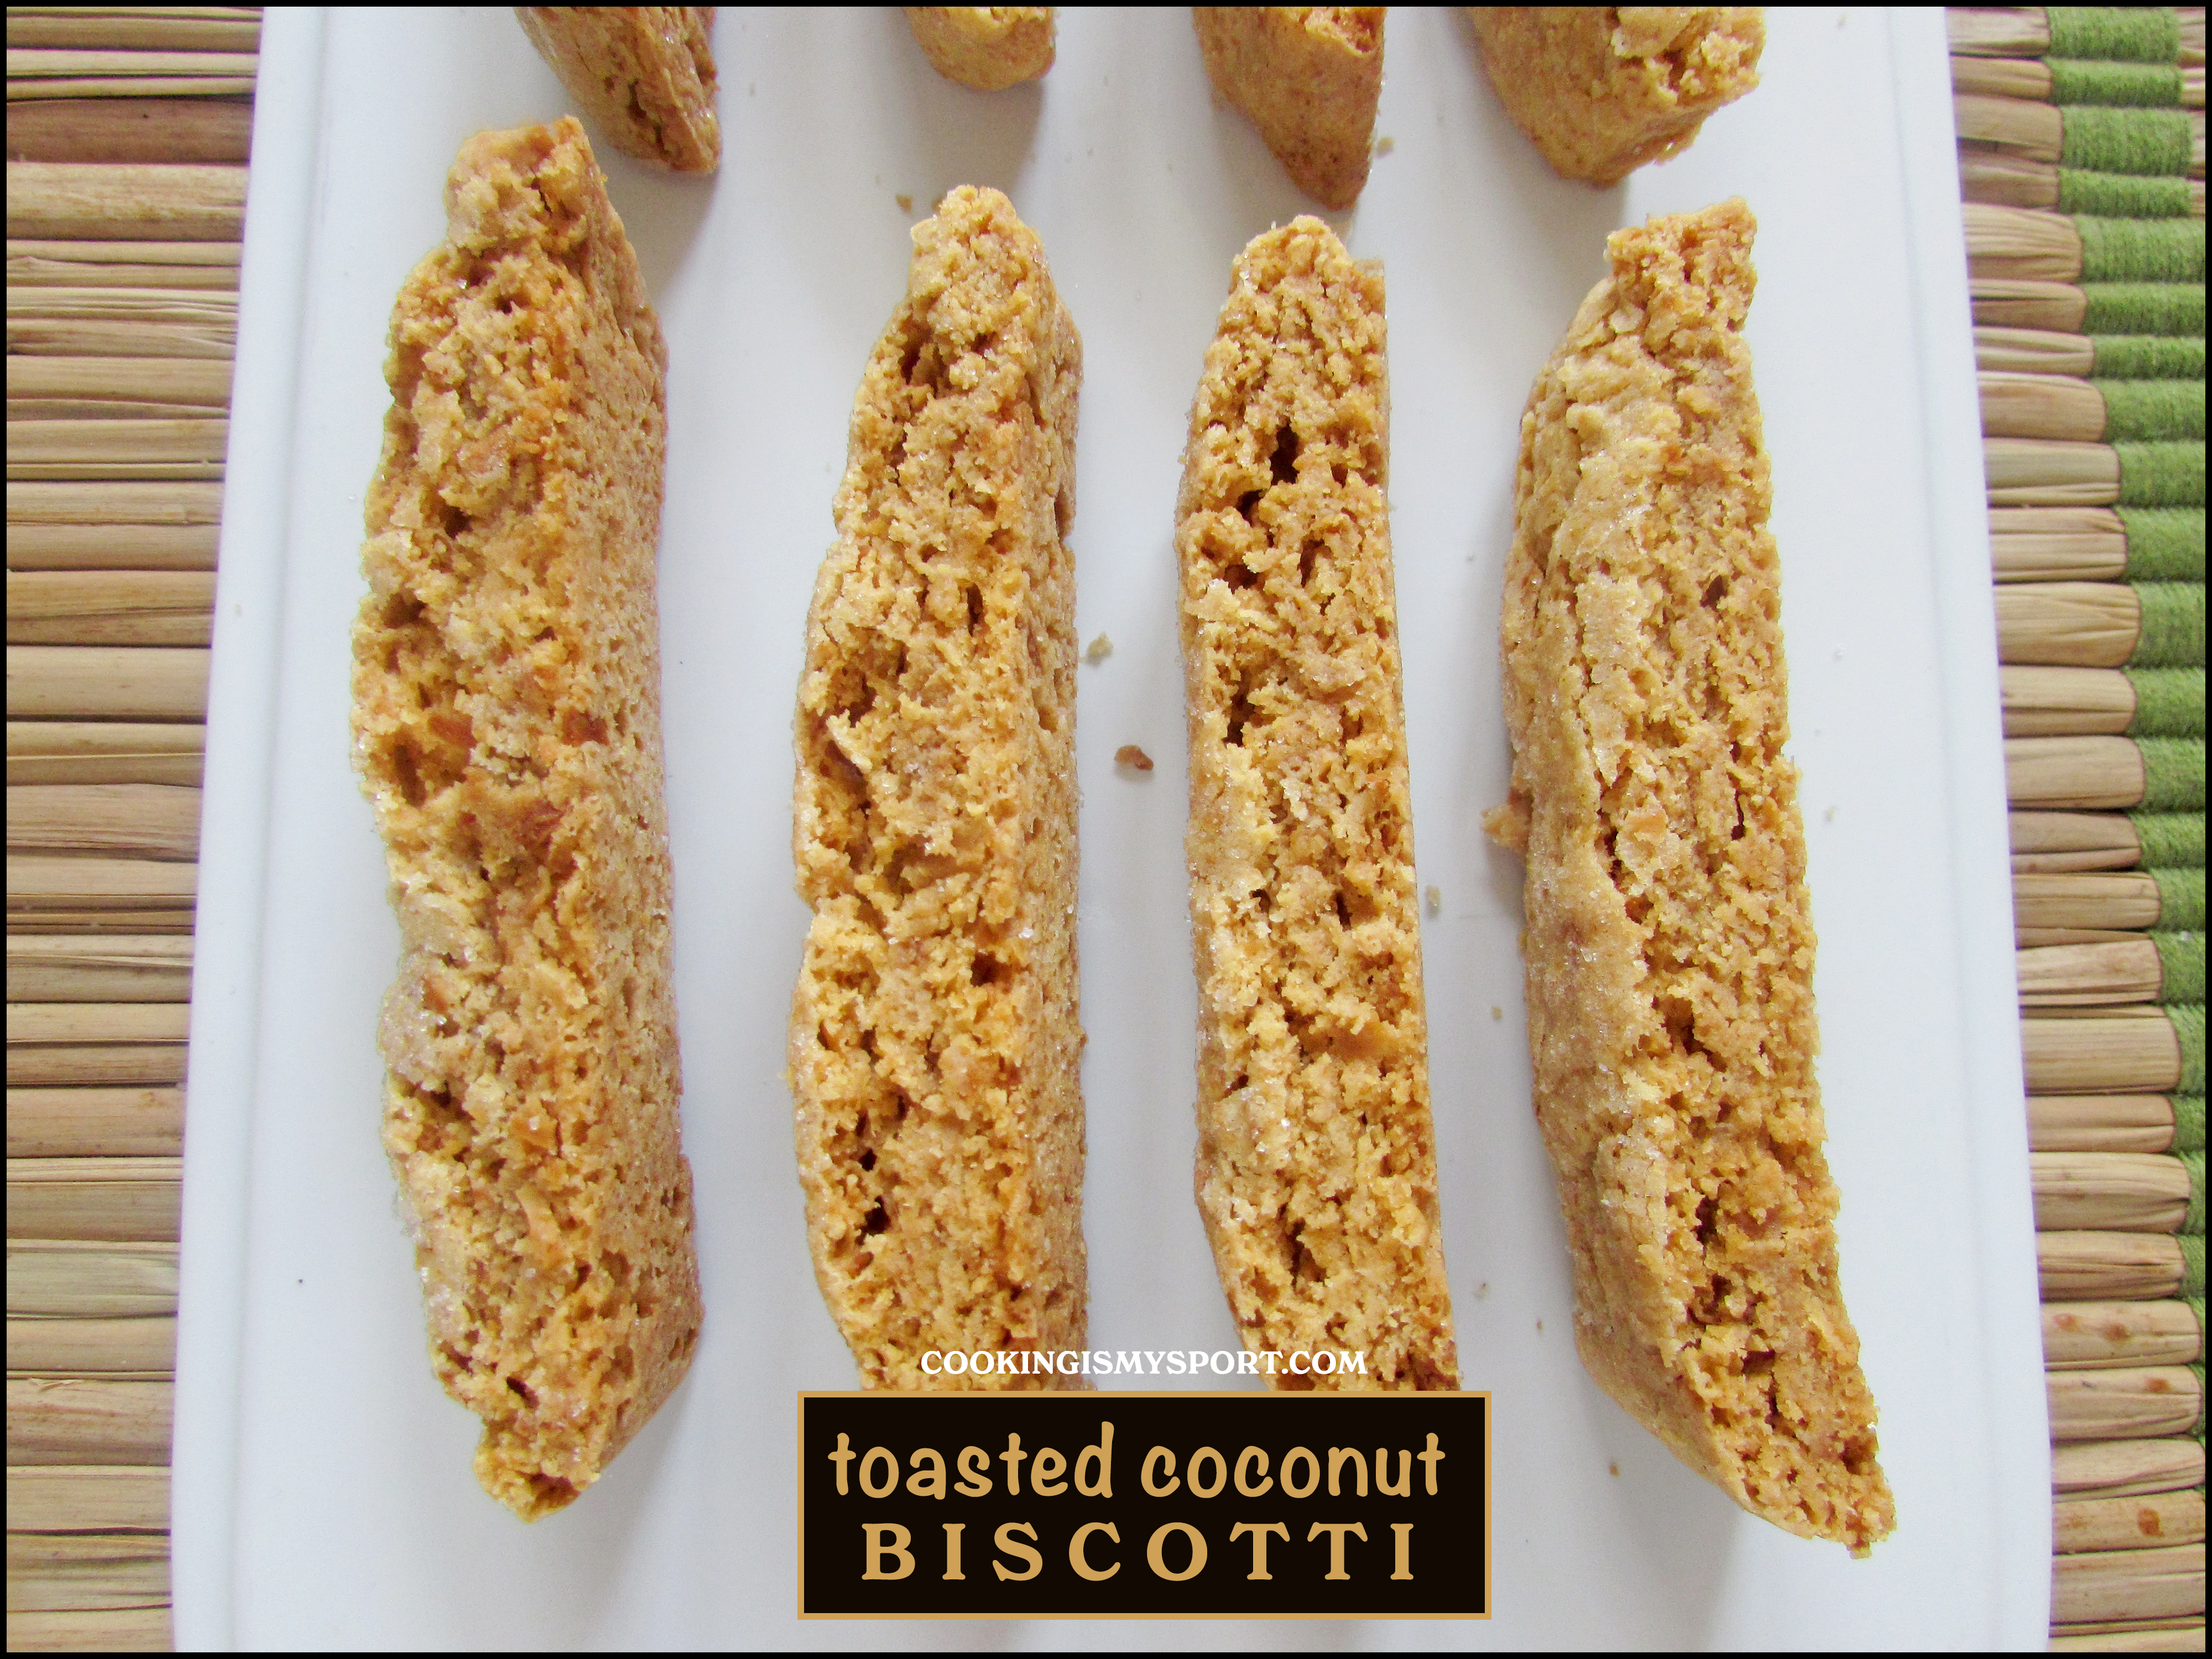
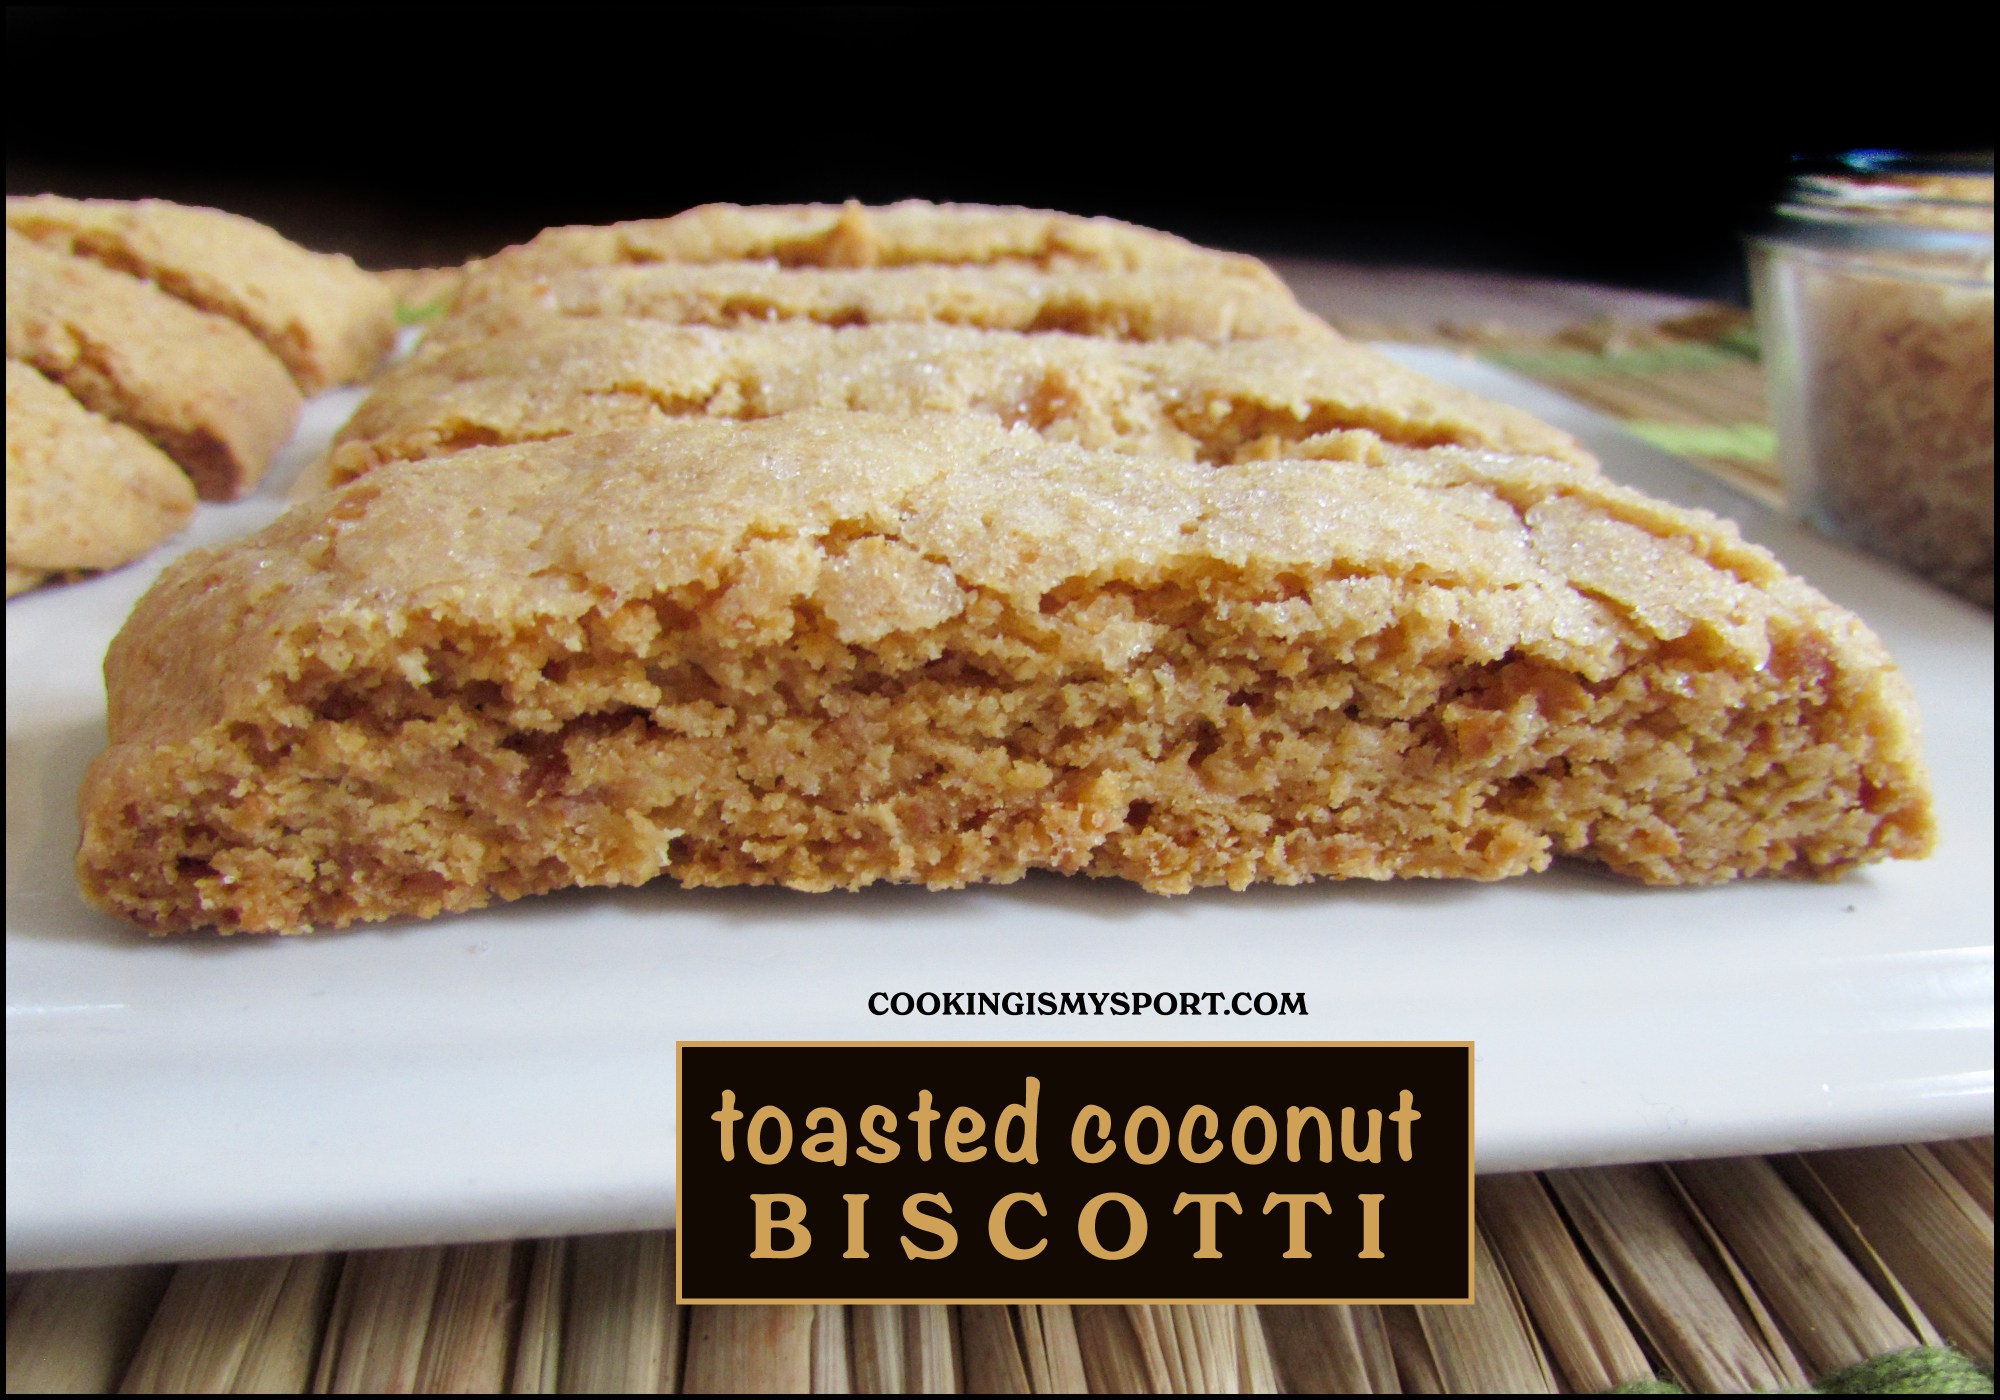
This biscotti is made with just about as much toasty coconut flavor as I could cram in there.
Obviously, there’s toastecd coconut, but it’s being incorporated in two different ways. First, the sugar is sifted/ground together with toasted coconut, so that it’s actually more like toasted coconut sugar; doesn’t that sound delicious?
Then, instead of regular butter, which forms the fat base of most biscotti recipes, we’re using melted coconut oil.
There’s both vanilla extract AND coconut extract or emulsion to flavor the dough.
And then, we’re incorporating even more toasted coconut into the dough to give it added texture.
Toasted coconut on toasted coconut on toasted coconut on–you guessed it, more toasted coconut.
One of the things I likle best about biscotti as opposed to other cookie doughs is that there’s no chilling/waiting time. You bake the dough right away. You let it cool some. You slice it. And then you bake it again until it’s nice and and crispy. You also don’t have to worry about them going ‘stale’ or drying out, because the longer that biscotti sit, the more flavor they take on. They’re alaso supposed to be extremely crunchy; sometimes so crunchy, you gotta dip em in coffee or tea. That’s the whole point.
You wanna know what else was on point? This biscotti. The layers upon layers of toasted coconut in the recipe truly do come through in the final product. They taste nutty and slightly rich while that delicate coconut flavor lingers on your tongue. And the texture of the toasted coconut pairs well with the natural crunchiness of the biscotti.
I was super pleased with these, and if you try them for yourself I think you will be too 😉
Toasted Coconut Biscotti
Recipe Adapted from Food Network Magazine
Ingredients
For Dough
- 1 1/2 cups toasted coconut flakes (see here for a dependable recipe for toasting coconut)
- 1 cup granulated sugar, plus more for sprinkling
- 2 cups all-purpose flour
- 1 teaspoon baking powder
- 1/4 teaspoon baking soda
- 1/4 teaspoon salt
- 1/3 cup coconut oil
- 1 teaspoon pure vanilla extract
- 1 teaspoon coconut extract or emulsion (I use LorAnn Oils Coconut Emulsion)
Directions
Position racks in the upper and lower thirds of the oven; preheat to 350 degrees F.
Transfer 1 cup of the toasted coconut to a food processor or a blender; add the granulated sugar and pulse until finely ground.
Line 2 baking sheets with parchment paper.
Whisk the coconut-sugar mixture, the flour, baking powder, baking soda and salt in a bowl and briefly set aside.
Melt the coconut oil in the microwave; add to the flour mixture along with the vanilla and 1/3 cup water and mix with a fork until a stiff dough forms.
Stir in the remaining 1/2 cup toasted coconut flakes; gently knead until the dough comes together.
Divide the dough in half and shape into two 9-by-2-inch logs; place 1 log on each baking sheet.
Bake, switching the pans halfway through, until the logs are firm and golden, about 30 minutes.
Reduce the oven temperature to 300 degrees F.
Let the logs cool 10 minutes, then GENTLY transfer to a cutting board.
GENTLY slice the logs diagonally with a serrated knife into 3/4-inch-thick pieces.
Arrange the slices cut-side down on the baking sheets.
Bake, flipping halfway through, until just golden and the centers still have a little give, 25 to 30 additional minutes.
Let cool completely on the baking sheets. (The biscotti will crisp as they cool.)
Sharing at Fiesta Friday #642.