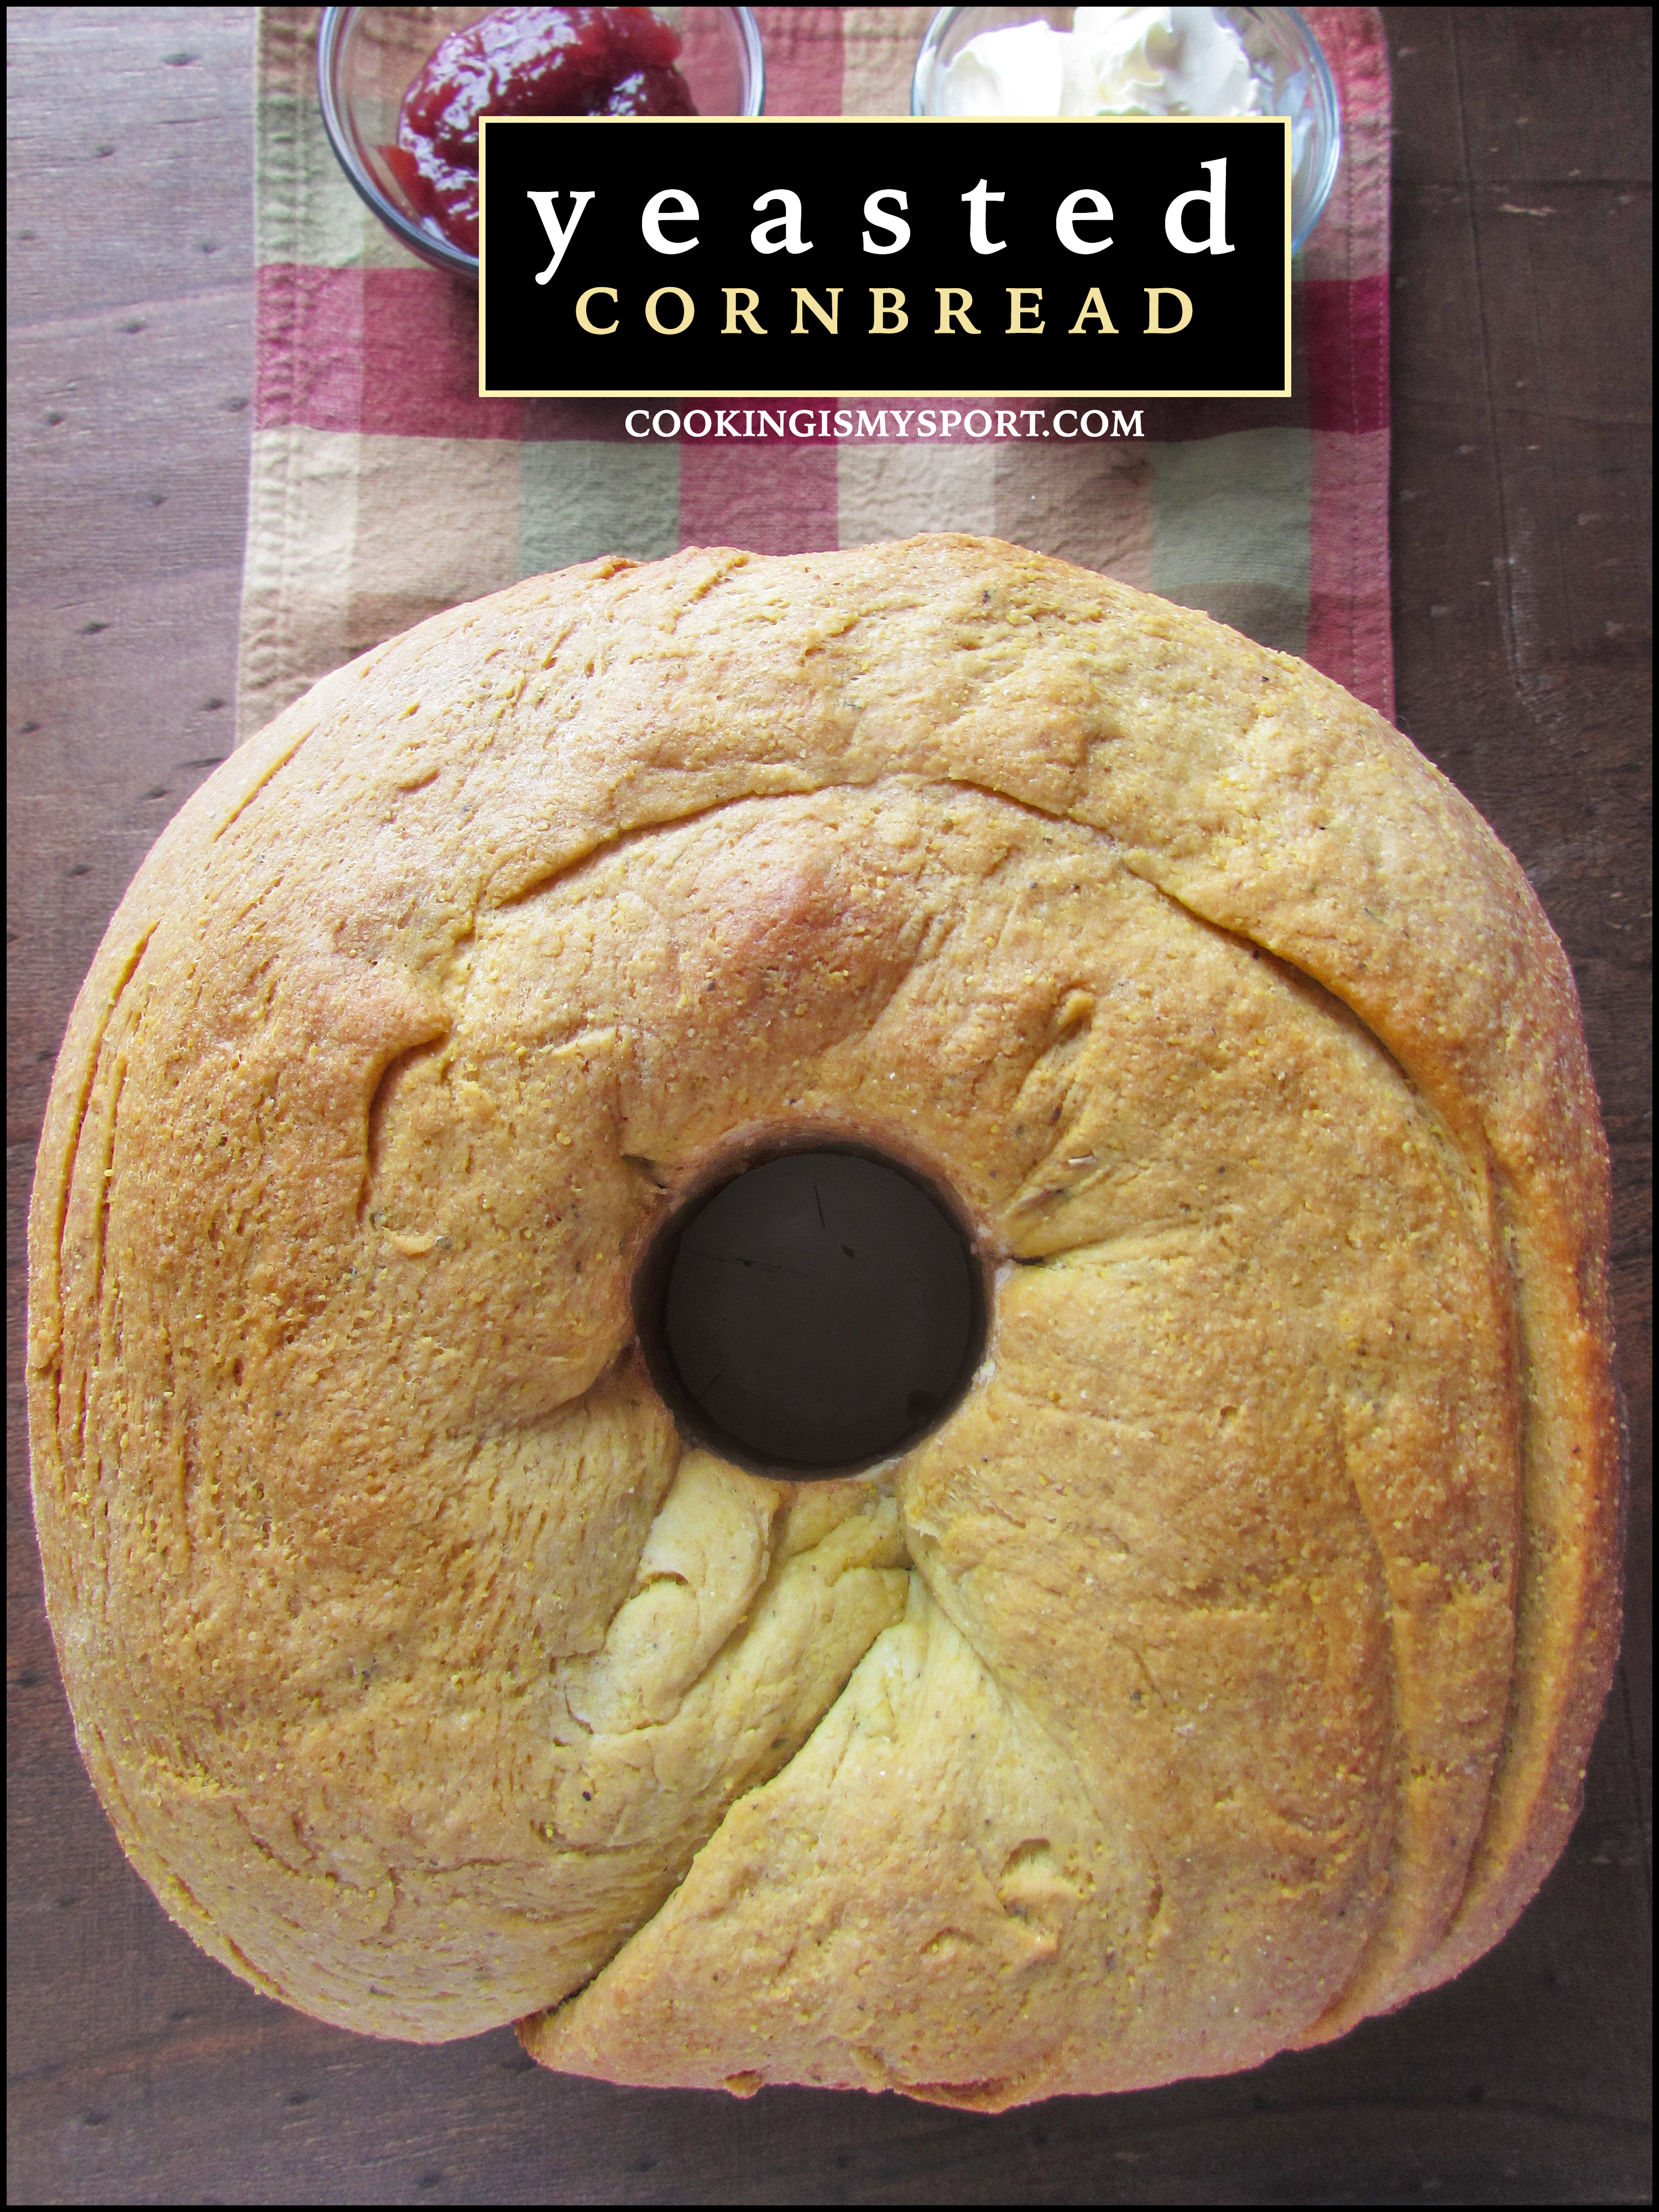
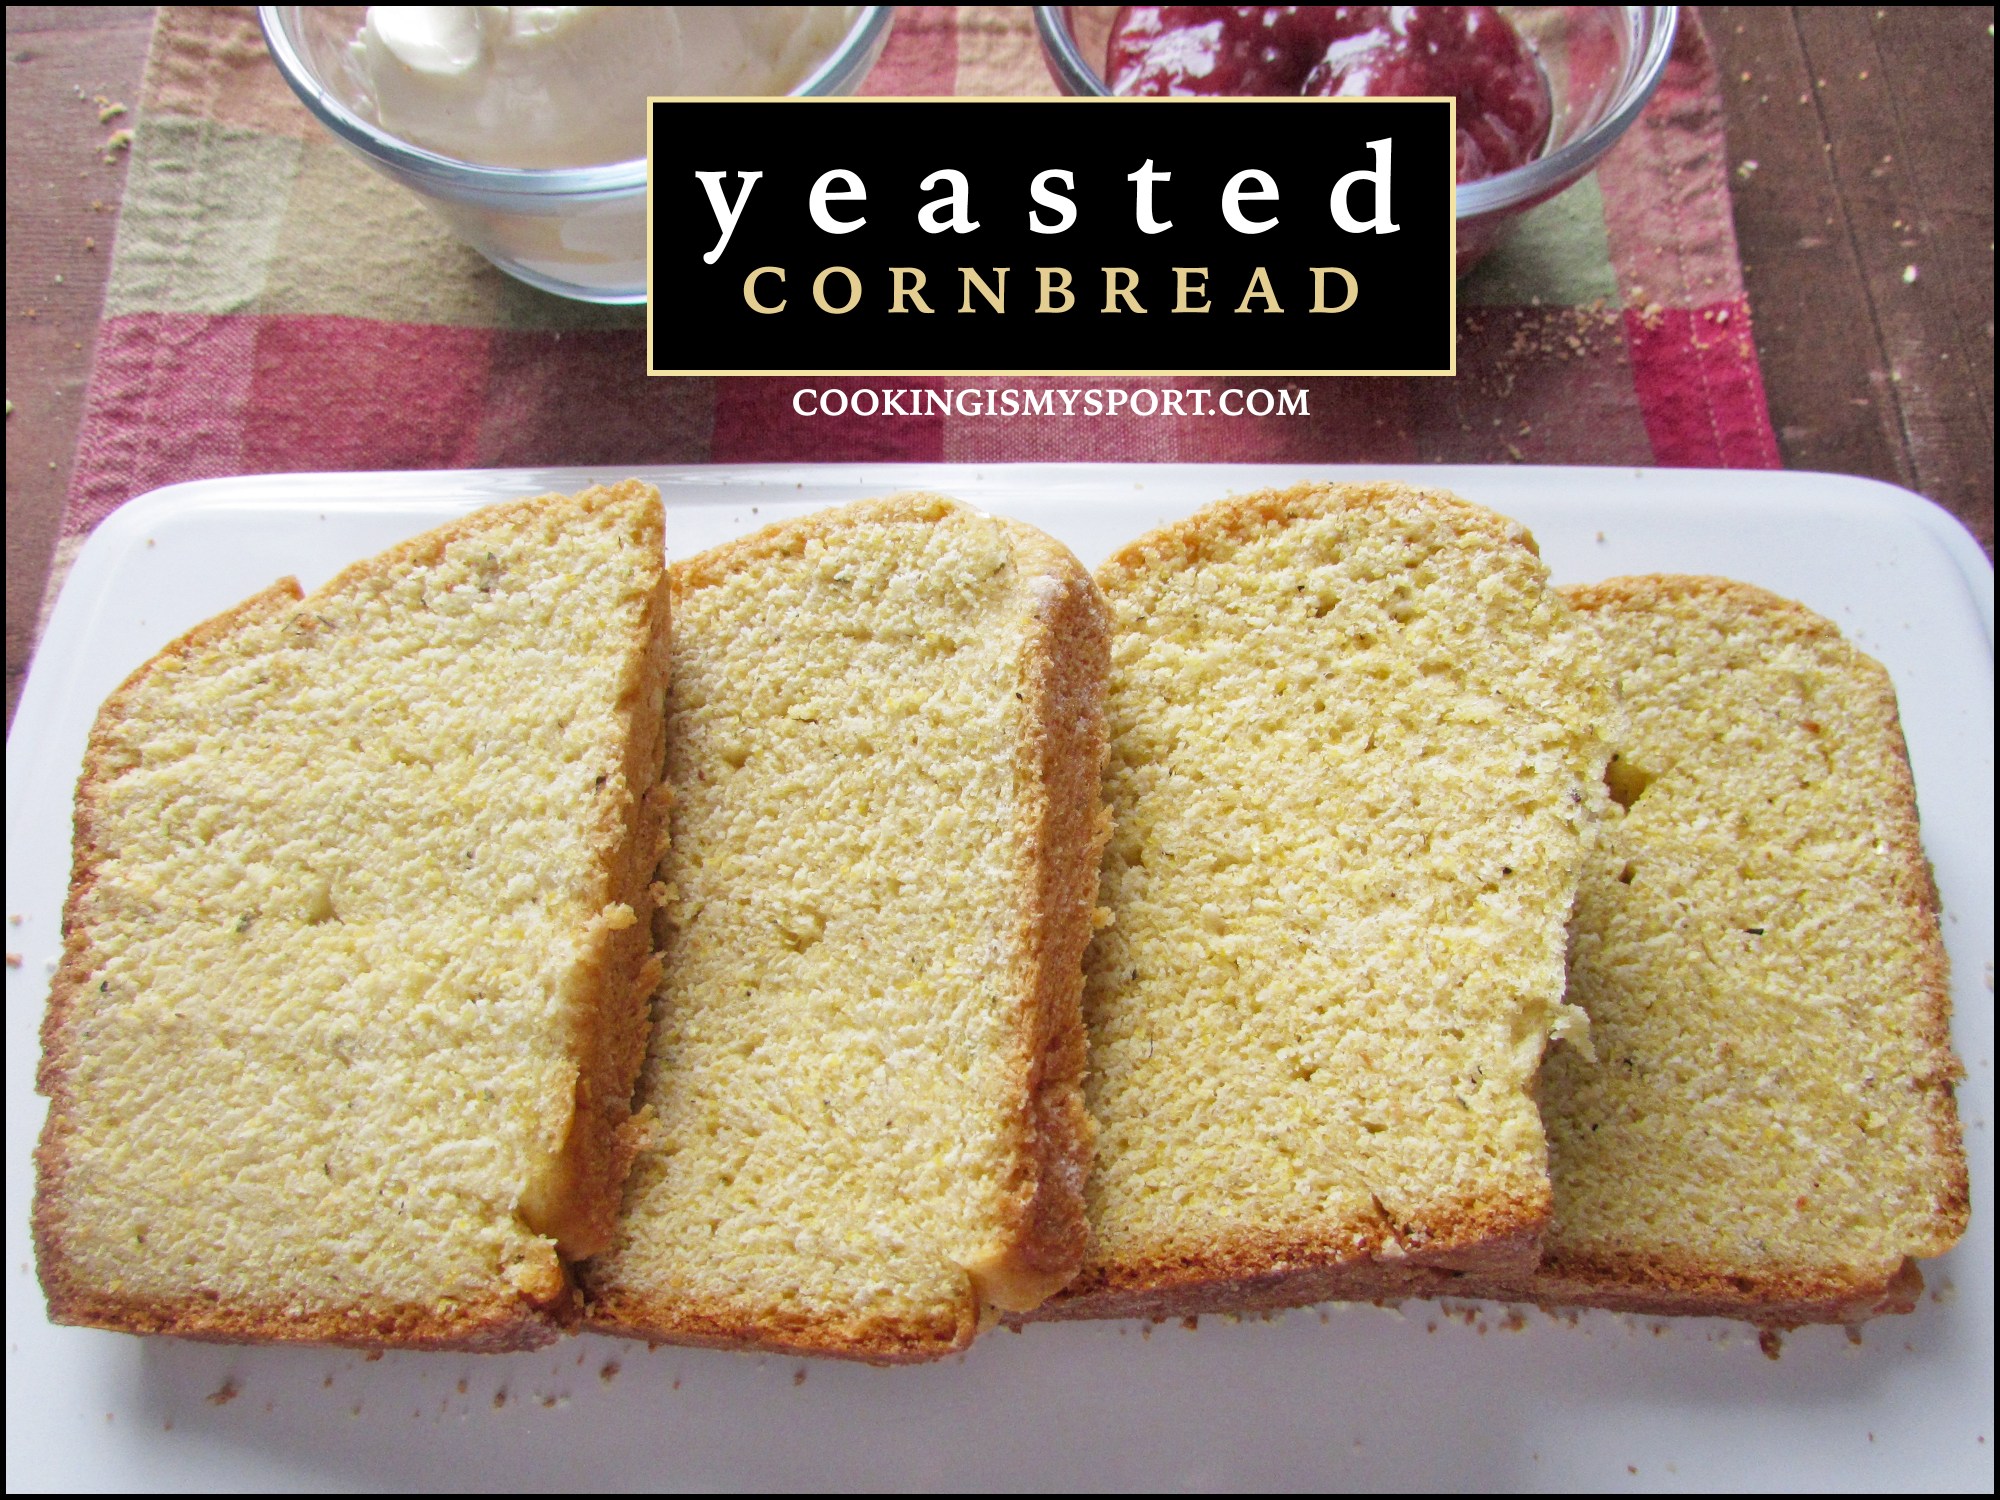
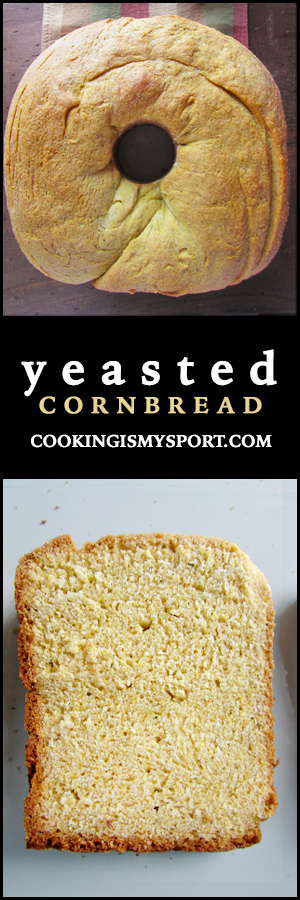
Yeasted Cornbread
In case you’re reading this and you’re new here, there’s something you should know: this a cornmeal-stan blog.
Cornmeal is and always has been one of my favorite ingredients to bake with/eat. It’s a very versatile ingredient that can
Cornbread itself is the most obvious one, and it’s also my favorite– but by all means don’t stop there. It’s capable of so much more than that.

It probably wouldn’t surprise you to hear that cornmeal makes awesome, and I do mean absolutely AMAZING biscuits.
But did you know that it makes just as awesome scones? Did you know it makes the best toaster cakes, ever?
And can we talk about cornmeal cake?? And cornmeal cookies??
Don’t sleep on cornmeal, guys. It’s a gamechanger.
As you can tell, I’m always looking for new ways to bake with the stuff, and this week I’m back with yet another that I’m very excited about.
I’ve definitely made cornmeal breads with yeast in them before multiple times, to really great results, but most of the time, the cornmeal takes a back seat to the flour and just acts as a more of a textural component/supporting character.

For a while I’ve been okay with that, but I recently was on the hunt for a yeasted bread recipe where the cornmeal was more of the starring role so to speak.
I’m pleased to report that I’ve finally found one.
The ingredients for this recipe are very simple, straightforward and familiar if you’re used to baking yeast bread. The instructions/technique are where you may need to improvise. As seasons change the amount of moisture/humidity in the air varies, especially depending upon where in the world you live. This inevitably affects how much flour you’ll need to add to a bread dough to make it not be too wet, and develop enough gluten.
Depending upon the time of year and where you are in the world, you may or may not need to use all of the flour. I wish I could give everyone an exact amount, but unfortunately this comes down to more of an instinctual ‘feel’ for the dough that only comes with practice/experience.

A lot of bread bakers subject their doughs to what’s called a ‘window pane’ test where they tear off a piece of dough, stretch it slightly, and if it’s translucent enough to see through, they know they’ve kneaded it enough.
I’m not so sure that would work well here. The thing about cornmeal is that it makes just about any bread dough ‘coarser’ and ‘denser’ as a whole. It’s not meant to be like ciabatta or focaccia, or brioche, where the lighter/wetter the dough the better. No matter what you do, if there’s a healthy amount of cornmeal in the dough (and there is in this recipe) it’s going to be a heavier, denser dough because it’s meant to be a heavier and denser loaf.
Unless the recipe is specifically telling me otherwise, I typically will knead every bread dough between 8-10 minutes by hand. This has given me pretty consistent results in terms of churning out well kneaded doughs with enough gluten developed to rise and bake well.
This has also helped me know how a ‘ready’ dough feels. It’s hard to explain; you just know when you know.

To be honest, the kneading is the hardest part of this (the cornmeal definitely makes you have to put a little bit more muscle into it lol). That, and waiting for it to bake in the oven as it fills your kitchen with the most heavenly, warm and savory aroma that only cornmeal can.
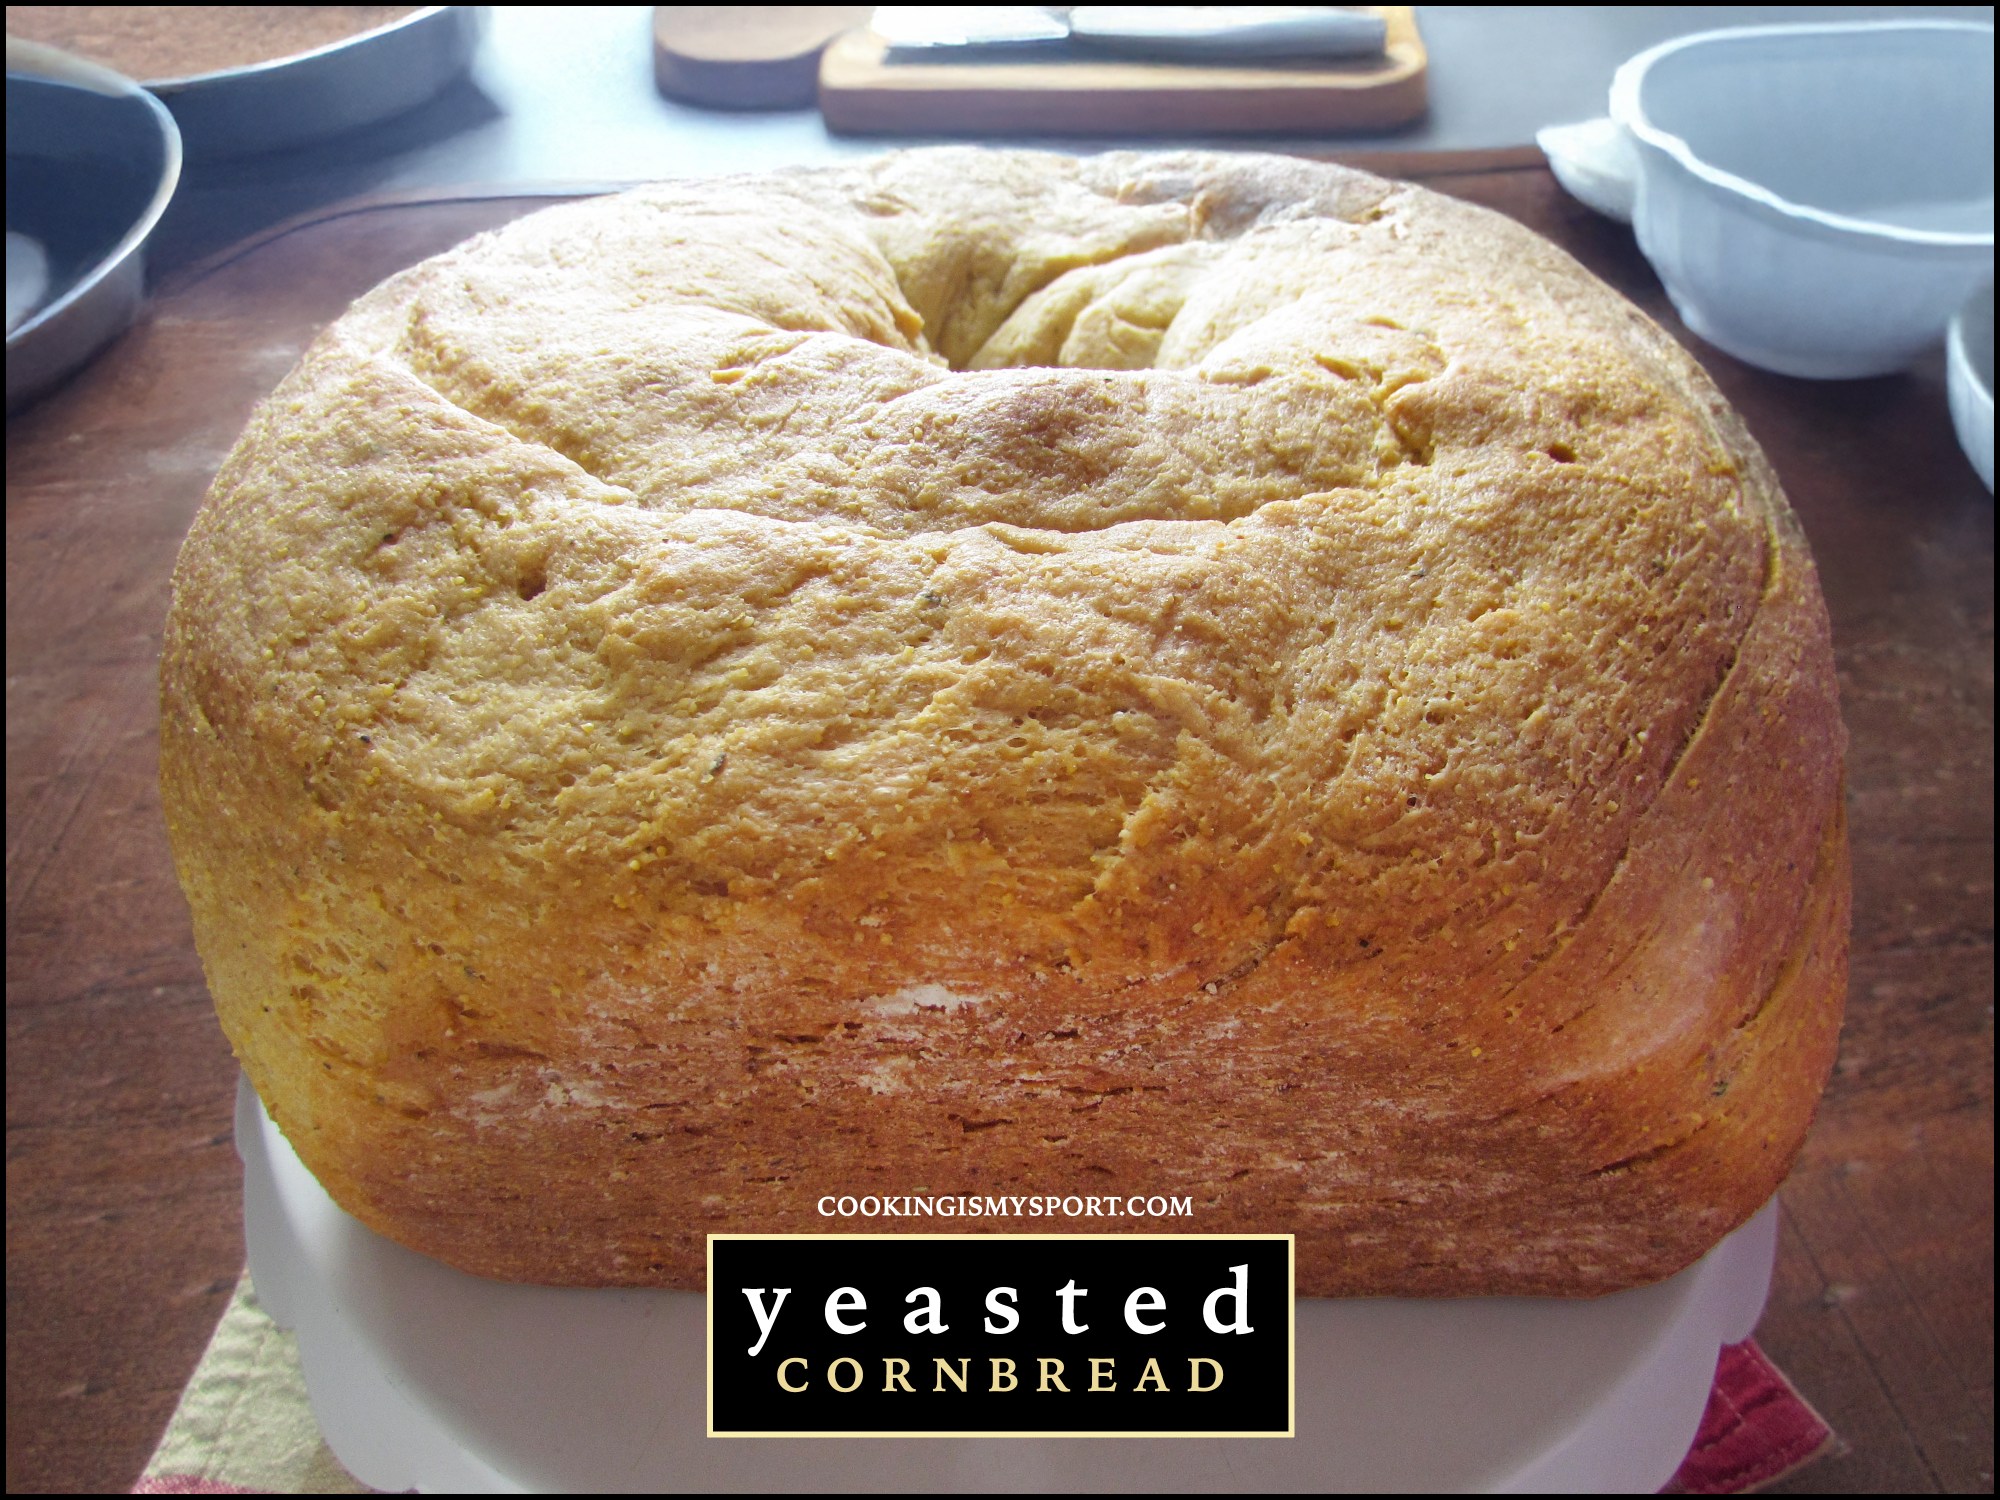
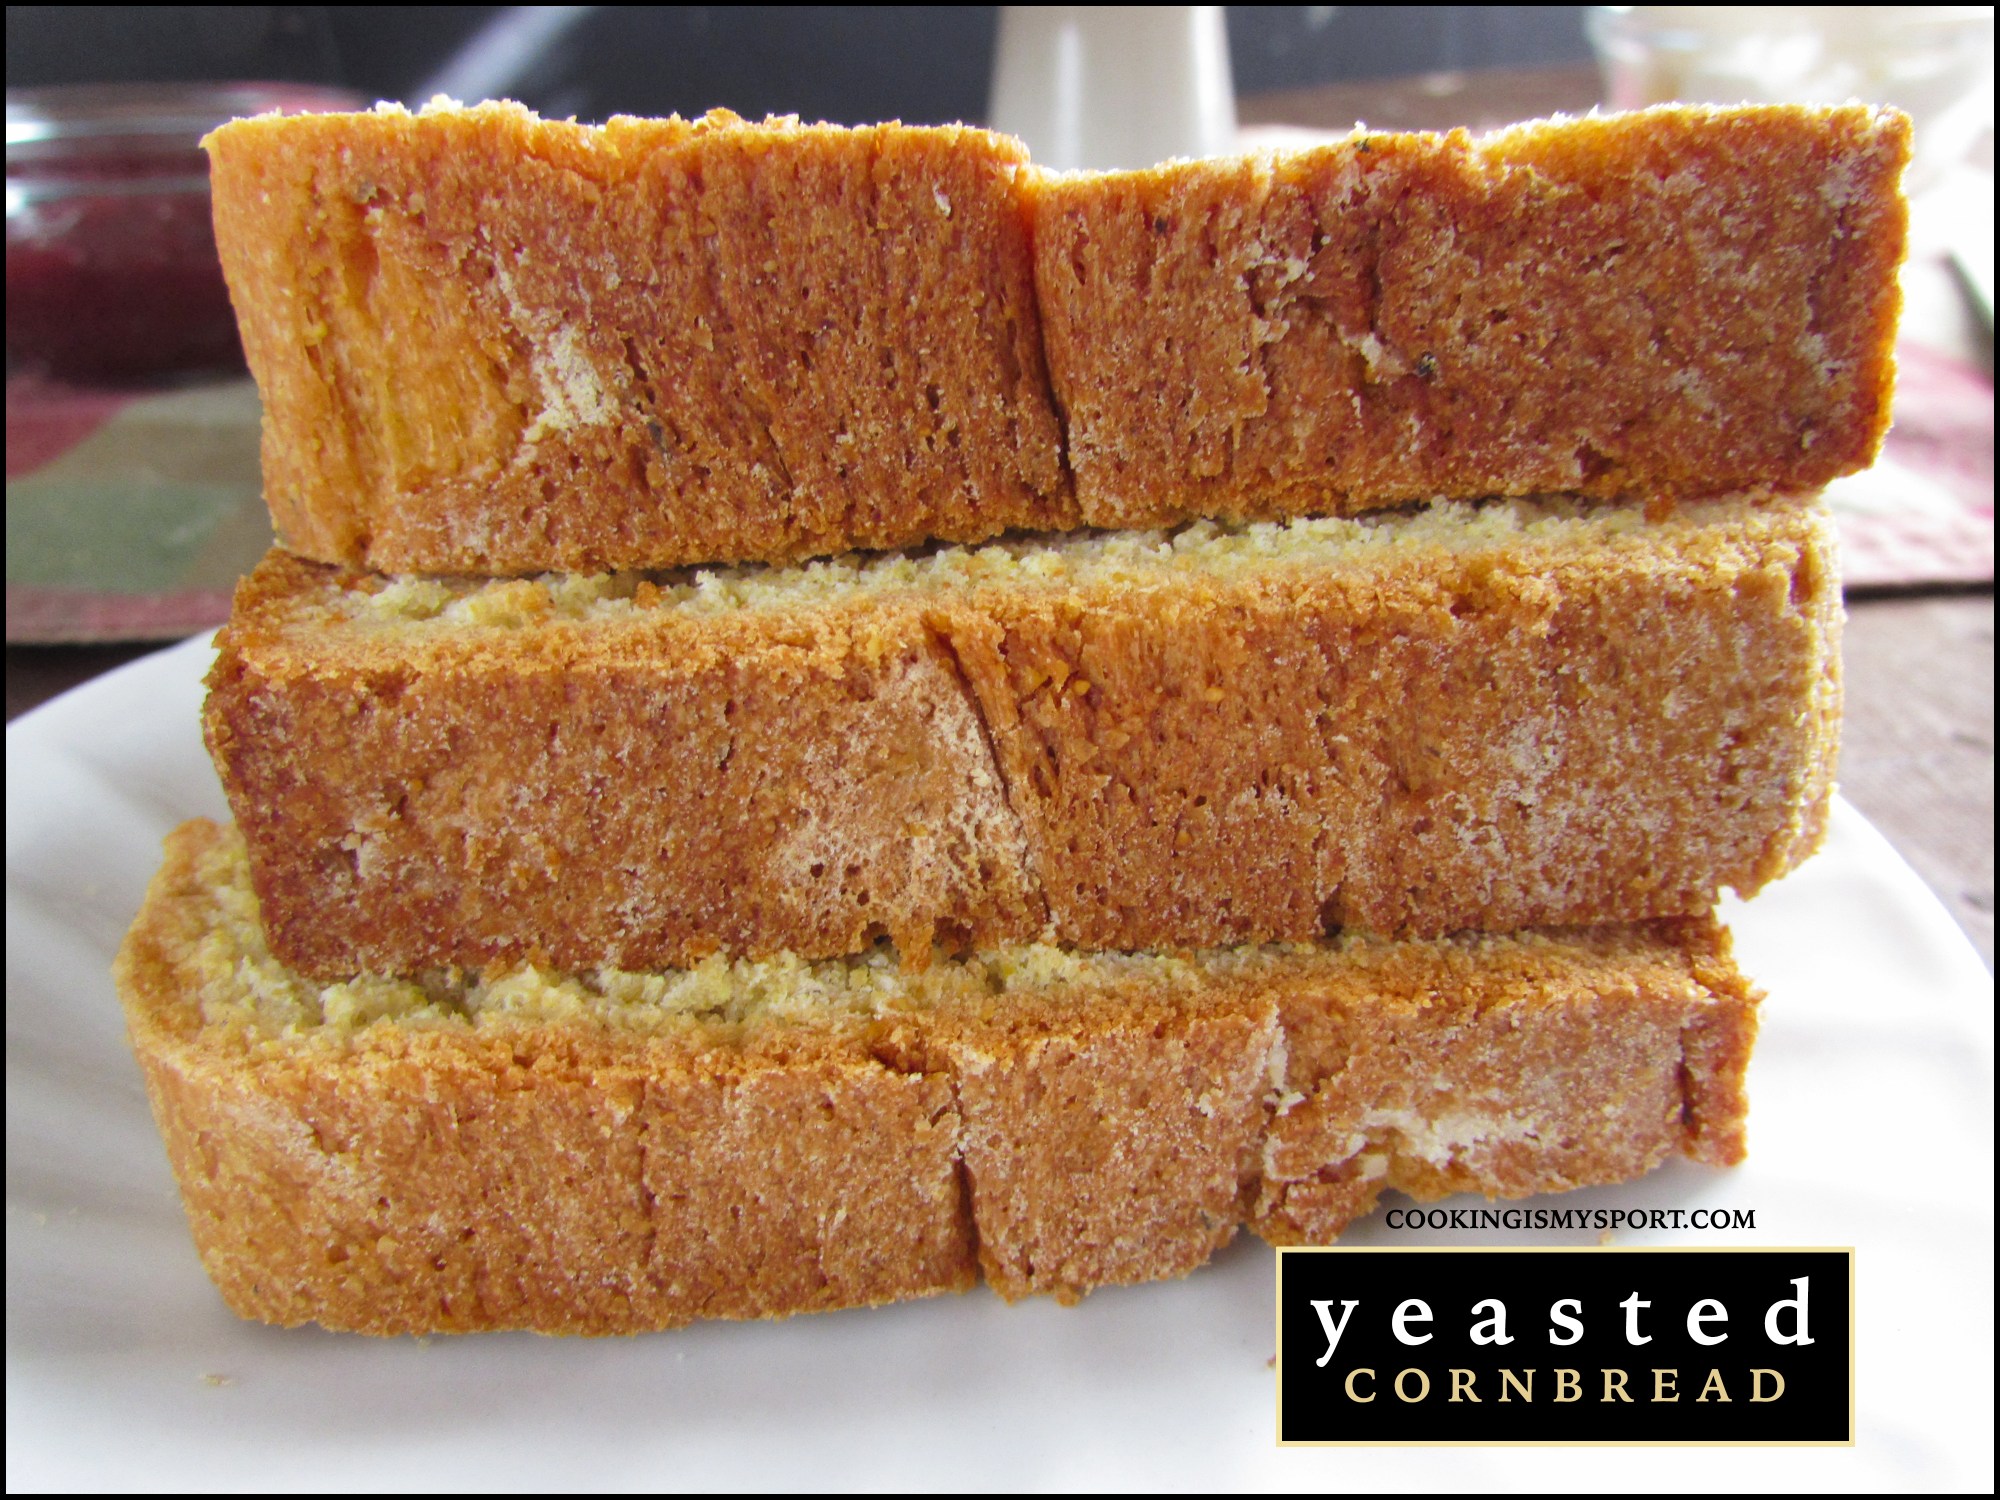
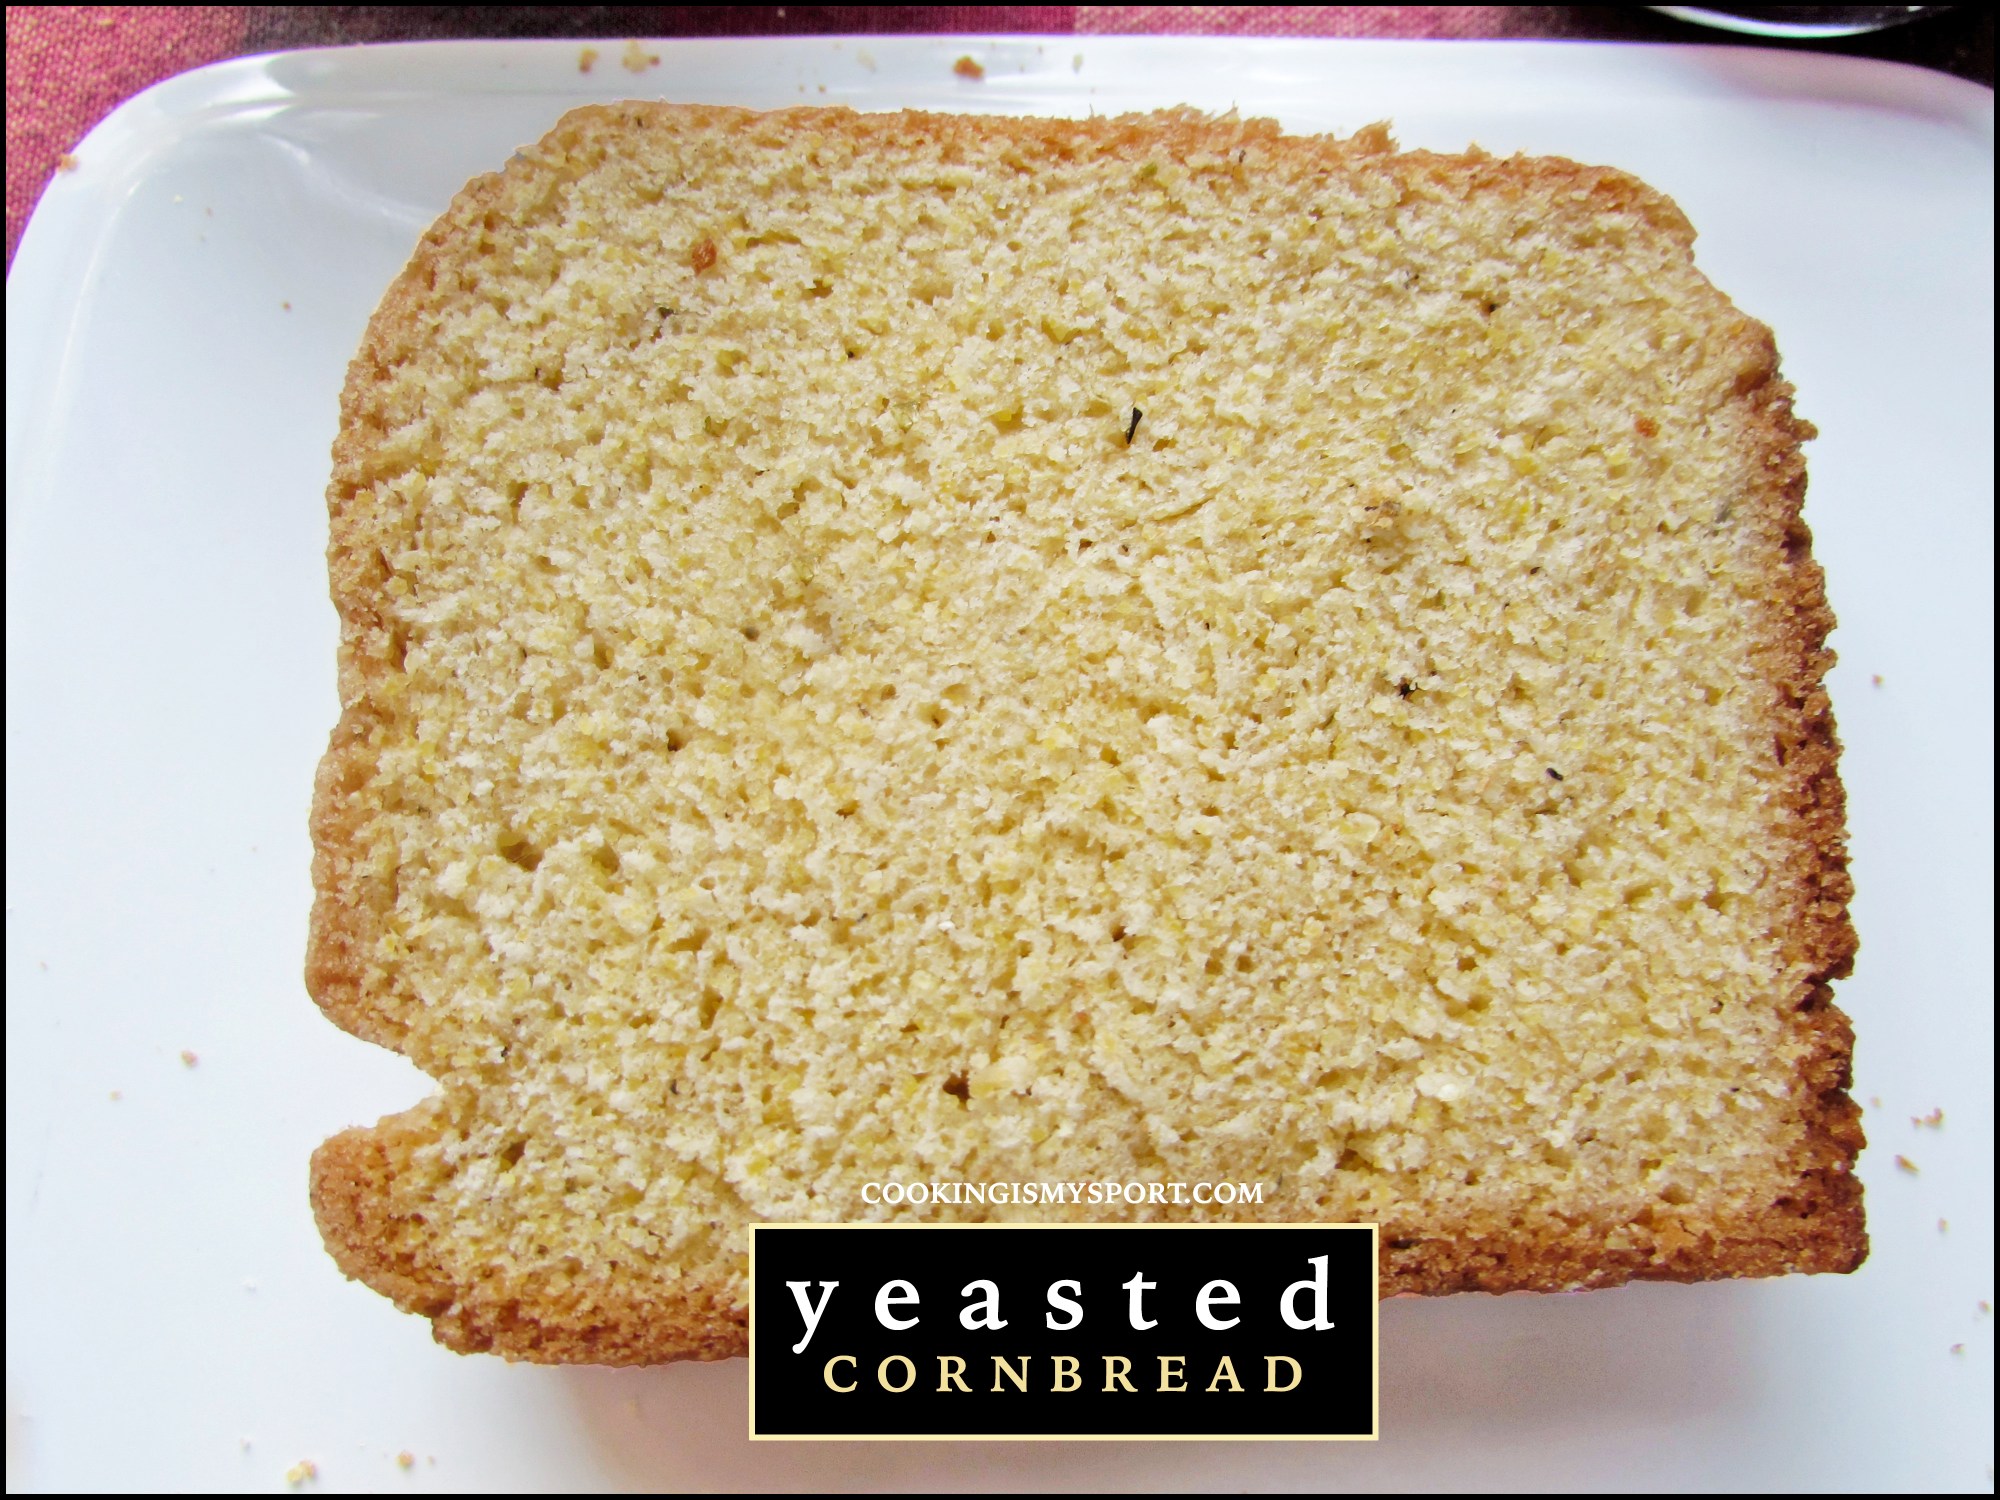
As you all can see, this is a very cornmeal-forward bread, which makes for a very tight and close crumb that is actually a lot moister and more soft than you might expect. The crust is a real thing of beauty. It’s thick and sturdy–just like an artisan bread- and gives the perfect contrast to the softer inside.
And when it’s toasted???
FORGET ABOUT IT.
I was so pleased with how this bread turned out, and if you try it, I think you will be too. It’s delicious enough all on it’s own toasted and smeared with butter. But feel free to add jam, apple butter, or even cheese. It would be an amazing base for a strata or bread pudding.
The possibilities with cornmeal are truly endless 😉
*******************************************
Yeasted Cornbread
Recipe Adapted from Taste of Home
Ingredients
- 4 1/2 teaspoons active dry yeast
- 2 1/2 cups cups warm water (110° to 115°), divided
- 2 cups yellow cornmeal
- 1/2 cup nonfat dry milk powder
- 6 tablespoons butter, softened
- 5 tablespoons sugar, sugar
- 3 teaspoons salt
- 4-1/2 to 5-1/2 cups all-purpose flour
Directions
Pour the warm water in a medium sized bowl. Sprinkle the yeast on top, and then sprinkle 1 tablespoon of the sugar on top of that.
Allow to sit for 10 minutes, until proofed and frothy.
In a large bowl of a standing mixer, or in a large bowl, using the dough hooks of a handheld mixer, add the cornmeal, milk powder, butter, remaining sugar, salt, 1-1/4 cups flour and remaining water. Beat until smooth.
Stir in enough remaining flour to form a soft dough.
Turn onto a floured surface; knead until smooth and elastic, about 6-8 minutes. Place in a bowl coated with cooking spray, turning once to coat top.
Cover and let rise in a warm place until doubled, about 1 hour.
Grease and flour a 12-16 cup capacity tube pan and set aside.
Punch dough down and shape into a ring, tucking the joined portion underneath. Place in greased tube pan. Cover and let rise in a warm place until doubled, about another hour.
Preheat oven to 375°F.
Uncover pan and bake for 40-60 minutes or until golden brown. Wait 15-20 minutes, then remove loaf from pan to a wire rack to cool completely.
Sharing at Fiesta Friday #616 cohosted by Jhuls @ The Not So Creative Cook.


This is definitely different, and the texture looks amazing!
Thank you Dorothy–the texture is different, but in a very tasty way 😉
I could easily have gone my whole life without giving a yeasted cornbread a thought…and then I saw the pics and read your vivid description! It looks truly amazing!
This was the first time I had heard of it, but once I had, I knew I had to try it out, and it did NOT disappoint. Thanks 🙂
Just pulled these out of the oven, worked great! Taste phenomenal! I made them into 3 oz dinner rolls and baked for 20 minutes in muffin tins. Thanks for the recipe!!
Thank you Kristie, this makes me so glad to hear–hope you had a great Thanksgiving! 😀
A soft, fluffy twist on classic cornbread, love the texture! Thank you for sharing and for joining the Fiesta Friday party!
Thanks Jhuls 🙂