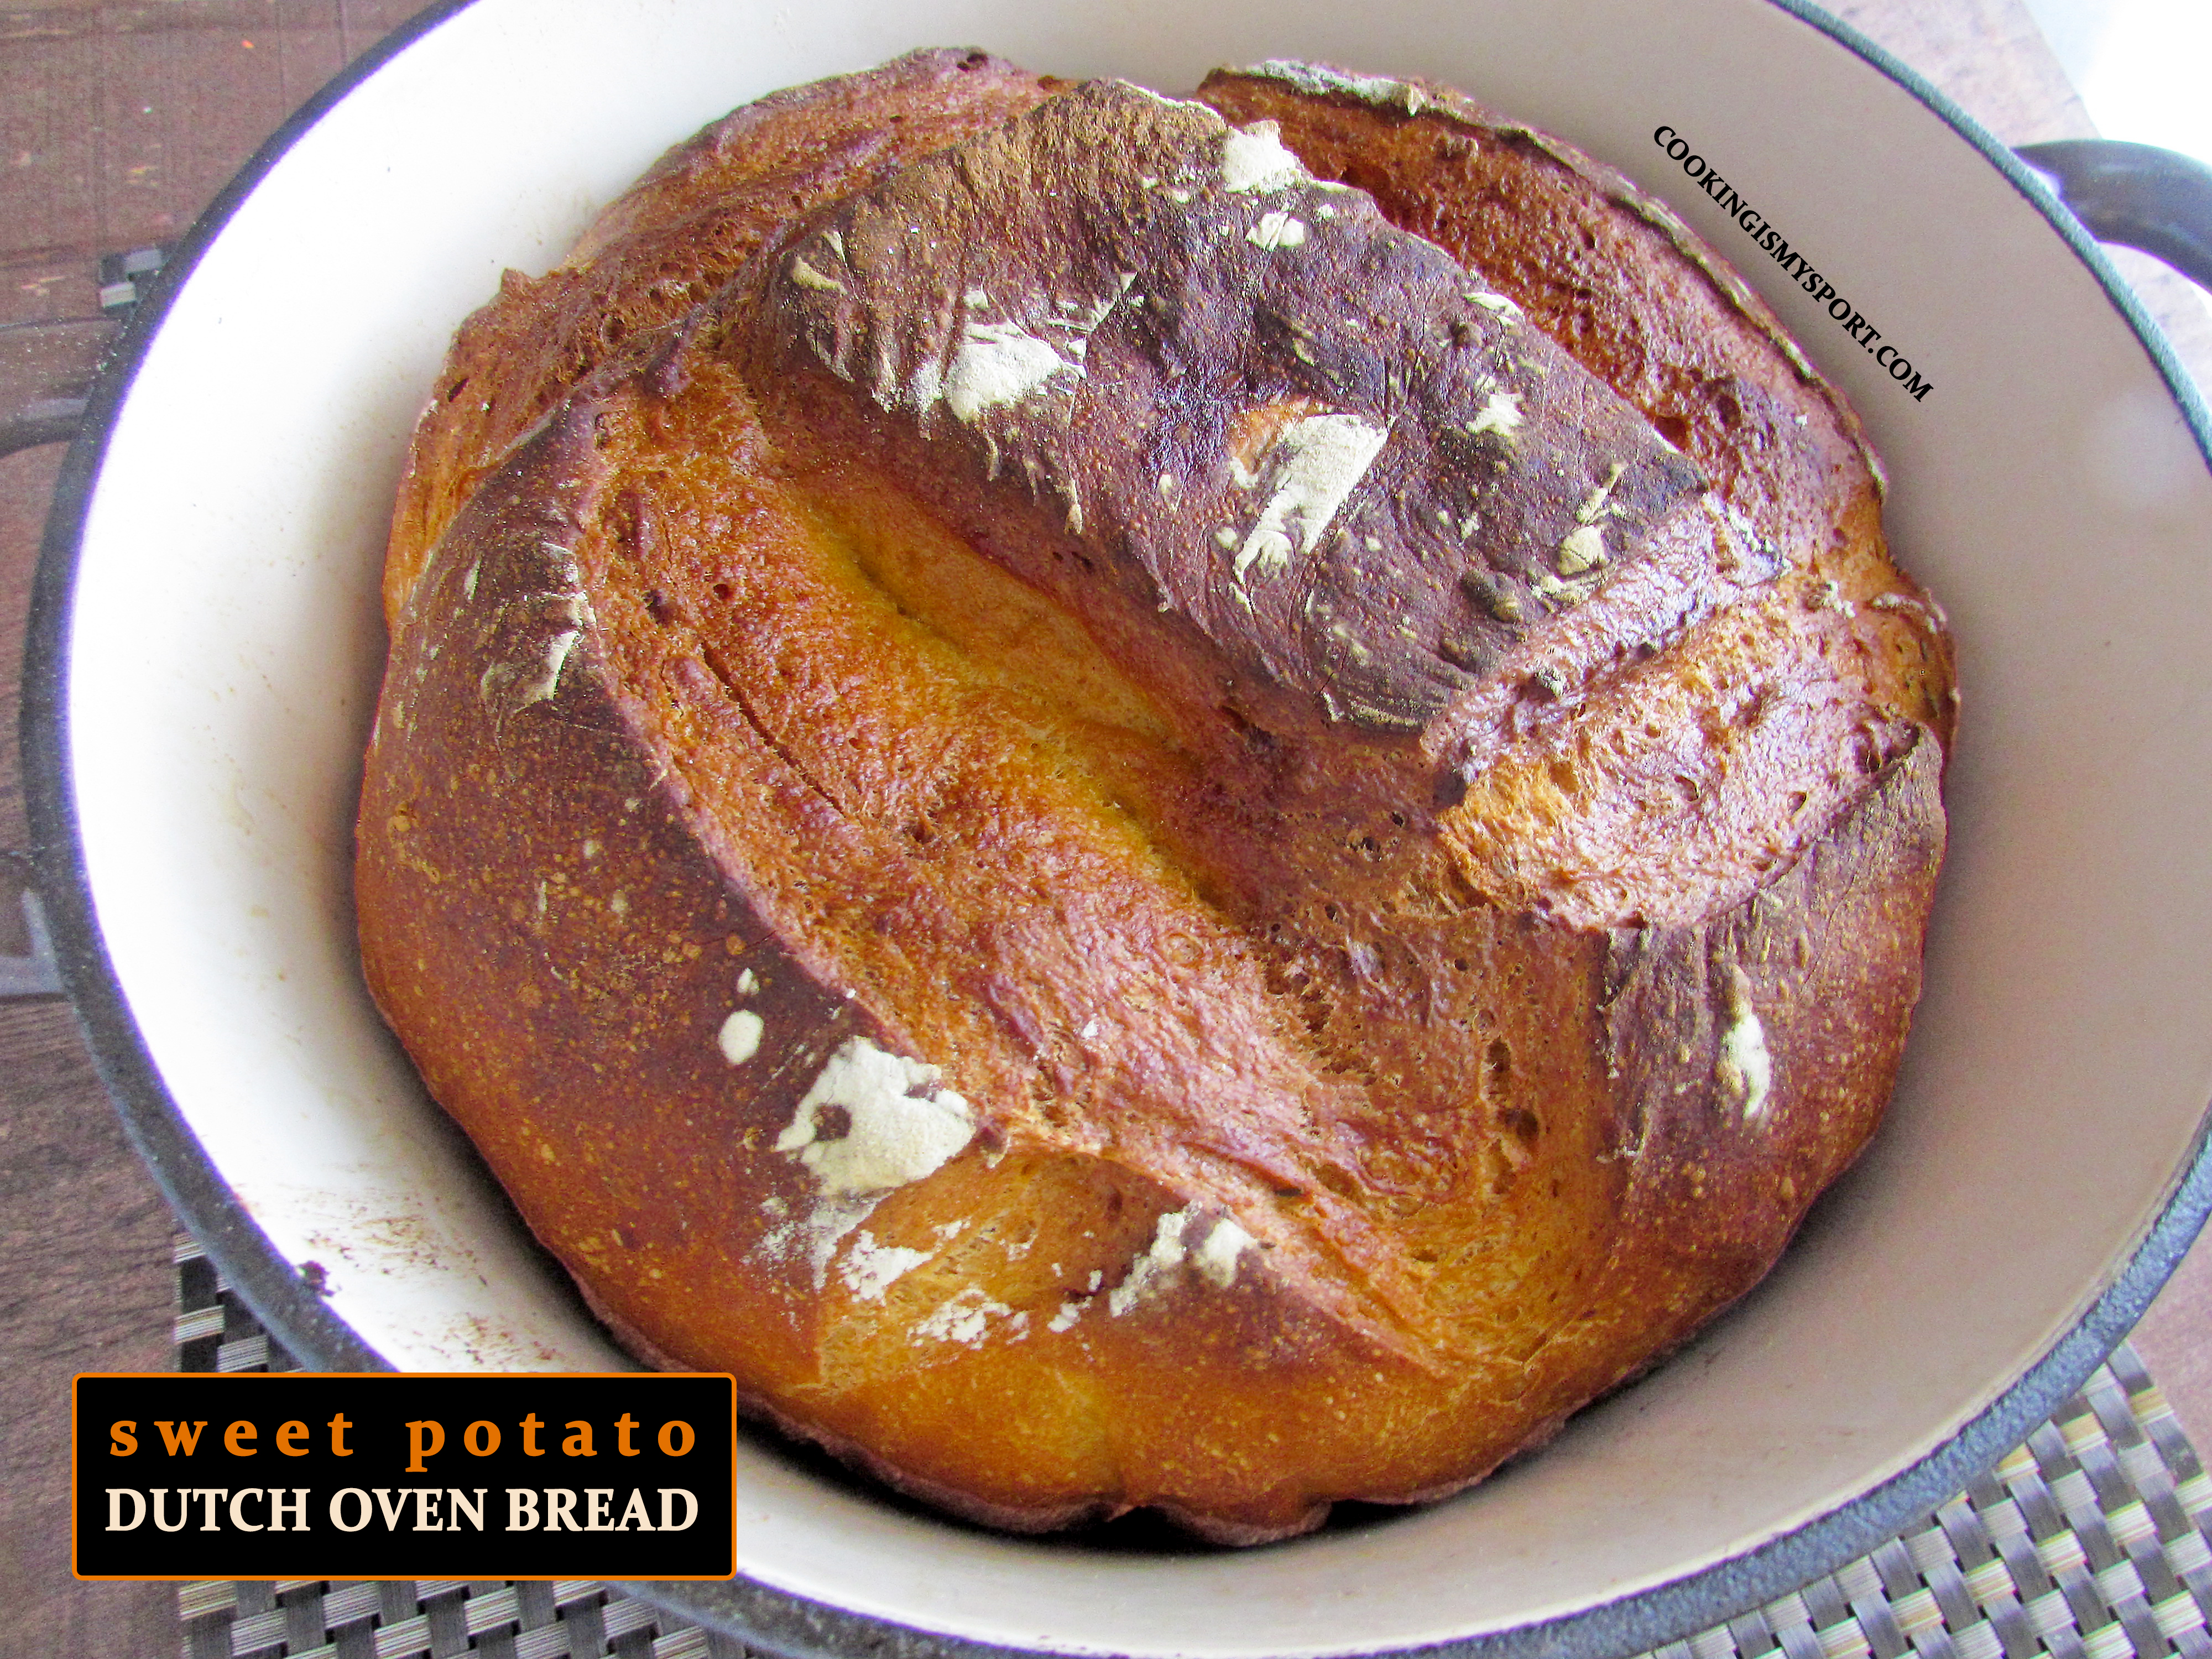
Sweet Potato Dutch Oven Bread
I consider it a real shame that I’ve had and treasured my Dutch oven for literal years and never realized that there were more things I could do with it than just make stews and braises.

It wasn’t until a few months ago when I started baking sourdough bread that I first tried out baking in my Dutch oven. To be frank, I was blown away by the results, and shocked that I had gone this long without having Dutch oven-style bread in my life.

So what’s the big deal with the Dutch Oven? In the first place, a big one (Mine is 6 quarts) is perfect for baking up huge loaves of bread at a time, which is great if you’re like us and you love the carbs.

Second, the heat distribution of a Dutch Oven is where it’s at because it allows you to get that thick, crackly artisan style crust that you normally only see in bread coming out of professional bakeries.

Third (my personal favorite), the Dutch Oven will keep the loaf from spreading out too wide and flat while baking so that you can get and keep that rounded height shape even after baking.

Mashed potato is really a magic ingredient for bread dough. It keeps it soft and moist for days, and if you use sweet potato, you get added flavor and color. This isn’t a sourdough bread, but I still used the same technique for mixing, rising and baking as I did with my go-to sourdough recipe, and got really great results out of it.

One last thing: I really don’t recommend baking this bread without having a thermometer on hand to doublecheck the inner temp. The sweet potato makes it very moist, and the golden outer crust can be misleading as to whether or not it’s actually cooked through. Better to be safe than sorry. Remember, baking is science: the numbers won’t lie or steer you wrong.
*************************
Sweet Potato Dutch Oven Bread
Recipe Adapted from Bake from Scratch
Ingredients
- 8 cups (1016 grams) bread flour
- 3 cups (760 grams) lightly mashed baked sweet potato
- 1 tablespoon fresh rosemary, finely chopped
- 1 tablespoon dried basil
- 2 tablespoons (18 grams) kosher salt
- 4 1/2 teaspoons (14 grams) active dry yeast
- 1 tablespoon granulated white sugar
- 2 1/2 cups (568 grams) warm water (105°F/41°C to 110°F/43°C)
Directions
In a medium bowl, sprinkle the active dry yeast on top of the warm water. Sprinkle the tablespoon of sugar on top of the yeast and allow to sit for 10 minutes, until proofed and frothy.
In a large bowl, combine the flour with the herbs and kosher salt and stir together with a fork.
Make a well in the center of the dry ingredients and pour in the yeast-water and the sweet potato.
Use the dough hook to stir until a smooth dough comes together. (I’ve had days where I needed to add more flour, I’ve had days where I needed to add more water. This is probably just going to depend upon the weather, the time of year, and the temperature of your kitchen.)
Grease the bowl, place the dough back inside and cover with plastic wrap, and a damp kitchen towel. Allow the dough to rise until it’s covered in size, about 90 minutes.
Gently deflate the dough. Shape into a boule-like round. (It’s somewhat like a tomato) Flour a banneton bowl (or a regular bowl) and place the dough inside, seam side up. Cover with the plastic wrap and kitchen towel and allow to proof for another 45 minutes-to an hour.
About halfway through the second rise, preheat the oven to 475 degrees Fahrenheit and place a 6 quart Dutch oven with the lid on inside the oven. (BE SURE THE HANDLE IS METAL AND NOT PLASTIC)
Take the Dutch oven out of the oven and remove the lid. (It’s going to be very hot; Don’t burn yourself.)
Place a piece of parchment paper on a sheet pan. When the dough is finished rising, Turn the parchment line sheet pan upside down and place on top of it. In one swift motion, turn the dough bowl upside down onto the parchment paper, and lift away the bowl.
Grip two sides of the parchment paper and use them to swiftly lift the bread into the Dutch oven. Use a bread lame, or a very sharp knife to slash at least two gashes into the surface of the bread, about 1-1 1/2 inches deep each. You can make a cross, or any other pattern you desire) Place the lid on top of the Dutch oven and place the whole thing back inside the oven.
Immediately reduce the oven temperature to 425 degrees Fahrenheit. Allow to bake, undisturbed for 40 minutes. Remove the lid and check the color of the dough. The bread should be risen and slightly golden brown on top. If it’s still pale, place the lid back on and allow to bake for another 10 minutes, then check it again. If it’s golden brown, remove the lid and allow to bake for another 20-30 minutes.
Use an internal thermometer to check the inner temp of the bread. It should be at least 205 degrees Fahrenheit.
Carefully remove the bread from the Dutch Oven and allow it to cool completely on a wire rack for at least an hour.

Sharing at Fiesta Friday #430.


Sounds great. So you keep the dough sitting on parchment paper as it sits in the dutch oven? I always think of a dutch oven as cast iron. Are their other kinds?
Yes! Keeping the dough on the parchment paper makes it easy to transport into the piping hot Dutch Oven and keeps it from sticking to the pot itself. My Dutch oven is cast iron, it just has an enamel finish. They come in multiple kinds, though in my experience, cast iron ones last longer, and they heat/cook more evenly. I definitely recommend a cast iron oven for this recipe, as the oven does get quite hot.
Oh…like my Le Cruset (sp?) Enamel covered cast iron pot.
Yes, exactly 🙂
Thanks. I always referred to it as a casserole dish 🙂
This looks beautiful! Love baking bread in the Dutch oven.
Thanks Dorothy, I’ve been loving it myself, instant convert to Dutch oven baking 😉
You’re making me want to get a Dutch Oven. And I’m pretty close to making sourdough starter for the first time. Any pointers?
Awesome!
So far as sourdough starters, here’s a few tips that made all the difference for me:
Start your initial feed with whole wheat flour. I don’t know why, but it really gives the yeast the strong kickstart it needs to become active. After a couple of days, transition to white bread flour, which is what I use on daily basis.
Keep the starter in a warm, draft-free place in between feedings. Leaving it out on the kitchen counter doesn’t work for me. I keep it in my microwave with the overhead light beneath switched on. Sticking it in a cold oven with the oven light turned on works as well.
When doing feedings, I go with the order of starter, water, flour. Again, I don’t know the science of why this works best, but it does.
Finally, be patient. If you’re starting from complete scratch, I would probably feed the starter for 2 weeks at least before baking with it. My starter baby is about 5 months old right now, and I’ve noticed a real improvement of the flavor of the bread the older that it gets.
Hope these help–happy baking 😀
Thank you for these helpful hints!!
I’m confused. The bread looks delicious but is the recipe for 2 boules? The quantity is rather high – 8 Cups flour, 3 Cups mash etc. yet instructions talk about making just one boule.
I did make this in one loaf; however, I have a *very* big Dutch oven that will accommodate this. If you do not, feel free to split it into 2 loaves.